Create A Functional Shelf Over Your Washing Machine & Dryer With A Simple Woodwork DIY
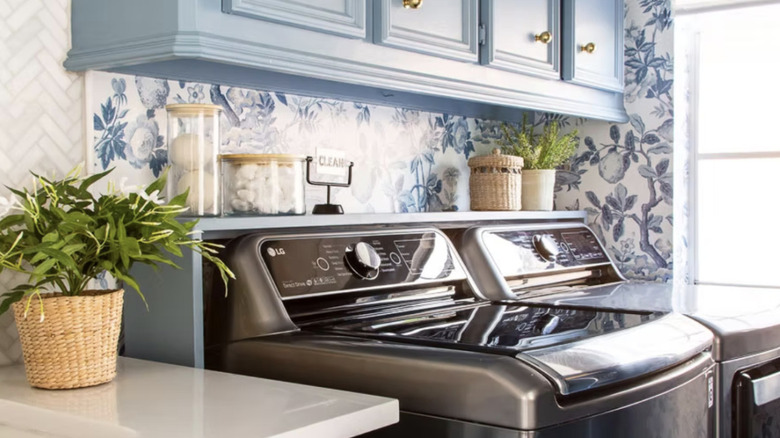
Laundry rooms are having a moment. Once purely functional and often uninspiring, these rooms are now undergoing major makeovers, being transformed into stylish spaces with beautiful flooring, bold wallpaper, and colorful cabinetry. With this new development, it's no surprise homeowners are looking for ways to conceal the clunky cords that stem from the washing machine and dryer, detracting from the overall aesthetic of the room. Fortunately, there's a simple DIY solution for those looking to spruce up the space. By building a shelf above the units, you can easily conceal those ugly elements — and gain some valuable storage space in the process.
Adding shelves above your laundry machines is an easy, affordable project that requires only a few pieces of plywood or pine board and some basic tools. The project shouldn't take more than a few hours to complete, and the end result will elevate the look of your laundry room, making it appear more polished and organized. In addition, since the area behind the machines is dead space you should take advantage of, it's a great place to add storage space — which many agree is the laundry room feature that is the most important.
How to build a simple shelf above your washer and dryer
The first step is to take measurements. You'll need the machine height (to the top of the control panels), the width of the machines together, and the depth from the wall to the back of the units. For top loaders, measure with the tops open. Next, cut two side panels that are 6 or 8 inches wide, depending on the distance from the wall to the machines, and the height from the floor to where you want the shelf to sit (adding about 1.5 inches for clearance). Then, cut the horizontal shelf panel slightly longer than the width of the machines so it fits easily. If you'd like additional storage — or if your cords are higher than the control panel — you can extend the height of the side panels and add a second shelf along with a back panel to hide the cords.
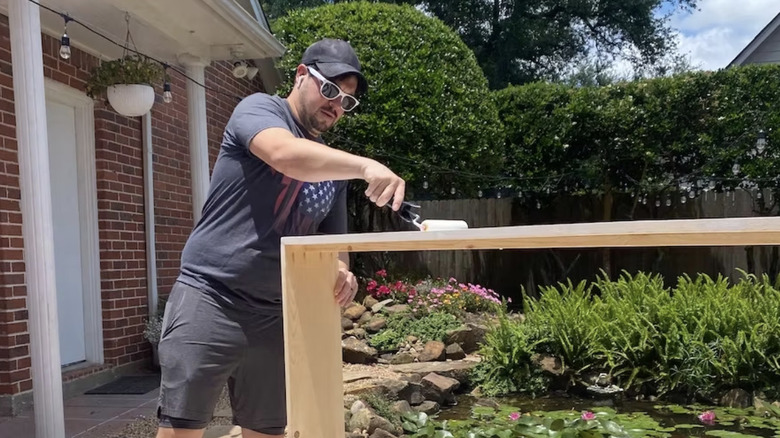
To assemble, drill pocket holes into the shelf and side pieces — a pocket hole jig can make the job easier. For other helpful hints, consider TikTok's tips for perfect pocket holes during any DIY wood project. Attach the pieces with pocket hole screws. Once complete, paint or stain the shelf to fit the vibe of the laundry room. This is where you can add style — paint it the same color as the walls to make the shelf blend in, or choose a contrasting color to make it stand out.
After it's fully dry, put it in position above your machines. For added stability, screw a piece of wood into the wall studs vertically next to your side pieces directly beneath the shelf. If there's base molding on the wall, you may need to notch out a section so the side panels sit flush.