How To Clean Your Outdoor Air Conditioner Unit (& The Best Time To Do It)
We may receive a commission on purchases made from links.
If you're wondering why AC repairs and replacements are so expensive, you're not alone. Just having the coils cleaned on the outdoor air conditioner can range from $100 to $400. Replacing the entire AC unit can cost anywhere from $3,905 to $8,026. Factors, like labor shortages, market inflation, and a shortage of raw materials and parts, have driven the prices of maintaining these units up, often leading consumers to find alternate ways to keep cool or lower costs.
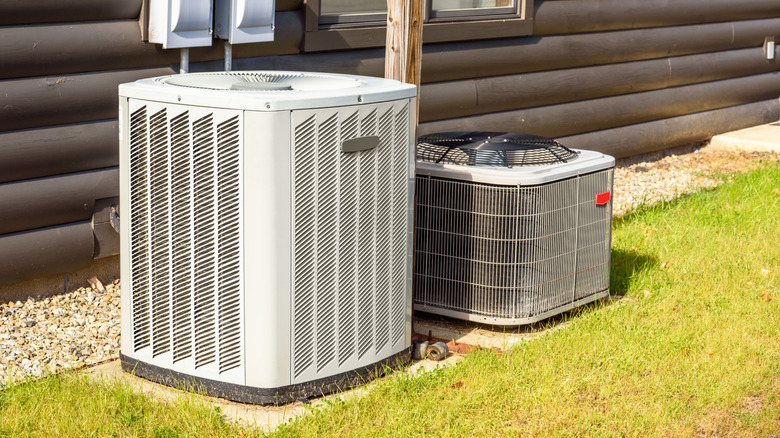
One of these ways includes keeping your air conditioning unit clean to ensure it's running at optimal efficiency. Performing tasks, such as removing debris from its exterior and interior, rinsing the condenser coils, and other maintenance steps, can be helpful in keeping its parts functioning properly. So, if your AC unit is starting to look like an outdoor shelter for birds and sounding like it's struggling to cycle on and off, it might be time for a little TLC. In fact, a little cleaning now could save you from sweating through your next utility bill.
HVAC experts recommend giving your outdoor unit a thorough cleaning once a year to keep it running at its best. A great time to do this is during the spring season (before it gets hot), so adding this as an essential task to your spring cleaning each year can go a long way toward keeping your unit in good condition for years to come. In time, this can save you money on potential repairs and part replacements in the future.
How to clean the exterior, interior, and straighten the fins
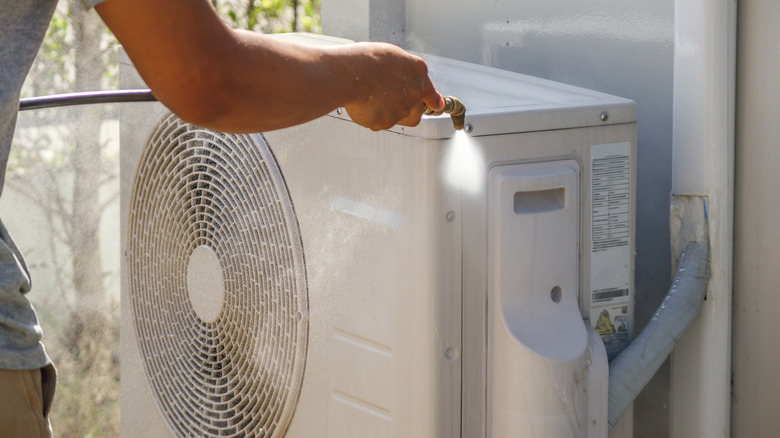
Always power off your air conditioner before working on the outdoor unit. Once it's off, grab a pair of gloves and remove any debris from around the unit, tossing it into a trash bag. This includes any leaves, bird feathers, sticks, or litter that may have accumulated on top of or near the AC unit. Getting rid of all of this debris can prevent it from becoming caught in the coils and trapping further dirt.
Next, inspect the fins on the AC unit, after removing the outer cover. If they're bent, grab a Cenipar fin comb to straighten them. Gently run the comb in a straight line up and down the fins — this will also help loosen any wedged debris between them. If you're having trouble straighten the fins, dilute some dish soap in a spray bottle and use the solution to lubricate them. Use caution when working with the fins because you don't want to break the tubing hidden within them. Then, remove any fallen debris from inside the unit using a shop vac or vacuum with a hose attachment.
How to clean the condenser coils and replace the air filter

Condenser coil inspection is one of the main reasons you should have your HVAC system checked annually. They're connected to the refrigerant line and are directly responsible for keeping your home cool. Throughout the year, things like pollen, dust, and other outdoor elements can cause dirt to build up on these coils, making them less efficient. So, making sure that they stay clean is important for the health of your AC unit.
To clean the coils, keep the cover off and rinse them with a hose. Next, spray the coils with Arm & Hammer Biodegradable Coil Cleaner. Be sure to rinse the coils again after letting the cleaner sit for the recommended time, to completely remove any residue.
Finally, check your air conditioner filter. Your filter may be located in the return air duct inside your home or on your furnace, if your system uses the same ducts for both your heating and cooling. Once you locate it, give it a once-over to see if it's clogged with dirt and debris, and if so, clean it or replace it with a new one (if it's disposable). If you have a reusable filter, you can typically clean it by rinsing it off with soapy water. If it's disposable, make sure to note the size of the current filter before replacing it. You can usually find this located along the edges of the filter. If not, check the make/model of your AC unit, or look for this information in the owner's manual.