DIY An Adorable Garden Planter Using Repurposed Paint Stir Sticks
We may receive a commission on purchases made from links.
Planters come in a variety of shapes, colors, and sizes. Oftentimes, buying the right planters for your garden means finding those that work well with the decor in terms of color and style. It's easy to get caught up in the same old planter style and look, such as your everyday terracotta pots and bland plastic saucer pots. What if you could make a unique, outdoor-inspired planter pot from a few pieces of wood without spending more than $25 on it? Well, you can! All you need to make it happen are some Grade Pine stakes, a pack of 5-gallon paint stir sticks, and a few tools. Better yet, you can reuse some of the stir sticks you already have at home. You just have to carefully get rid of any caked-on paint on them. Consider re-sealing them too, since this planter will likely be placed outside at the mercy of the weather.
This affordable DIY planter can help you curate a garden space that is aesthetically pleasing and visually balanced — something that may inspire you to spend more time improving your garden. And the great thing about it is that you don't need a lot of materials to make it happen. However, in addition to your wood pieces, you'll also need Titebond Premium wood glue, FolkArt chalk paint or some other spray paint color, a Neu Master staple gun with 1/2-inch staples, and a Metabo miter saw (though a reciprocating saw will work). Except for the miter saw, sticks, and staple gun ($17), all the other materials can be purchased for under $10 each.
Step-by-step to make a planter with paint stir sticks
Using your saw, cut the paint stir sticks down to eight pieces that are 11 inches long and then eight more that are 11½ inches long. Then, cut the garden stakes down to four 7-inch pieces and another four 9½-inch pieces. On a table, place one of the 9½-inch stakes horizontally at the bottom between two of the 7-inch stakes. Apply glue to the ends of the 9½-inch piece and secure it to the 7½-inch pieces to form a sort of "U" shape. Next, make another piece just like this.
Glue one 11-inch stir stick to the bottom side of each of these "U" pieces and reinforce it by stapling at both ends. Then, repeat this on the open end of the "U" pieces, before placing two more 11-inch stir sticks evenly between the two sticks at the top and bottom of each piece. Reinforce each stir stick by stapling them to the stakes. This is especially necessary if you're using repurposed paint stir sticks that might not adhere properly with only glue. Stand the two pieces up, with the garden stakes facing each other — you've just created two of the planter's sides.
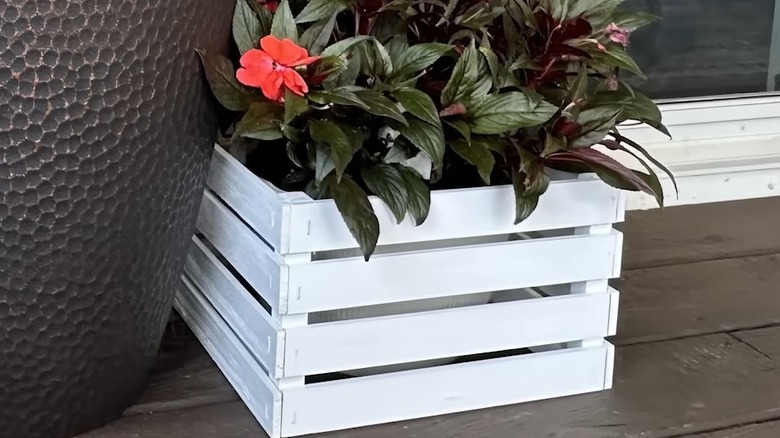
Next, glue the other two 9½-inch stakes to the bottom ends of the two planter sides, connecting them and creating the bottoms of the remaining two sides of your planter. Glue the remaining eight 11½-inch paint stir sticks to these sides, four sticks per side. Be sure to staple the sticks to secure them in place. Finally, place your planter on a piece of cardboard and apply your spray paint.
Customization options for your DIY wood planter

You could consider building a bigger or smaller planter, depending on your needs. Just ensure to measure carefully before making any cuts so you don't end up wasting your materials. Once your planter is completed, you can always spruce it up with a few decorative touches. Adding a colorful splash of pink, blue, or green paint is a great way to bring attention to your latest garden addition. If your goal is to create a single color garden, consider painting it a lighter shade of the main color, or even an accent color if you want it to stand out. Or you could glue pieces of mosaic tile or stenciled art to the outside of the planter for extra flair. But always ensure any paint you're using is plant safe.
For a more festive look, consider adding solar fairy lights and washi tape along the edges. You could even label the planter with a mini chalkboard — something that can make for an interesting addition to your garden if you're creating multiple planters. You can also take an ACRSIKR wood-burning pen and add your favorite designs or quotes to the sides of the planter. These pens can be purchased online for about $20, and their kits often come with pre-made stencil designs.