The Best Method For Repairing The Bail Bar Handle On Your Lawn Mower
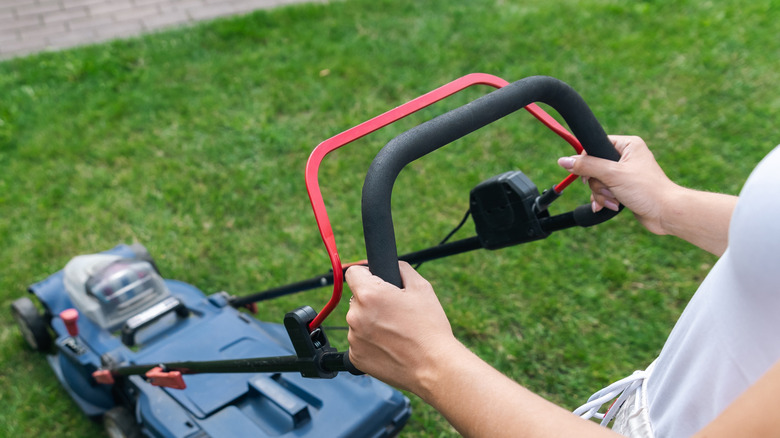
Pretty much every powered lawn mower — whether push, self-drive and gas-powered, or cordless — has a bail bar, also called a control handle. It's an important safety feature that needs to be held closed while you mow. If you accidentally slip or lose your grip for any reason, the lawn mower stops automatically. It also ensures you're not tempted to clear jams with the motor running.
Problems with the bail bar linkage or sensors can be one of the reasons your lawn mower won't turn off, but if it breaks, it's more likely to prevent you from starting the machine at all. Getting it fixed by a professional could be expensive and will probably mean your lawn mower is out of action for a while. There are several ways to fix the bail bar yourself, but the method shown by Charlie-Whiskey on YouTube is the best because it's straightforward and only requires a few tools. What's more, if you're any kind of a DIY enthusiast, there's a good chance you'll already have most, if not all, of the necessary parts.
Before you start, there are a few other things you might want to check that are signs it's time for a new mower. If you think you'll get another season or two out of it, then it's worth doing the repair. Let's look at the process in detail.
A practical, DIY approach to fixing a lawn mower bail bar
After confirming that the motor does actually run, Charlie-Whiskey sets to work. Although he doesn't do it, it's a good idea to disconnect the spark plug cap or remove the battery to prevent accidental starting while you are working on the machine.
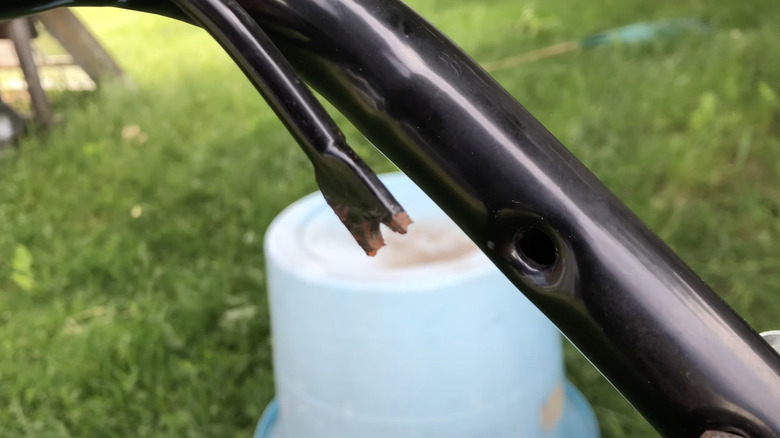
The first thing to do is drill out the lawn mower handle where the bail bar would normally attach to accept a different bolt, with nuts and washers for spacers that will hold the repaired bail bar in place. Yours don't need to be the same size, they just need to be large enough to support the repair. If you already have parts available, drill to whatever size suits them, or you can get nuts and bolts at the hardware store for a couple of bucks. For the repair itself, he uses a section of shelf standard (the steel uprights used for adjustable shelving). Any similarly dimensioned angled metal or tubing could be modified in the same way. It is sawed to the appropriate length, which will depend on your lawn mower.
Charlie-Whiskey drills two holes in the shelving piece. One for the bottom attachment and another where the safety cable will go. Whenever you're drilling metal, always wear eye protection, and clamp the piece you're working on firmly so it can't spin around and cause an injury (which nearly happens in the video). Finally, he saws part way into the repair piece near the top to allow it to be bent round the remainder of the bail bar where it had broken off.
Completing the bail bar repair and testing the lawn mower
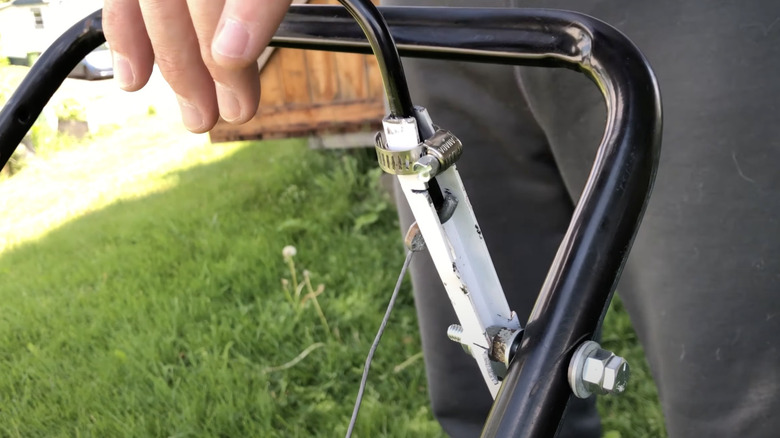
He initially holds the repair together with an adjustable pipe clamp before crimping the top of the repair piece around the existing bail bar using vise grips. Depending on your strength, you might be able to achieve the same with large pliers. Alternatively, use a clamp or small vise that can be tightened with a wrench. The pipe clamp is then retightened to give additional support. Charlie-Whiskey has a socket adapter for a power drill, but a screwdriver or an ordinary wrench could be used.
With everything tightened, it's time to reattach the safety cable, put the spark plug cap back on or replace the battery, and then test the repair. Hold the bail bar as usual in the closed position and start the lawn mower. When the motor is running, release the bail bar. The motor should stop. The repair is straightforward, so if it doesn't work, it's most likely that the safety cable has been positioned incorrectly. This hole may need to be redrilled.
There's a fair bit of trial and error in the video, but using it as a guide, you should be able to speed up the process. There are several other simple steps that can prevent lawn mower damage that are worth doing. These should help prolong the life of your machine and hopefully reduce the chances of other problems in the future.