The Clever Dollar Tree DIY You Need To Create A Chic Jewelry Storage Solution
We may receive a commission on purchases made from links.
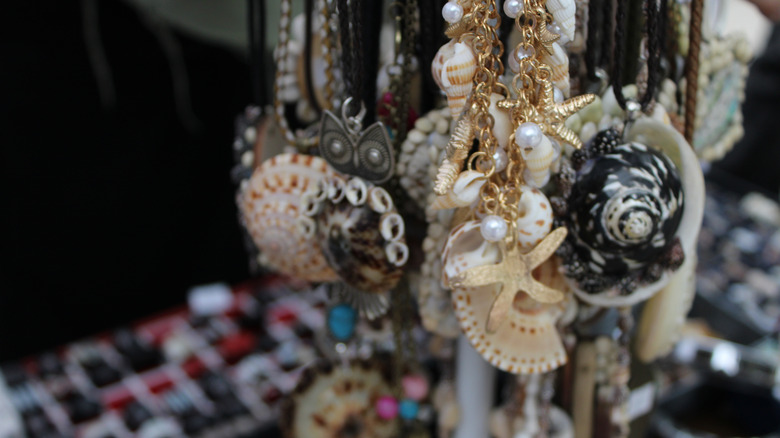
Anyone who's an avid jewelry collector and a frequent Dollar Tree shopper knows that there are any number of ways to ditch the clunky jewelry box for a space-saving storage alternative. It's also the case that the most ingenious crafters try hard to use the most unusual DT finds when they're creating such hacks. So, it should hardly come as a surprise to learn that you can make a DIY jewelry holder that converts a kitchen cupboard drawer pull and a Dollar Tree framed print into a piece where your necklaces, bracelets, and hook earrings can hang out.
To gather your materials, first up is a metal drawer pull, like you'd find on a kitchen cabinet to pull the door open. Dollar Tree carries gold and black drawer pulls, and their packs even come with screws. Given that the screws may be too long for this project, you'll need a bolt cutter, a drill, and a screwdriver, too. Next up, you'll grab a Halloween newspaper print in a decorative frame. Depending on the time of year, the picture inside the 8-inch by 11-inch frame will vary as the holidays change. What's important about this item is to grab a framed piece of art that sports a twine cord on top to hang it up.
Since you're going for chic on this Dollar Tree decor hack, you'll need to do something to take the Halloween art to fine art. For that, you'll need a beaded lanyard, some contact paper or wallpaper, a pencil, and a paper cutter. Finally, you'll need to grab your hot glue gun and a pair of scissors so that you can get things rolling.
Making the DIY drawer pull jewelry holder
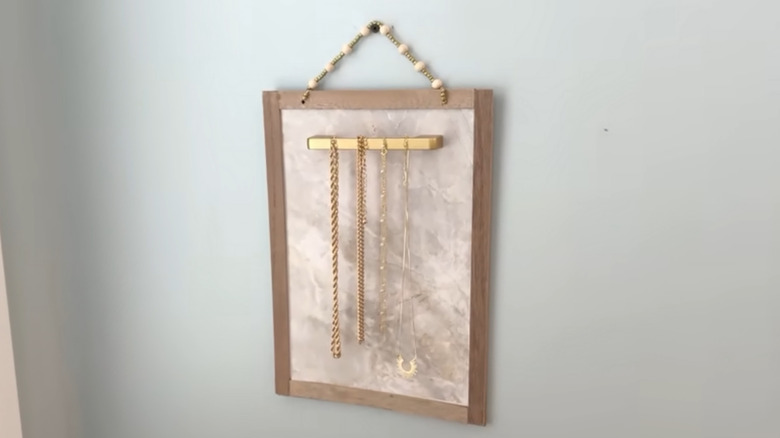
To convert your framed print into a jewelry holder, you'll first want to attach the drawer pull to the front of picture. However, the print needs to be upleveled a tad first. That's where the Dollar Tree floral contact paper comes into the picture: You're going to trim it with the paper cutter so that the adhesive paper covers the original artwork.
Once that's done, mark the face of the artwork where the screws for the drawer pull will go. The marks should be positioned about an inch below the top of the frame. (Use the drawer pull as a guide if you need to measure where the holes go.) Drill holes in the places you've marked so that you can attach the handle to the front of the artwork. The screws will be too long for this, so trim them with the bolt cutters, so that they will fit the thickness of the print. Once that's a go, fasten the drawer pull to the front of the framed piece: You'll hang your necklaces on the drawer pull to keep them from getting tangled.
To make this piece fancier, swap out the twine hanger and replace it with a beaded Dollar Tree lanyard. To do this, a few beads on each end of the lanyard need to be removed. This allows you to push the lanyard's string through the holes where the twine was attached to the frame. Finally, tie up the ends of the lanyard string and glue them to the back of the frame.
Things to consider as you're making this piece
Framed items at the Dollar Tree change often, depending on the season. If you can't find a framed holiday piece that sports a twine hanger at the top, you have a couple of alternatives. DT does carry plain wooden 11-inch by 11-inch signs that have a twine hanger at the top. These can be a substitute for the framed art.
Or you could turn a Dollar Tree picture frame into a DIY jewelry storage solution, instead. You can then use a heavy-duty NEU MASTER staple gun to attach the lanyard to the frame. Since you'll only be putting in a couple of staples, you should be fine using just a manual staple gun. Or, you could use an electric stapler, remembering to wear protective eye goggles. With this alternative, strip a few beads off the lanyard as you normally would and then staple its ends to the back of the wood frame. Use a couple of staples for each one. Alternatively, you could drill a couple of small holes in the frame and thread the ends of the lanyard through these before tying, stapling, or gluing them down.
Finally, consider making this jewelry storage piece even more useful by attaching a Dollar Tree mirror to the front of it, just below the drawer pull. The DT sells both square and round mirrors. Either would work, though if you'd like to create visual interest, go with the round one. This last addition to the piece means that you can check how your jewelry looks with your outfit before you head out for the night. Finally, don't forget to declutter and organize your jewelry to free up space.