Upcycle A Wood Pallet Into A Chic Planter Box To Upgrade Your Outdoor Living Space
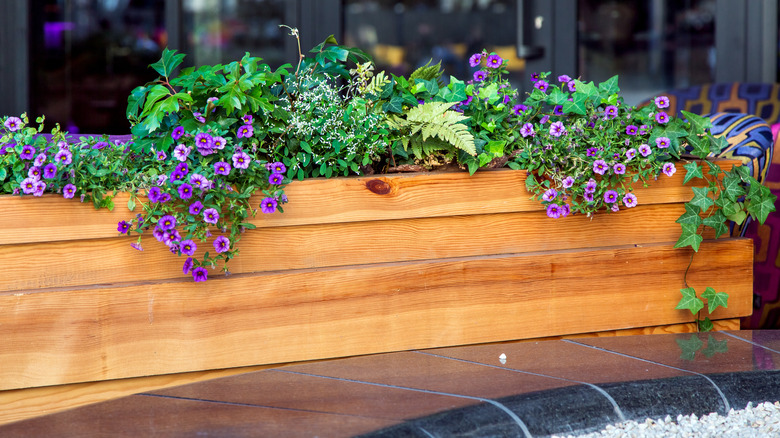
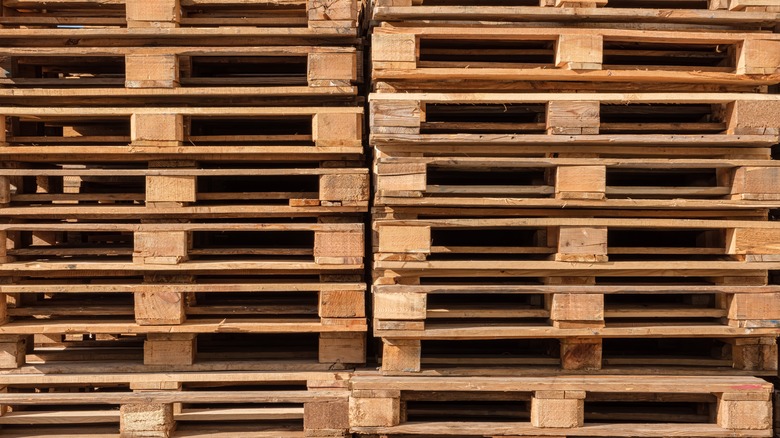
Wooden planter boxes add style and elegance to your home. They're versatile and look great mounted under windows or sitting on a porch or balcony. You can even use planter boxes to create a simple privacy wall for a deck or balcony railing. The only downside is the price. Premade planter boxes can get expensive, and with the price of lumber continuing to rise, you might end up spending a lot even if you DIY. Fortunately, you can source cheap or free lumber for small projects from pallets. Because pallets are used to ship inventory, they're very common, and many stores will be happy to give them to you. If you see a pile of pallets behind a store, stop in and ask the manager if you can grab a few for this project.
Crafty designers can likely see the possibilities for using pallets you might find on the side of the road to build simple, high-quality planter boxes that provide the finishing touches for an exterior aesthetic. Dismantle the pallets, cut them to size to fit your patio or balcony space, and screw the boards together to create custom planter boxes for practically nothing. To complete the build, you'll only need a tape measure, a hammer, a drill, screws, a saw, a sander, the finish of your choice, and brackets if you want to install the box under a window or on a railing.
How to build a planter box from pallets
This DIY wood pallet planter box can be completed with fairly common tools and is simple enough for beginners. Start by safely dismantling wood pallets without damaging the boards. Wear work gloves and eye protection while doing this step, since used pallets often have protruding nails or screws and rough wood. Use the claw end of a hammer or crowbar to pry apart the pallet boards and discard any that are too damaged to use. Remove any screws or nails.
Cut the boards for the front, back, and bottom to the length you want your planters to be so they can fit in your desired placement. The boards for each side will sit horizontally on top of one another in a panel design to reach the desired height. You'll also need to cut boards to form the sides, though these will run vertically, with two or more boards sitting side by side to define the box's depth. Using a drill and outdoor-rated wood screws (to prevent rusting from the elements), screw the vertical side pieces to the bottom piece. Then, screw the sides to the front and back boards. Thoroughly sand your planter box, starting with a coarse grade of sandpaper, such as 50-grit and using progressively finer grades until you have a smooth finish. Sand in the direction of the grain if you plan to stain the boxes; otherwise, the sanding marks will show through. Paint or stain the planters to match your decor.
Safety considerations when using pallets for planter boxes
When you upcycle wooden pallets to build planter boxes, you want to be sure they're safe to use. The main issue to watch for with used pallets, particularly when you'll be putting edible plants in them, is chemical exposure. Pallets that come from out of the country must be treated to avoid carrying insects or plant diseases over the border. These pallets will have two stamps on them. One is the International Plant Protection Convention (IPPC) stamp and the other is the method of treatment. Heat treated pallets will be marked with HT to indicate they've been heated to a high enough temperature to kill pests and diseases. These are safe to use for your planter boxes.
You should avoid pallets marked with MB, which indicates the pallet was treated with methyl bromide, a toxic pesticide. This is the one safety check you can't skip before working with wood pallets. Fortunately, these are rare since methyl bromide is no longer used to treat pallets. You should also avoid building a planter with colored pallets, which are often used to transport chemicals. When you're picking out pallets, pass up any that have obvious spills or stains on them, since you have no way of knowing what caused them. Pallets that are only used within the U.S. may not have any markings. While many of these are safe to use, some that were produced before 2004 may have been treated with chromated copper arsenate, another toxic pesticide.