The Budget Friendly Material That Looks Like A Glass Backsplash Without The Price Tag
Glass kitchen backsplashes add a sleek, modern touch, reflecting light beautifully to create a bright and open-feeling space. Their smooth, glossy finish creates a clean look that complements a variety of design styles. Beyond their visual appeal, they are also easy to clean, making them both stylish and practical. A major downside to this backsplash type, though, is the price tag. Including materials and professional installation, you can expect to pay anywhere from $18 to $42 per square foot, depending on the type and complexity of the design. For a standard kitchen backsplash, which typically measures between 20 and 40 square feet, that's a total of $360 to $1,680.
There is a way to get the look of a glass backsplash in your kitchen without spending tons of money. Using polycarbonate sheets instead of glass will give you many of the benefits of a glass backsplash, without the high cost. This material can be found at big-box home improvement stores for around $21 per panel.
If you're interested in this sleek backsplash alternative, there is another upside to polycarbonate backsplashes: You get to choose the exact color you want because you will be painting the panels yourself. Of course, when installing anything in your kitchen — a room with frequent periods of high temperatures — there are extra things to consider, and this backsplash type is no exception. A little bit of research on the front end of your backsplash project will help you circumvent potential problems.
Polycarbonate backsplash installation, color options, and special considerations
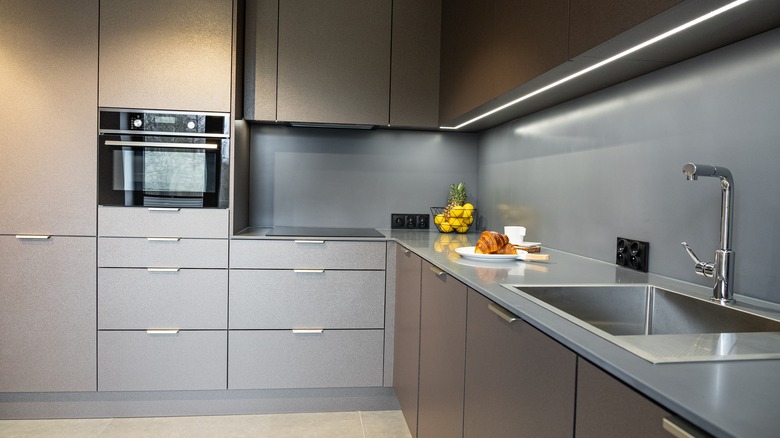
When it comes to customizing the color of your backsplash, the limit is your imagination. Select the desired paint color and prepare one side of your polycarbonate panel set for painting. This involves degreasing and sanding the surface to ensure the paint adheres properly to the panels. Then, paint the prepped surface, and it's ready to put on your wall. If you don't want to paint your panels, but still want something that looks good, keeping your wall's current color and installing gray-tinted panels is an option.
Installing a polycarbonate backsplash is a relatively straightforward process. After the panels are painted, use a jigsaw to cut out openings for outlets. Then, apply mounting adhesive to the back of the panels (the painted side), and press them against the wall. Finally, after the adhesive sets, apply sealant to the edges to prevent moisture from getting between the panels and the wall. If you opt for a translucent polycarbonate backsplash, you will use glass-mounting spacers to attach the panels to your wall, rather than using mounting adhesive.
There is one downside to installing this affordable backsplash alternative. This material has limited heat resistance, and installing it behind a cooktop is not recommended in case it comes into contact with a flame. You also need to take special precautions when cleaning your polycarbonate backsplash. The material scratches easily and should be wiped only with soft cloths. Only mild detergents should be used, as well, to prevent damage to the polycarbonate.