Transform An Old Sewing Cabinet Into A Stylish Kitchen Island With One Genius DIY
We may receive a commission on purchases made from links.
When you lack counterspace, kitchen islands can be just the thing you need to save dinner. However, their cost can sometimes be high — over $2,000 for the upper-end ones — though price isn't always the deciding factor. Novelty counts, too. That's why you should nab that inexpensive old sewing cabinet you happened upon at the thrift store. With the right kind of TLC (and the right kind of additions), that second-hand treasure can be converted into a kitchen island that fits your budget and wins hands down in the originality department, too.
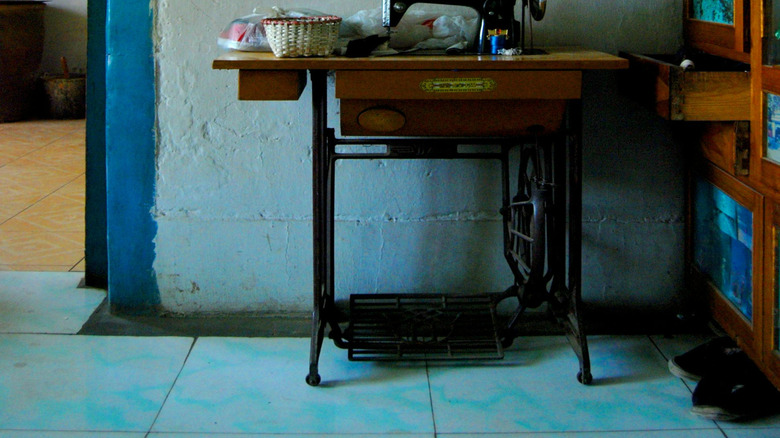
The outcome of this kind of project depends largely on the sewing cabinet, so you may want to consider the type you plan to thrift if you don't have one already. There are deluxe models with similar dimensions to side buffets that will take up a lot of real estate in the kitchen. More suitable ones stand on thin legs and have a small work surface, about 2 by 4 feet. Also, many of these also boast a hinged top that flips over to one side, extending the counter-space potential of the piece when the sewing cabinet is in its expanded state.
The tools and supplies you'll need to revamp the sewing cabinet will vary. Some sewing cabinets will require a lot of work, sanding, and stripping, for example. You may also need a drill to add or remove screws or a claw-head hammer to take out extra nails. And unless you're going for a shabby chic or rustic decor style, you may need to revamp the piece with some paint or stain.
Working with the vintage sewing cabinet
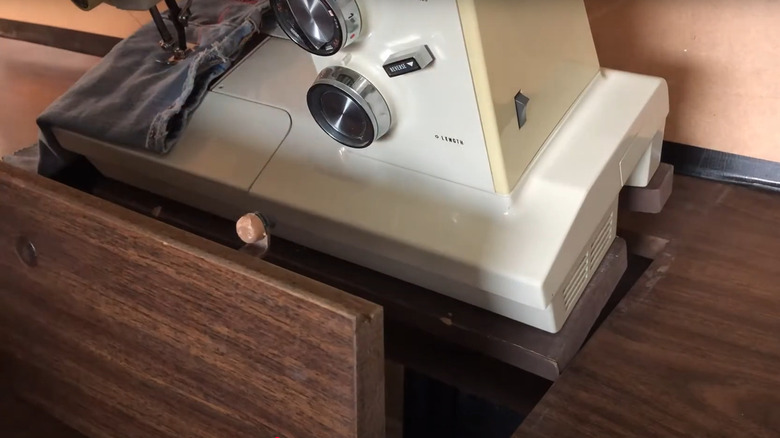
How complex this DIY is for you depends largely on the state and style of the cabinet. No two sewing cabinet repurposing projects will be alike. In light of that, there are some general tips to keep in mind. First, on the off-chance that the cabinet still has the sewing machine intact, you'll need to remove it. If your sewing cabinet is the kind with the machine attached to the top, just unscrew the hinges and take it off. For the kind with hidden machines, if you lift the machine up, you'll usually see two hinges that attach it to the cabinet. Loosen the screws on the hinges and pull the machine out.
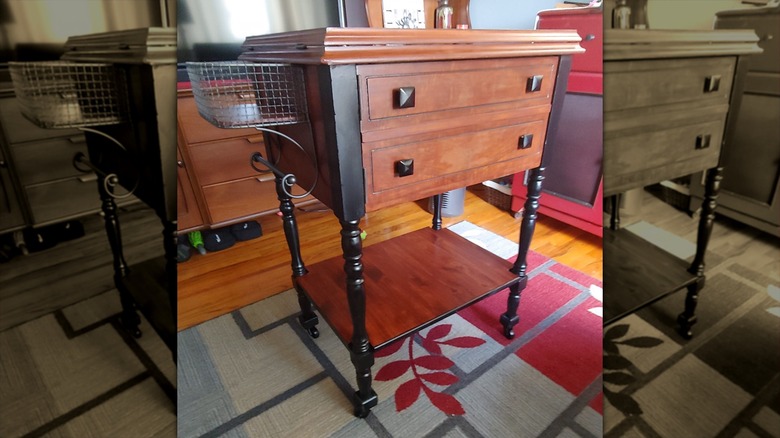
Once that's done, assess the kind of work the cabinet needs. If removing the sewing machine left a hole on the top, you'll need to fill it with a wooden board. Also, old cabinets with beat-up finishes will likely need to be sanded or stripped off, or both. If the cabinet has extra doors or a hinged top, detach those before you sand and strip to make the process easier. Some old machines have a metal foot pump that you'll likely not need, so you might have to remove it. In-built drawers and cabinets would be excellent storage, so consider keeping them.
Finally, when you're ready to stain or paint the piece, ensure that you've opted for choices that would work on kitchen cabinets. Acrylic paint is typically the way to go here if you do paint it, due to its durability and ease of cleaning. If you'll use the cabinet for food prep, you're bound to spill tomato juice or drop cookie dough onto it, so you want it to be a breeze to clean.
Additional customizations you can add to your new kitchen island
Homeowners sometimes use a rolling cart as an add-on to a permanent kitchen island when they need more working space. If you put your sewing-cabinet-turned-kitchen-island on casters, you can mimic this option. Additionally, many kitchen islands on the market have features like marble cutting surfaces or butcher block tops, so if that's something you'd like on yours, you could go ahead. If you choose to get a new top, go for one that fits completely over the top of the cabinet. This prevents food and liquids from getting under the slab. You may be able to find something like this at a specialty second-hand store, like Habitat for Humanity's ReStore. If not, consider the Bme Hevea Solid Wood Butcher Block Top that comes in various sizes.
Attaching baskets or utensil holders on the side will add storage. Finally, regardless of whatever size of cabinet you go with, ensure it doesn't obstruct the floor space. Shoot for having at least 36 inches of clearance space between the cabinet and the counters. This should give you enough room to walk around and work.
Regardless of the style of sewing cabinet you choose, this piece forms the bones of this DIY and offers you a great option for extending your counterspace. This is especially helpful if you rent your apartment or home and can't make significant improvements to the space. The downside to this is that a less-permanent kitchen island won't have electrical outlets or a second tap to provide you with water, which could limit its uses. But this is still an easy way to get more counter space in your kitchen.