The DIY Outdoor Lighting Project That Elevates Your Yard With Elegance

When most people think of a chandelier, the word luxury comes to mind. Ever since their creation, these lighting fixtures have symbolized elegance and sophistication, adding beauty to entryways, kitchens, and bedrooms with their multi-light design. A chandelier instantly steals the attention when it's hung in a room — so why not enjoy its dazzling features outdoors? Believe it or not, it's easy to give an old chandelier new life by turning it into a solar-powered light fixture for the yard. Just imagine how gorgeous one would look while you're soaking up the night. It doesn't have to cost an arm and a leg either.
Chandeliers can often be found at thrift shops and secondhand stores. For this DIY project, it's okay if the lights are broken or other parts aren't in perfect shape. You'll be replacing the lights with solar ones, and you can always paint the chandelier a fresh new color to match your décor. Next, you need solar stake lights. How many and what kind to get depends on your chandelier, your preferences, and your budget. Make sure to grab enough so that you can place one in every section made for a bulb.
Solar lights come in different shapes, sizes, and quality levels. You can sometimes find them at dollar stores, or Walmart sells a 10-pack of stylish ExcMark Garden Pathway Solar Lights for $26.99. Amazon has a big selection as well, such as these Greluna Solar Powered Mushroom Lights, which come in a set of eight. The most important thing is that they fit your chandelier. You'll also need supplies like wire cutters, strong glue, and spray paint.
Take your old chandelier to the next level with this DIY
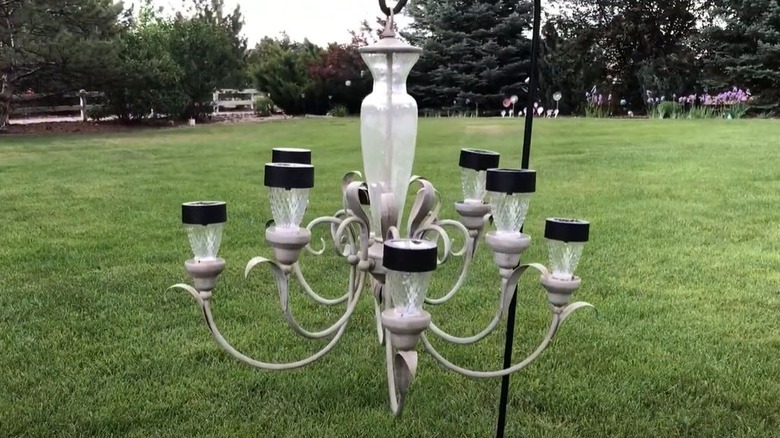
Start by removing all of the wires from your chandelier and any hardware pieces that are no longer necessary. Once it's all stripped, you can either paint it a new color if you prefer or move on to the next step. Take the solar lights off the stakes (if needed) and make sure they are in the "on" mode. One by one, attach them to the chandelier with glue, so that there is a light in every bulb slot. If you want to make it even more of a glam chandelier, you can attach dangling beads that give off the look of crystals.
The next step is to find the perfect place to hang it. Since the lights get their power from the sun, it's important that the chandelier is in a spot that gets some sun exposure. You can hang it from a gazebo, a large branch, or a shepherd's hook, which you can set anywhere in your yard. Or, if you want it under your covered patio, you can sit it in the sun all day, then hang it up once the evening rolls around. One thing's for certain: It'll be an eye-catching piece that adds a touch of luxury to your outdoor space.
Create your own solar-powered chandelier from scratch
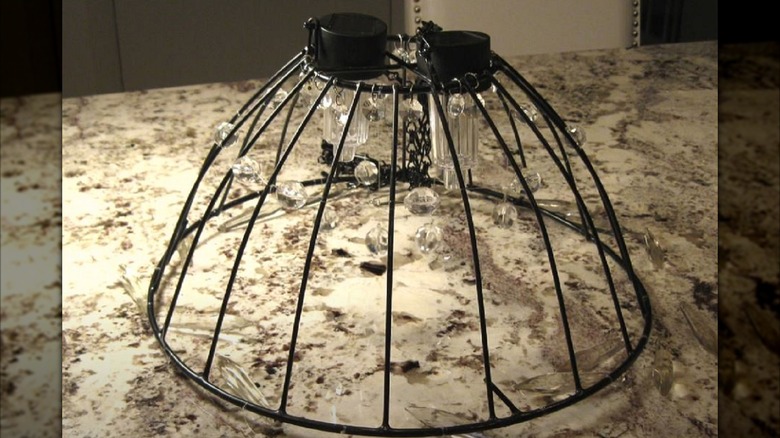
If you prefer to get a little more crafty, you can make a chandelier using a hanging plant basket, which you can get from your local hardware store. For example, Home Depot sells this Vigoro Black Metal Hanging Basket for under $11. You'll also need solar stake lights and some strings of faux crystal beads for added decoration. Begin by turning the wire basket upside down, then fix the chain so that it can hang in that position. The bottom of the basket should have an opening, which you can use to hold your solar lights. Slide one or two of them in so that their solar panels are facing upwards.
Now, time to do some decorating. Attach your beads to the basket using invisible wire. You can hang them from different areas of the base so that they beautifully dangle like on a real chandelier. After you're done, find a nice sunny spot for your new yard décor piece. You can hang it from a shepherd's hook and set it in the garden, or find a tree that's in view of your deck. It'll give off a gorgeous glow after the sun goes down. Since hanging baskets and lights come in different sizes, just make sure that you find ones that pair well together.