Transform An Ordinary Wall Niche Into Stylish Storage With A Simple IKEA DIY
We may receive a commission on purchases made from links.
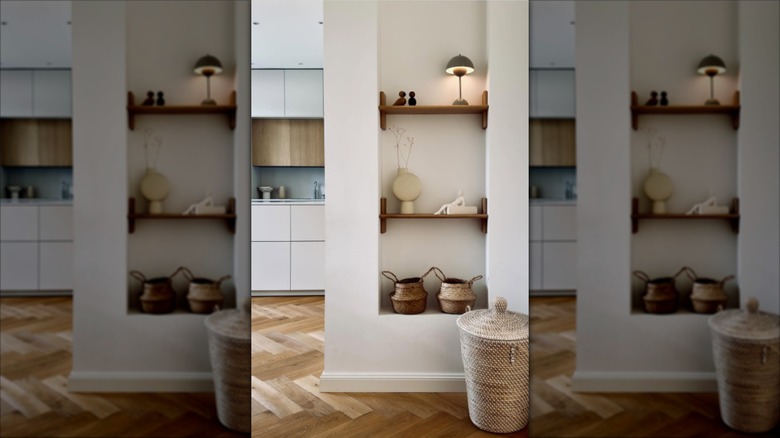
Wall niches, a popular interior design trend, serve some pretty important functions in homes and apartments, including breaking up a physical wall to create more visual interest, and of course, storage. That said, it doesn't always mean that these carved-out spaces have all of the trappings of storage, like built-in shelves. If you have a wall niche that's one large open space and are a fan of IKEA, you're in luck. At almost 2 feet long and just over 6 inches deep, IKEA KLAVRESTRÖM floating wall shelves more than make up where the carpenter left off. The IKEA shelf becomes the main event in this DIY storage hack, which creates the look of built-in shelves that were there all along.
The shelf has three parts in the box: a long shelf and two end pieces that hold the larger board in tongue-and-groove style. Under normal circumstances, these end pieces keep items on the shelf by creating an end-cap of sorts. The end-caps serve an important function in this particular design trick. They essentially provide reinforcement for the shelves on the sides of the niche. If the niche is just under 2 feet wide, the shelves will fit into the alcove from end-to-end. If not, they'll stay on the walls thanks to built-in hooks. They just won't give the display an appearance of built-in shelves. The number of shelves you'll need depends on the height of the niche, how many shelves you want, and how much space you want between each shelf.
The IKEA shelf does come with screws and will need to be assembled. You'll need a drill to put it together and to add screws to the walls when you're ready to hang the shelves. You'll also need a pencil for this IKEA storage hack.
Putting the shelves into the wall niche
Before you put the shelves together, you want to look for the studs in the wall. The budget-friendly IKEA shelf has slots in the back of the longer board to allow you to hang the unit on the wall. While the end pieces of the shelves will provide extra reinforcements (because they'll be snug against the walls of the wall niche), you'll hang the shelves by attaching the slots in the back of the shelves to screws on the wall.
To that end, you want things to be solid, and for that, you'll need a wall stud. You can use a stud finder, like the Jurgen K stud finder. You can also knock on the wall until you find the studs. They're usually spaced either 16 inches or 24 inches apart. Or you can use the magnet-and-string stud-finding method — dangle a magnet on a string until it is attracted to screws in the studs. Mark the studs with a pencil mark. Ideally, both hooks on the back of the IKEA shelf will be supported by the studs. If not, use wall screw anchors to add support.
Assemble the shelf. Try to align the hooks on the back of the shelf to at least one stud on the wall. Once you find your placements, add a screw to the wall in those places with the drill. Hang the shelves up, centering them between the walls of the niche. Finally, if you'd like to make this space practical and beautiful, paint the interior of the alcove area with a color that contrasts the painted walls around it, like a deep red or emerald green.