The Best Way To Repot Monstera For A Bigger, Healthier Plant
Repotting one of the many varieties of a monstera (Monstera deliciosa) plant can feel like a daunting task. You might worry about damaging the plant or if you're about to do more harm than good, but a little preparation can go a long way in setting up your tropical friend for a bigger and healthier life. Knowing the right steps and recognizing the signs your monstera gives can turn this intimidating task into a rewarding project. Providing enough space and fresh soil is important for it to grow larger leaves, a stronger root system, and be happy in its pot.
The process of repotting the plant allows it to absorb nutrients and prevents it from becoming root-bound, which is when the roots become so tightly packed that they can no longer absorb the water and minerals they need. When you repot, you're moving the plant out of a tiny living space and into a bigger, more comfortable home. Doing this can give your plant the room it needs to really thrive and grow in its space.
When to repot and why it matters
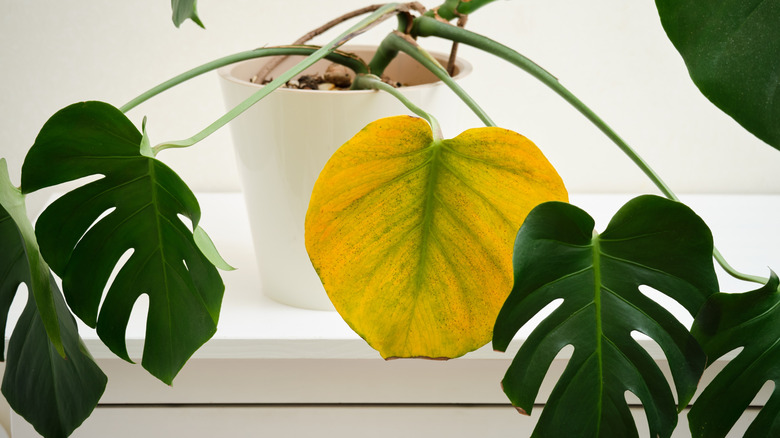
Monstera plants will show you exactly when they need a new home. The most visible sign is when the roots begin to grow out of the drainage holes at the bottom of the pot. Other clues include roots at the top of the soil or a noticeable slowdown in growth. Drooping or yellowing leaves, despite proper watering, may also signal a root problem.
In general, these fast-growing houseplants need to be repotted about every one to three years, usually in the spring or early summer when they are in an active growth phase. Putting it in a new container that is just a couple of inches wider and taller than the old one gives the plant plenty of room to grow and keeps your monstera happy. A pot that is too large can lead to overwatering, since the roots won't be able to absorb all the water from the new soil. This can cause the roots to suffocate and lead to rot.
The right way to repot a monstera
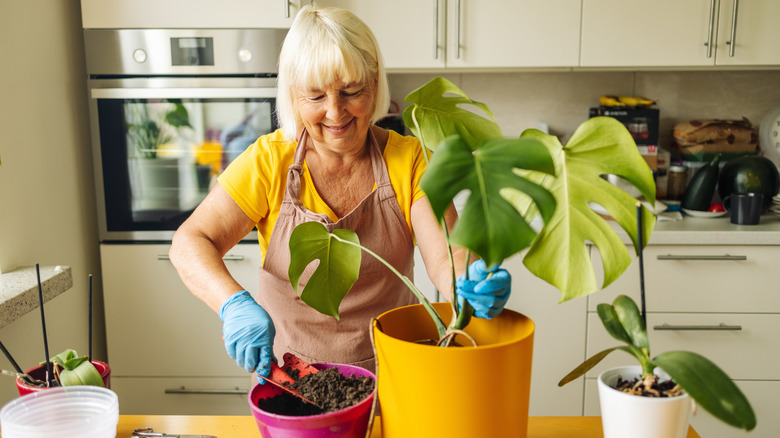
Before you begin, gather your supplies together: a new pot with drainage holes, a high-quality monstera soil mix, gardening gloves, and a tarp or newspaper to keep the area clean. A good potting mix is well-draining, similar to the soil from their natural habitat. Many gardeners use a mix of potting soil, perlite, and orchid bark. To make the process easier, give your monstera a deep watering the day before you plan to repot. This helps reduce the shock the plant feels, and makes it easier to remove it from the old pot.
To get your monstera out, gently tilt the pot to its side and hold the plant by the stems near the soil line. If it's stuck, you can tap the side of the pot to loosen the soil and the roots. Depending on the size of the plant, you may need some help to wrangle it out of the old pot. Once it's free, gently untangle the roots, and gently massage them to remove any old soil. Inspect the plant and use clean pruners to cut away any black, mushy, or rotting sections. Be very careful when handling the roots, since monstera can go into shock after repotting if the roots are handled too roughly.
Place the plant in the new pot with a layer of fresh soil at the bottom so it sits at the same height as before. Fill in the space around the root ball and water well to help the soil settle. After the plant is in its new home, put it back in its original spot where it gets bright, indirect light, and avoid fertilizing for at least six to eight weeks.