Square Tile Lamps Are Trending Everywhere: So How Do You Make Your Own Cheaper?
We may receive a commission on purchases made from links.
After looking at pretty square tile lamps on your social media feed, you might be tempted to bring one home. Alas, you'll have to part with hundreds of dollars — the most expensive ones retail for $600 — to get your hands on these beautiful light fixtures. And even if cost isn't an issue, you'll have to wait about six to eight weeks for one lamp to arrive at your doorstep. Moreover, there's no guarantee you'll find the color that will fit in seamlessly with the rest of your interiors; it might be out of stock. But don't let these drawbacks deter you. Instead, make your own square tile lamp for cheaper.
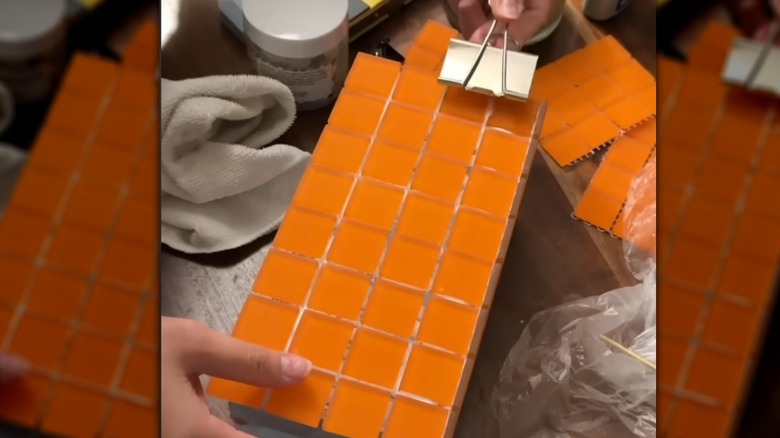
You just need a sturdy base, like the GRÖNÖ 9-inch frosted glass table lamp from IKEA, and a few sheets of tile. Go with fun styles, like checkerboard, brick, marble, or iridescent, for an eye-grabbing lighting. You can get the peel-and-stick variety if you want a straightforward DIY. Or, opt for tile-like sheets if you don't want to compromise on your lamp's looks. However, if you go this route, you'll require additional supplies. For starters, you'll need a specialized glue to adhere your tiles to the glass surface. A multi-surface adhesive like Weldbond is a good choice if you don't have the more common types of glue on hand for your home's upkeep. You'll also need some grout to fill in the gaps between your tiles and give your lighting an authentic touch. Keep a sharp pair of scissors, a soft sponge, and your rubber gloves (for grout application) handy, too.
How to DIY a square tile lamp
Once you have the supplies, take the bulb out of your frosted lamp and put it in a safe spot. Next, remove the adhesive label. In case it doesn't peel right off, try one of the many hacks to remove those pesky price tag stickers. You also want to sand the surface, so the fixture isn't too smooth and your tiles adhere without issues. Now, for the most important part: measuring the length and breadth of the lamp and cutting your tile sheets accurately. Don't rush this part, or you'll end up with a tile lamp that sticks out like a sore thumb. Be careful and keep dry-fitting the cut parts over your lamp to ensure you're moving in the right direction; make adjustments if necessary.
Apply glue over one section of the glass lamp (don't go overboard, or the tiles will keep gliding) and gently lay down a cut sheet. Press it down firmly to keep it in place, and let it cure completely before moving on to the next side. Repeat this process until your lamp is entirely covered in tile sheets. After they're cured, mix grout and water or go with pre-mixed versions, like Red Devil's Tile Grout Squeeze Tube. Either way, ensure it matches your tile's color for a cohesive finish. That being said, white grout usually goes with a lot of shades. In case it doesn't complement your current selection, add a few drops of tinting paste to your grout mix. Then, apply it liberally over your tiles. Let it dry for a while before gently removing the excess with a damp sponge.
Ways to customize your square tile lamps
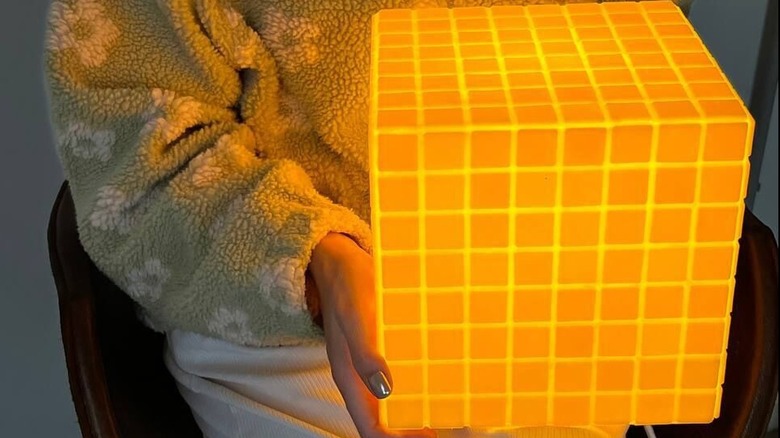
Although it's quite simple to DIY a square tile lamp, what if you want something unique? A simple way to achieve that is to buy tile sheets in differing colors and styles. Alternatively, spray paint the ones you have for a budget-friendly solution. This way, each of your lamp's sides will look different, with differing light reflections when you turn it on. In fact, you can make your own glowing Rubik's cube. Another idea is to get self-adhesive disco tiles, like PP Opount's 2360 Pieces of 5 x 5 mm Mosaic Tiles, in a color of your choosing to DIY a disco lamp that adds sparkle to any space.
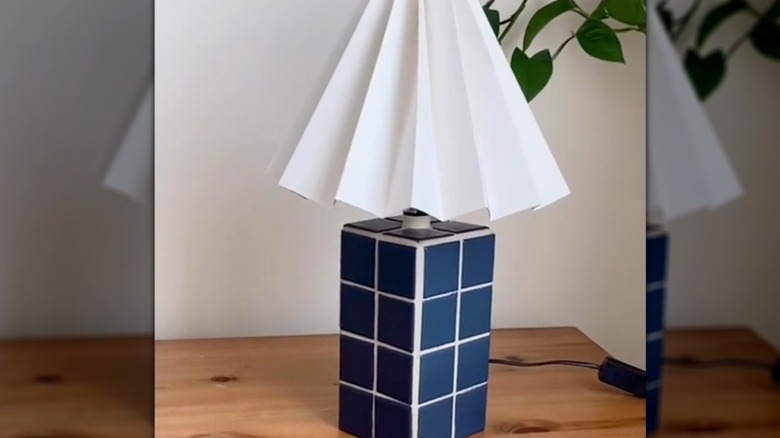
But if you're looking to jazz up a lamp you already own or got from a thrift store, you'll need to build a sturdy box-like structure around your lamp's base. This will help your chosen tile sheets adhere better. Leftover MDF boards or plywood from past projects work great. Just measure the dimensions of the box you'll need and cut out four sides accordingly. Join them with screws or use Liquid Nails' Heavy Duty Construction Adhesive. Don't forget to create a hole for the lamp's wire. You'll also need a sturdy wooden base for your lamp to sit on. Otherwise, you'll have to carefully slip the box over the top (take the bulb off for a hassle-free experience). Then, use construction glue or pre-mixed mortar, such as Custom's Ready-to-Use Thin-Set Mortar, to bond the tiles to your box. To cover your DIY tracks, paint your lamp's neck in the same shade as the tile or the grout.