The 12 Best Simple Solutions To Prevent Weeds From Growing In Gravel
We may receive a commission on purchases made from links.
Gravel is a relatively low-maintenance option to cover part of your landscaping. You can skip the mowing, and you don't have to worry about watering gravel, which helps conserve resources. Plus, gravel allows for good drainage, stabilizes soil for effective erosion control, and is a relatively low-cost, easy-to-install option. You can find many stunning gravel garden ideas to transform your outdoor space into something beautiful.
Gravel may seem like the perfect solution for landscaped areas. But there are some disadvantages, namely the chance that weeds will pop up through the stones. They're persistent little buggers that can establish themselves in minimal soil and grow through the tightest gaps. Fortunately, you can prevent gravel weeds if you prepare the base correctly and take a few extra precautions for your gravel areas.
Prevention starts with planning and installation. Doing your best to kill all traces of weeds before you rock the area and keeping weeds under control in adjacent spaces helps. The size of the gravel pieces and the thickness of the layer affect weed growth, too. Also, it's important to keep the gravel in place and replenish the area as needed to maintain the thickness. Then comes the raking, leaf blowing, and weeding if a sprout does pop up here and there.
Clear any vegetation from the area
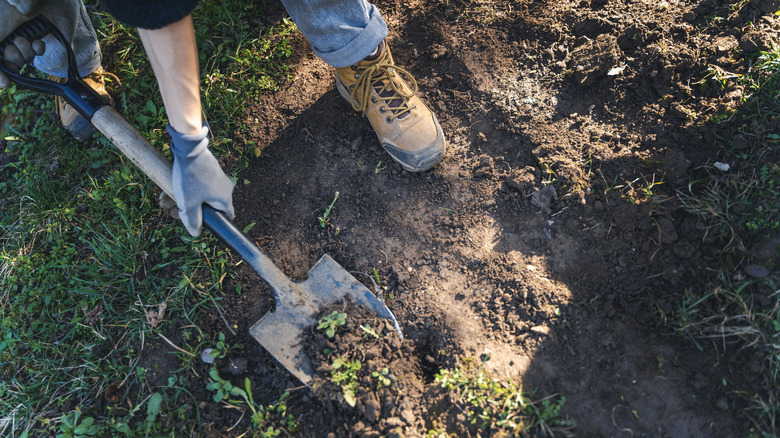
Who doesn't love a fresh start with a clean slate? That's just what your graveled area needs before you do any other work. In fact, prepping the ground correctly is one way to prevent costly errors when landscaping with gravel. Sure, you could toss down the rocks on top of the ground, but you'll likely have all sorts of grass and weeds peeking through the gravel in no time.
Look specifically for weeds in the area, and hit them directly with your best weed removal techniques. Removing them from the roots cuts down on the risk of weeds reemerging and snaking up through your gravel. You'll also want to remove all of the grass and other vegetation in the area in case any seeds from the weeds are still lingering. You can dig it out by hand if you want it gone immediately. Weed killer is also an option that can kill the weeds, seeds, grass, and all other vegetation in the area. Just be careful to contain it to the space you're covering with gravel. Yet another option is solarizing the ground, which involves covering the area with clear plastic tarps to block water and increase heat, resulting in the death of the plants underneath.
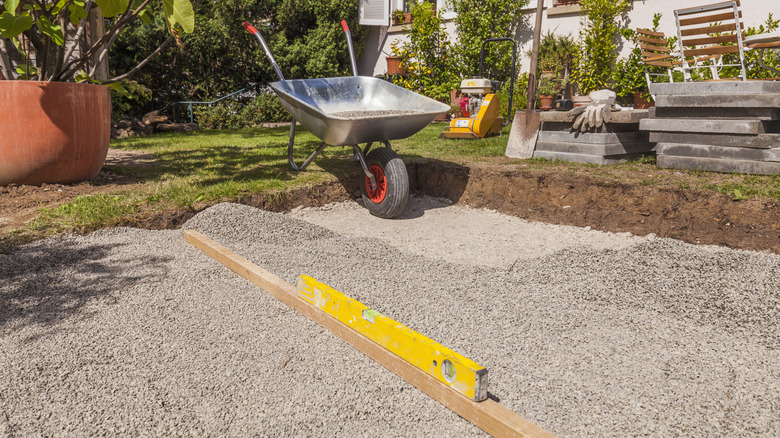
Lay down weed barrier underneath your gravel
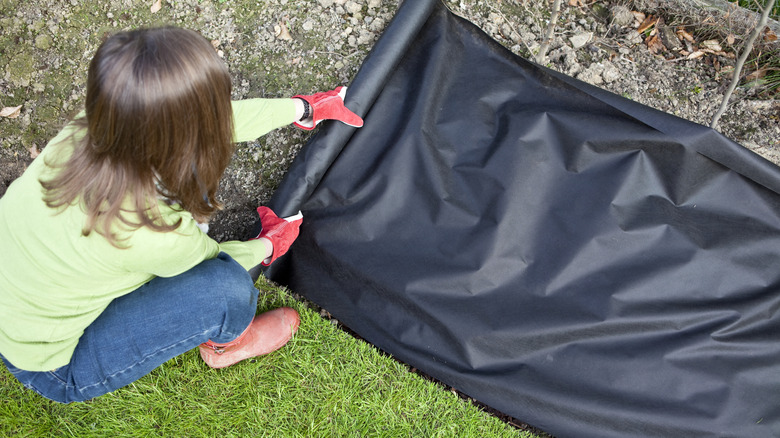
Even with the vegetation gone, it's possible for weeds to grow again in the area if you fail to take additional steps. Adding a layer of landscape fabric creates a physical barrier that can keep weed seeds from germinating. The fabric can also help keep the soil stable and minimize erosion, which helps maintain the gravel area better. Commonly used in landscaping, the fabric comes in a variety of materials, including polyester, polypropylene, linen, or recycled materials. Woven options work well in areas where water drainage is essential, while non-woven landscape fabric excels at controlling weeds and stabilizing soil. You'll also find differences in thickness and weight — thicker, heavier fabrics tend to offer greater stability and stand up to punctures from the gravel.
Roll out the landscape fabric over the cleared area, using pegs or stakes like the Feed Garden Landscape Staples to secure the fabric. You'll want the staples to be about 8 to 12 inches apart. When you put down new pieces of fabric, make sure they overlap the previous fabric by 6 to 12 inches to eliminate any small gaps where weeds can grow.
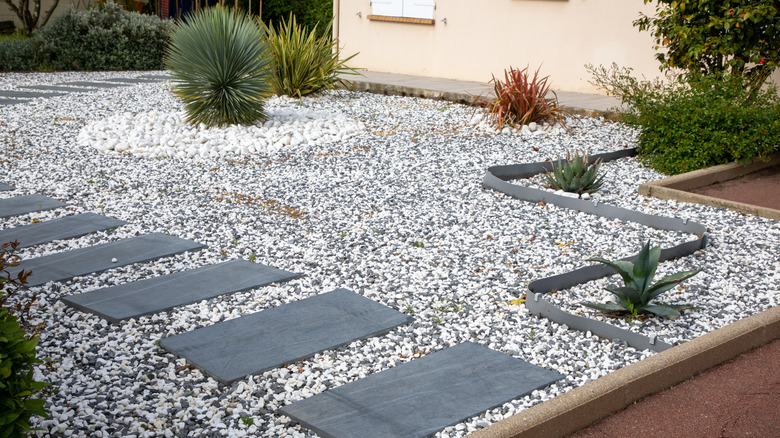
Choose the right size of gravel pieces to block growth
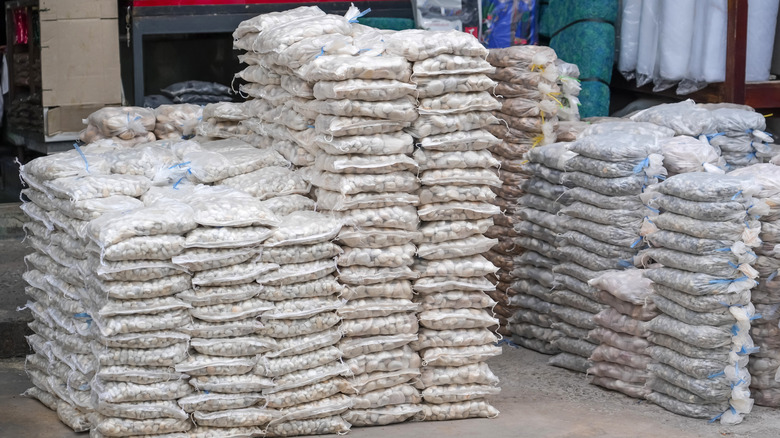
There are several factors to consider when comparing small versus large gravel and deciding which is best for your project. Size choices often come down to the type of project you're doing — smaller pieces tend to work best for patios and walkways, while the largest gravel sizes are commonly used for French drains and driveway bases. However, the size also impacts how likely you are to see weeds pop up in your rock-covered areas. If the rocks are too large, the gaps between them will also be larger — the irregular edges don't let them settle in close to one another — and that makes more room for sunlight to reach the weeds and spark germination.
Ideally, you want to stick with smaller gravel pieces that are less than 2 inches in diameter. However, super tiny gravel could also make it easier for weeds to grow. For example, tiny pea gravel shifts easily, especially with foot traffic, which means it could move aside, allowing weeds to grow. Choosing medium-sized rocks and applying an adequate thickness can help keep weeds under control.
Apply a thicker layer of gravel
Gravel weed control is often more effective when you layer in multiple barriers. To make the gravel itself an effective barrier, it needs to be thick enough to smother the weed seeds that are just waiting to germinate. Piling up the gravel helps block the sunlight from reaching the soil underneath. Thicker layers also help dry out the roots of weeds that might start to grow, making it more difficult for them to survive.
To keep the weeds from germinating, apply a layer of gravel that's at least 3 to 5 inches thick. The exact thickness can also depend on what type of area you're creating. Gravel driveways typically need to be thicker — usually a minimum of 6 inches. In general, the thicker the layer of gravel you apply, the better it will suppress the weeds. However, creating a thicker layer also increases the price of your project, so be sure to balance the cost with the appropriate thickness level to minimize weeds.
Use mulch glue to hold the gravel together
Keeping the gravel in place is a crucial part of effectively controlling weeds. Maintaining the gravel level at an ideal thickness can starve the weeds of the sunlight and water they need to grow. Some types of gravel are more difficult than others to keep in place — pea gravel shifts easily, for example, like we mentioned above.
Mulch glue is an easy-to-use product that helps keep smaller rocks in place, particularly when exposed to wind or rain. While it's often used for mulches like pine needles and bark mulch, it also works on pea gravel. You can also find products like GoRezn Mulch Glue, which is designed for use on all types of rock. The glue itself doesn't prevent weeds, but it can hold the gravel in place, allowing it to block weed growth more effectively.
For the best results, choose a product that's designed to work for the type of gravel you have. Before you apply the glue, use a leaf blower or another method to clean any residue and debris from the rocks — you don't want those items to get stuck to the gravel. The instructions may vary, but you typically spray the glue onto the rocks in an even layer and let it dry completely.
Control weeds in nearby areas
Removing weed growth under the gravel is important, but it's not the only area you should consider. If there are patches of grass or other vegetation nearby, the weeds in those spots can still infiltrate your gravel areas. The wind often carries weed seeds to different locations, which could include your rocky landscape. Any organic materials that collect on top of your rocks could create the perfect spot for those weeds to grow. It's also possible for weeds growing along the edge of the gravel to spread underground, eventually popping through the gravel.
Keep a close eye on the zones near your gravel to catch weed growth early. Maintaining a strong, healthy lawn will help minimize weed growth throughout your property. It also helps to clean off your gravel areas periodically to prevent organic matter from accumulating.
Install a border around the gravel area
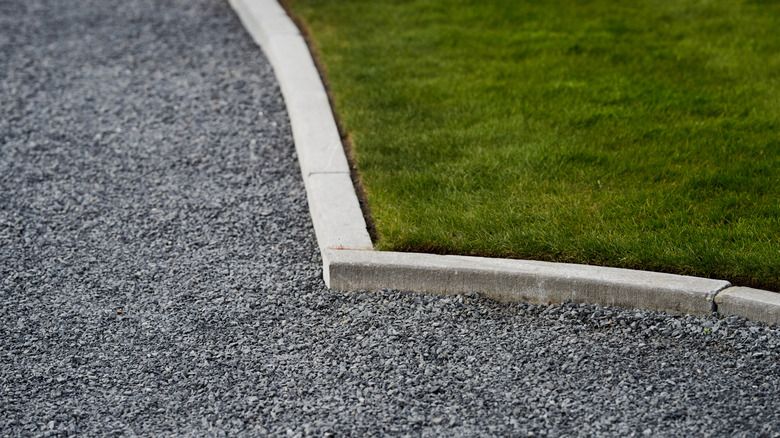
Borders along the edge of the gravel area prevent weeds in two ways. One, they keep the gravel in place so the pieces don't spill out into the yard and create thin patches where weeds could grow through. Two, they create a physical barrier between the gravel and any weeds that could be growing in the lawn area. Plus, they create a polished look that adds to the aesthetics of your rocky landscape.
There are many gravel types to consider before landscaping your yard and even more landscaping edging options. Consider your style preferences when choosing the border material. Stone or concrete edging material continues the look of the gravel while metal or plastic edging creates contrast with a modern look and still contains the gravel effectively. Keep in mind that plastic edging is often not as durable and may not be able to hold up as well to the gravel. Timber edging is also an option if you prefer a more natural aesthetic, and it can complement fast-growing border plants that bring year-round color.
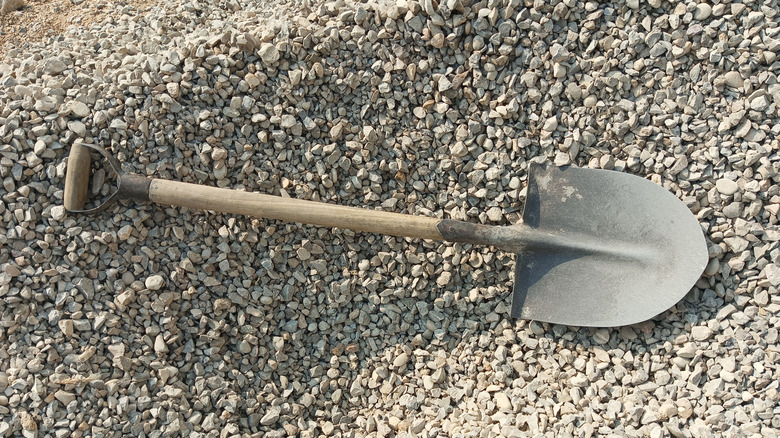
Rake the gravel periodically
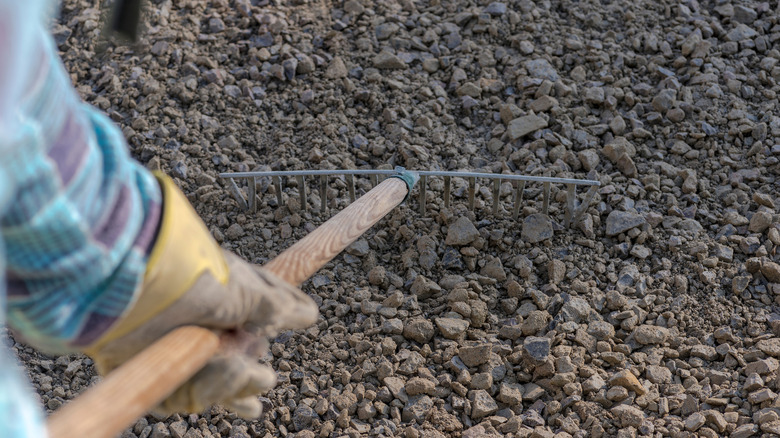
Covering your lawn in rock cuts down on maintenance tasks, but it's not time to retire your rake just yet. What you might not know is that raking the area is one of the best maintenance tips to keep your gravel looking as good as new. Raking can help shake things up if weed seedlings are starting to sprout, making it difficult for them to continue growing. You can also use the rake to get rid of leaves, twigs, dirt, and other natural debris that can serve as a host for seed germination. When you rake, you also reposition the rocks, which helps maintain a consistent thickness and fill in gaps between the rocks, inhibiting weed growth.
Grab an iron rake to tackle the rocks, or use a driveway grader or harrow for larger areas. Ideally, you want to use this method in an area where the gravel is loose enough that you can move it around with the rake while having a stable base. Rake the gravel at least once per year or more often if the gravel seems to shift or have high and low spots.
Invest in a leaf blower to thoroughly remove debris

Another handy tool for gravel that you might associate with lawn care is a leaf blower. We've already mentioned how important it is to keep organic materials off of your gravel area. Weed seeds might be able to germinate even in a small amount. If raking seems like too much work, a leaf blower is an easier alternative that doesn't require much effort. It can be particularly helpful in the fall if you have trees that dump massive amounts of leaves on the gravel. It's a quick way to touch up the gravel frequently between raking sessions.
It's best to use the lowest possible setting on the leaf blower. Higher settings could cause gravel to go flying, especially if you have small, lightweight rocks like pea gravel. Hold the end at an angle so the air blows across the gravel surface and not down into it. Start with the leaf blower several inches away from the rocks, moving it closer if needed to remove the leaves without displacing the gravel.
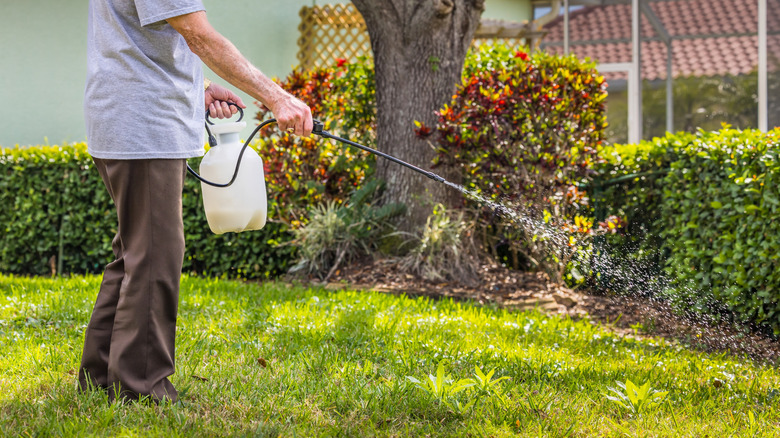
Apply pre-emergent herbicides to the gravel area
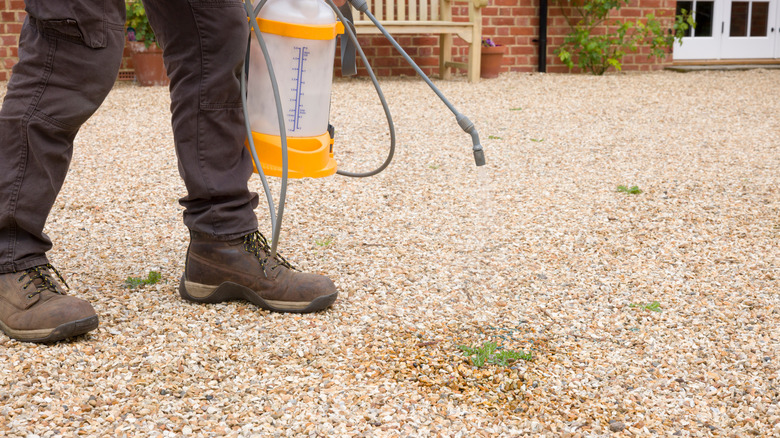
You might have used weed killer on the ground before you laid the gravel, but you can also apply it on top of the rock once it's installed. Pre-emergent weed killers are ideal when there aren't any seedlings in sight. They're designed to stop germinating seeds in their tracks before they can fully form. That means you have to get the timing right — if you wait too long, the herbicide won't be as effective.
Choose a pre-emergent weed killer, and apply it to the gravel area according to the package instructions. Following the correct dosage amount and application method makes the herbicide more likely to work well. Repeat the application once or twice per year or as needed to prevent weeds from growing. It works best in early spring before weeds start to germinate and grow. Be careful not to let the herbicide reach other areas that you don't want to treat.
Remove any weeds that do pop up before they set seeds
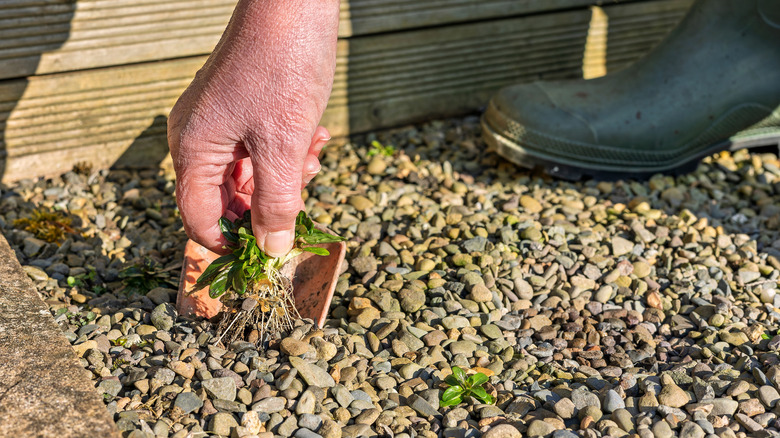
Despite your best efforts, it's possible for a few weeds to pop up here and there in the gravel. Don't feel discouraged when this happens. Instead, take action. Getting rid of the weedy growth can eliminate the problem before the vegetation has the chance to set seeds and spread more unwanted growth in your gravel.
To pull the weeds by hand, start by watering the area to soften the soil. You'll be more likely to pull the weed up by the root. There are other non-harmful tools and products you can use to help remove the weeds as well. For example, weed torches tend to work well on weeds that are about 1 to 4 inches tall. Combining 1 gallon of vinegar, 1 cup of salt, and a small amount of dish soap creates an effective and non-toxic weed killer. However, you'll want to be careful not to spray it on any plants you want to keep as vinegar is non-selective and could kill any type of vegetation.
Add extra gravel as soon as you see it wearing thin

To make sure your rock effectively controls weeds, you want to maintain a consistent thickness. Rocks can settle and compact over time, especially if you don't compact it at the time of application. You might also have gravel that gets washed away or displaced — foot traffic can push gravel out of the area, as can heavy rain. This can result in thinner areas or less gravel overall. As the gravel layer gets thinner, your protection against weed growth diminishes.
Monitor the rock thickness, and add more gravel as needed to keep the rock a consistent thickness. Spread the gravel out as you go to create a level area. You may need to rake the gravel first to disrupt any existing weed growth and level out the existing gravel to create a flat base for the new rock.