Turn That Dead Tree Stump Into A Backyard Essential You'll Make Great Use Of
We may receive a commission on purchases made from links.
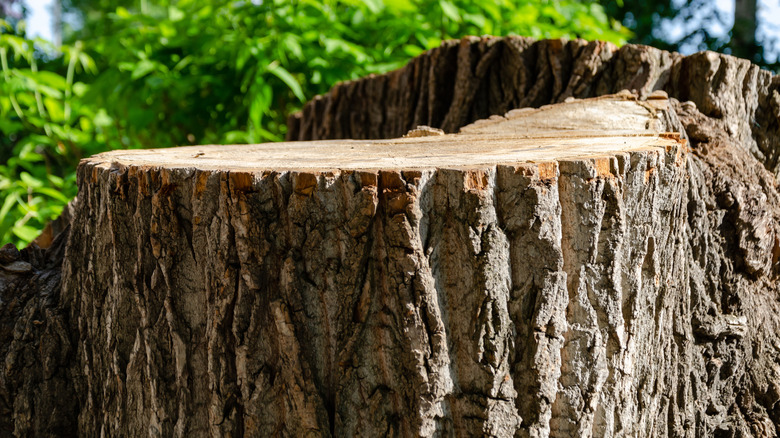
Are you tired of looking out the window only to see that dead tree stump looming in your yard? When you see signs that tree removal is the right decision for your yard, the project will still leave you with cut-down remains that create a visual eyesore and a physical risk. The rotting stump might be taking up valuable space and can even be a tripping hazard for guests who may not be familiar with your yard's layout. Instead of leaving the stump to continue decaying, put your DIY skills to the test and make a home essential to use either inside or in your backyard — a stylish side table!
While a dying tree stump is the perfect base material for a DIY table, you'll need to inspect the wood first to make sure it's not too far gone to use in the project. This means taking the time to look over the stump for signs of extreme rotting or certain types of fungal growth. Start by examining the wood for soft areas that feel moist or spongy. This could indicate that the stump is suffering from internal rot and is not a good candidate for a DIY wood table project. You should also keep an eye out for any mushrooms or small conks popping up on the wood. These types of growths can signal that the fungi are inside the stump.
How to DIY a dead tree stump into an essential side table
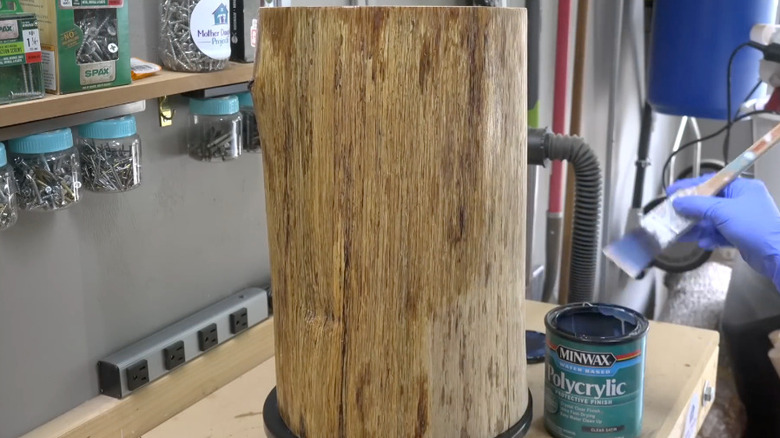
Once you've verified the stump is in good condition, cut it at a right angle at the base to make the table stand vertically. Then, measure and mark a cut line for the tabletop, marking several points around the stump that are equidistant from the floor so the top will be level. Cut off the top at the cut line to leave the raw table form. Then, you'll need to bring it inside and let it dry for at least a month.
After the stump has dried, grab your materials, which should include a sander, a protective face covering, and a clear protective coating like polyurethane (for outdoor tables) or Minwax Polycrylic (for indoor use). You can also incorporate paint or decorations to really amp up the final product. Saw off any unwanted nubs and chisel away the bark from the exterior to leave the smoother wood core. Use the hand sander all over the top and sides of the stump to clean up the surface and strip away any imperfections. Once this step is complete, go back in with the pieces of sandpaper to really address any hard-to-reach spots and problem areas by hand.
Once the stump is smooth and there are no pieces of splintered wood left straggling, move to the final steps of this DIY. All that's left is to add your color and protective coating. Painting the stump is completely optional but can enhance the appearance of your table. Lastly, apply the clear coat to weatherproof your outdoor furniture, and allow it to dry before enjoying your creation.
Ways to customize your new tree stump table

If finding a way to safely remove the tree stump is not an issue, you have the option to break it down even further to create a customized DIY table. For example, if the idea of just a stump being used for a basic table seems bland, add your own legs onto the bottom to give it a fun and fresh design. You can screw the legs directly into the bottom of the table, applying wood glue for even more adhesion. This addition supplies extra height to the table and allows it to also function as a DIY stool when needed.
Another way to make this DIY table truly yours is to go outside the box with the main design. Instead of using the entire stump as the table, incorporate the legs and just cut off a section of the stump to make the final product more sleek. You'll still want to seal the wood before use, though you can also opt to add embellishments like mosaic pieces to the top or fill any cracks or voids with epoxy to create an even more stunning visual.