Add Extra Countertop Storage To Your Kitchen With An Easy Dollar Tree Wood DIY
We may receive a commission on purchases made from links.
To make your kitchen as functional a space as possible, you'll need to keep all of your cooking supplies within easy reach. However, attempting to do this without a plan can create some organizational challenges within your cabinets if you're not careful. You don't want to keep items on your countertop in a haphazard manner either, since it will end up looking cluttered. A neat solution that might work for your kitchen could be to build a small-yet-functional wooden shelf or wood riser that slots into the corner of the counter but away from the sink or primary food prep zones. This sort of project is surprisingly straightforward, and only requires a couple of inexpensive supplies from your local Dollar Tree.
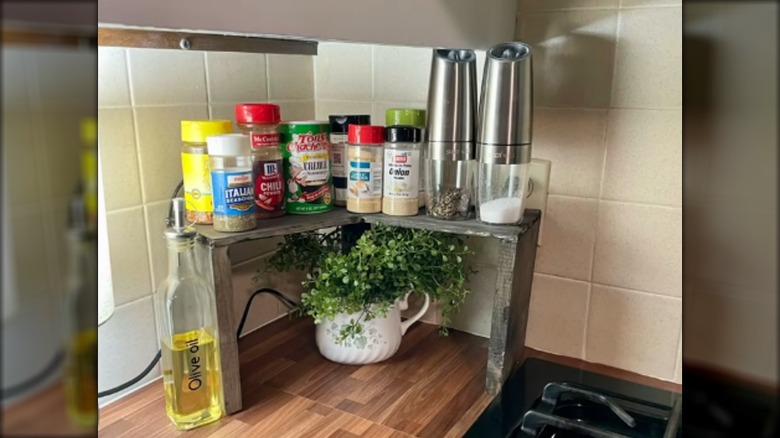
To get started, you'll need to pick up five 11 by 5.5 inch Crafter's Square MDF Wood Plank Boards and some brown acrylic paint. You'll also need a handful of items that you probably already have at home, such as a staple gun, a bottle of wood glue, and a tool to cut the wood. You'll effectively make a sloping cut along the tops of two of the plank boards, glue them together, and then use the rest of the boards to prop them up, so that the initial two boards can serve as a shelf. The angled design of this storage solution allows it to fit perfectly into the corner of your countertop without wasting an inch of space. From a decorative standpoint, it's also the sort of piece that could help you refresh your kitchen by adding texture.
How to assemble your countertop corner shelf
To get started with this DIY, you'll need to cut away a triangular piece of wood from the top third of two of your MDF planks. Use a pencil and a protractor to ensure that these cuts are exactly the same on both pieces. Once you've removed the triangular pieces, use wood glue to link together the planks along the freshly cut edges. Wait for them to dry, and secure them further by using a staple gun along the seam on one side. Next, use wood glue to attach two more of your MDF planks along the edges of the shelf, at a perpendicular angle. These will serve as the shelf legs. You can trim them down beforehand if you feel that they're too tall for your space. Then, cut down your final MDF piece so that it's shaped like a square post and will act as a third leg. Glue this to the bottom of the shelf along the middle seam, as close to the peak as possible.
With the shelf's structure assembled, all that's left is to paint the fixture. Any color of acrylic paint should work, or consider a wood stain, like Varathane Premium Fast Dry in Dark Walnut, for a rich earthy tone. Alternatively, you might like to paint your new shelf in a bright color to match other accents in your kitchen. You can stock your shelf with oils, vinegars, and seasonings, or use it as a way to design an at-home coffee station. Add a houseplant for a decorative touch, or a small table lamp, which is an unconventional kitchen countertop decor choice that Nate Berkus loves.