Create A Cute And Budget-Friendly Vinyl Records Storage Solution With An Easy DIY

We may receive a commission on purchases made from links.
A record player is a beautiful statement piece that embraces your personal interest in music and allows you to share it with guests. But that beautiful statement piece can't just sit on the floor, and neither can your vinyl records. While dedicated record storage can be expensive, you can repurpose cube shelving units as a vinyl record storage solution.
However, since cube shelving units are made with versatility in mind, they are a little too space-friendly and plain. Your record collection might not be massive, so you only want two or three cubes, but even if you position them vertically, those cubes don't reach table height. To lift your shelving unit off the floor, you'll need to add legs to the bottom. By adding legs, you further personalize your record storage and create a surface that is the perfect height to set your record player on, allowing easy access to your music. Couple this DIY with budget-friendly buys that makes vinyl record storage simple, and you have a functional and customized record storage station that you can show off before setting down the needle to fill the room with smooth jazz — or heavy metal.
Some legs to stand on
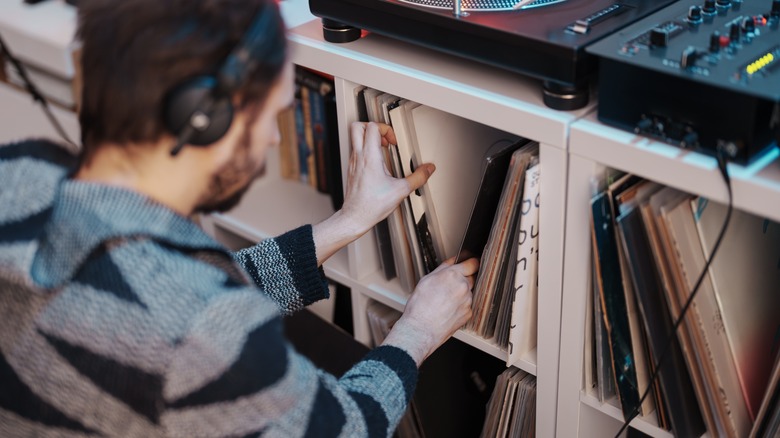
Cube shelving units are perfect for storing and displaying vinyl records since the interior of each cube provides just the right amount of space for a record sleeve. You can find cube shelving at a variety of stores, but some fan favorites of record collectors and the budget-conscious are IKEA's KALLAX ($50) and EKET ($28 per cube) units. Regardless of the kind of shelf you go with, it could use some legs.
Furniture legs can be purchased for affordable rates in-person at stores like IKEA or online with design options like the SmartStandard hairpin furniture legs for $20 or the Sopicoz wood furniture legs for $25. When it comes to choosing legs, keep in mind your height requirements, adding the leg length to the height of your storage unit to get an idea of how tall the finished product will be. Also be mindful of weight, as the legs must hold up the weight of the shelving unit, your records, and your record player. When it comes to materials, you have a lot of options, from contrasting wood to bold industrial metal. Before you attach them to your shelving unit, feel free to modify the legs to fit your style, sanding and staining the wood or spray painting the metal.
These legs were made for walking
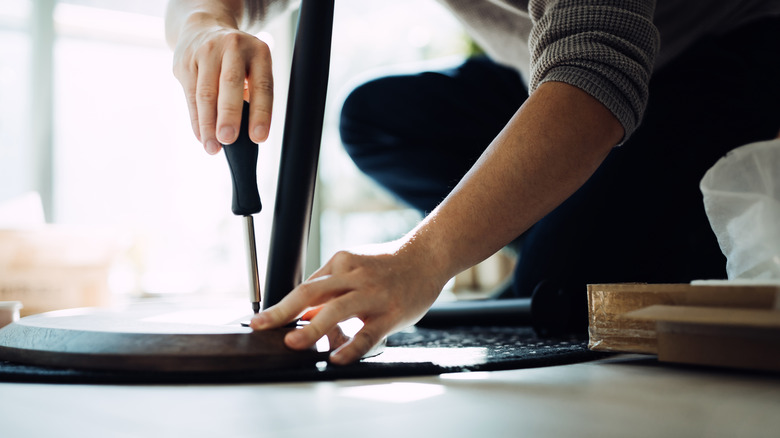
More than likely, your cube shelving unit comes smooth with no predrilled holes. The smooth sides are sleek, but they are a bit of an obstacle to attaching your new legs. Look on the bright side — this will give you an opportunity to practice your drill technique. Place your legs where you'd like them to be — inset at least 1 inch from the sides is recommended — and mark the center of each screw hole. Remove the legs and use a thin drill bit to predrill the screw holes. To keep yourself from drilling too deep, mark the length of your screw onto the drill bit with a bit of masking tape.
Once the holes are made, return the legs to their proper position. If you skip the predrilled holes, secure the legs in place with masking tape to keep them from moving around while you permanently attach them. Finally, screw the legs into place and flip the unit over, revealing your final product. Now, you have the opportunity to alphabetize your vinyl records as you move them to their new home.