Make Your Own Spooky Skeleton Snow Globe With A Dollar Tree DIY

Snow globes aren't just for Christmas decorations or snowy, winter landscapes. Instead, you can find snow globes tailored for almost every occasion, although their namesake "snow" may be replaced by glitter, confetti, or other fun additives. And the best part? If you're struggling to find the perfect snow globe to complete your holiday or seasonal décor, you can easily make your own, like this DIY skeleton snow globe using Dollar Tree supplies.
While you can easily DIY a stunning snow globe with a jar, this particular project involves using a blank, customizable snow globe from Dollar Tree and giving it a spooky touch by adding small skeletons and other Halloween-appropriate trinkets. If your selected items are too large to fit in the snow globe, you may want to keep a pair of sharp kitchen scissors on hand for easily cutting any plastic pieces you don't want included in the final product. For that eye-catching snow globe effect, you'll need water, baby oil, and your choice of glitter. If you don't have baby oil on hand, you can also use glycerin to thicken your fluid solution. Lastly, use a waterproof adhesive or epoxy to hold everything together.
This DIY is easy and beginner-friendly, making it the perfect craft for a slow afternoon. However, there are a few additional steps you can take to reduce the likelihood of mold or other problems that will turn your spooky snow globe into a real nightmare.
How to make a DIY skeleton snow globe for Halloween
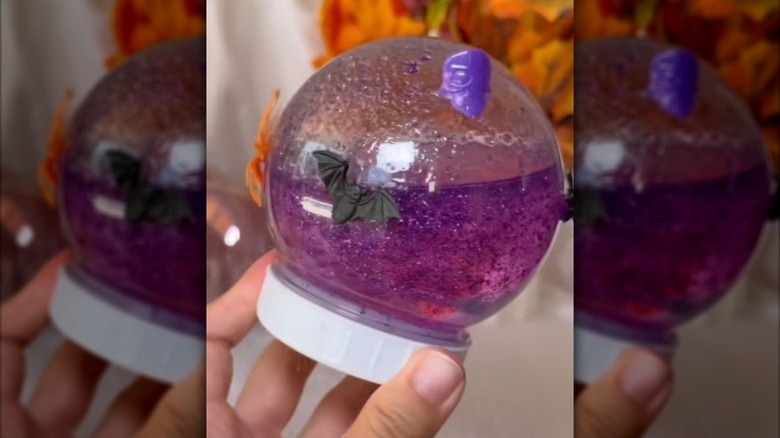
Before you can begin making your snow globe, you'll need to prepare your supplies. Clean both the snow globe and any figures you'd like to include. Once you've handled the elbow grease that comes along with cleaning, you can finally dive into the fun part: Building your snow globe. This is where you can truly let your creativity run wild. For large, static items, you can glue them to the inside of the lid, creating the landscape for your snow globe. Then, fill the globe portion with small additives, such as plastic bats, before filling the globe almost to the brim with water. Finish off the inside of the globe with a few drops of your chosen thickener and your glitter. Be careful of a heavy-hand at this step, as you'll only need a few drops of your thickener. Whether you use baby oil or glycerin, your thickening agent creates a fluid where the glitter can fall slowly without clumping. If you add too much, you may find that your glitter sticks to the top of your snow globe when flipped, rather than falling, for that iconic snow globe effect.
To finish off this project, simply screw the lid into place. You want to ensure that you have a good seal, otherwise you may end up with a mess in the off chance that your snow globe leaks. If you want to take your creative touch a step further, you can also decorate the outside of your snow globe to add more detail.
What to keep in mind when making your own snow globe
Making your own snow globe can be a simple, straightforward process, and you'll find that Dollar Tree has everything you need to make spooky DIY snow globes. But, it's essential to take the time needed to ensure your new decoration is safe. Any metal inclusions can rust over time if left unsealed, and even store bought snow globes can mold under the right conditions. As a result, one of the most important parts of making your own DIY skeleton snow globe is to choose the right supplies.
For this project, you'll want to stick to plastic decorations when possible. However, if you do want to add metal pieces to the inside of your snow globe, add a clear coat of spray paint to the exterior of the decoration before putting it into your globe. This can help reduce the chances of rust forming. Using distilled water instead of tap water is also recommended. After you've picked up your supplies, a thorough cleaning is needed to remove any potential grime or dirt that could later contaminate your snow globe. Finally, if you're looking for more fun projects, you can bring winter inside with adorable Dollar Tree DIY snowman decor.