DIYer Shows How Easy It Is To Ditch Basic Closet Doors For A Chic Sliding Door
We may receive a commission on purchases made from links.
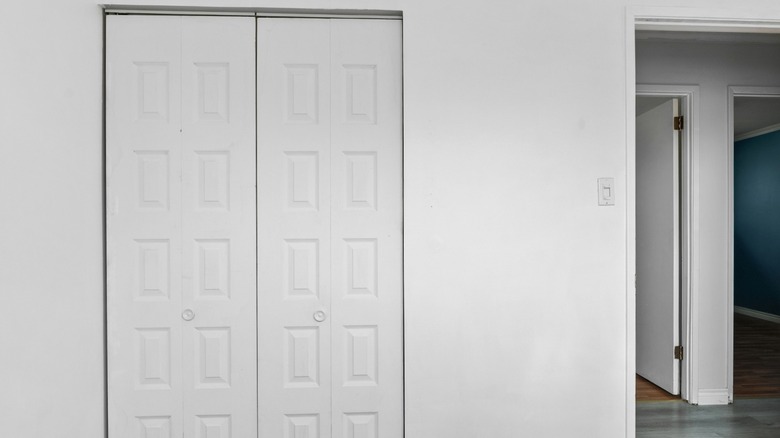
Well-loved for their functionality, bifold closet doors are a staple in modern homes — and for good reason. Being able to access your entire closet at once without a wide-swinging door is the ultimate win for many. But if you're short on space or the room's layout means you can't open the room's door and the closet door at the same time (we see you, tiny city apartments), even bifold options may not work. Instead, save space and add a touch of style with a chic sliding door DIY. TikToker @sohltrain breaks down exactly how to do it with a 2-by-4, a heavy-duty drawer slide, and a large piece of plywood as the door, creating a clever alternative to a standard barn door.
This is a straightforward project you can tackle over a weekend. Newer DIYers may need to budget a little extra time if they aren't familiar with finding studs in the wall or putting in drawer slides, but installing sliding closet doors isn't as hard as you think. Ready to get started? The first step to ditching your builder-grade closet doors is to pick up your materials, beginning with the wood for your new sliding door. One of the best options is to choose a good piece of plywood; it's affordable, readily available, and lasts. Medium-density fiberboard (MDF) is another possibility but weighs more than plywood, an important consideration when choosing your drawer slides. Many heavy-duty slides, like baidice Heavy-Duty Drawer Slides, support 50 to 100 pounds, but double-check the weight limits on your hardware. With your supplies ready, you can remove your old door and quickly install your new sliding feature.
How to DIY your own stylish sliding closet door
Remove your existing closet doors. If you have bifold doors that just have a top track, fold the door panel together, push up towards the ceiling, tilt the door towards your feet, and pull it free. You may need to use a screwdriver to press down on the top outside wheel to free it, and then use the same up-and-out motion to pull the door away. If your closet doors are on a track, there might also be pins you need to release before you can remove them.
With the door removed, measure your space to figure out how big your new sliding door should be. Don't forget to measure the plywood so it runs at least 4 inches above the closet frame (including the trim) to cover the 2-by-4 brace and the drawer slide hardware. Next, install the brace board. Put the brace board in place, and use your level to make sure it's even. Use your stud finder to identify studs, and mark their position with a pencil. Transfer the marks to the board, drill pilot holes, and secure the board into the studs with wood screws.
Brace the drawer slide's cabinet member against the 2-by-4, checking for level. Secure the cabinet member with the same routine (mark, pre-drill, and attach), and fully extend it. Lean your door piece parallel to the wall, supporting it on small blocks to slightly elevate it off the floor. Use the brace board's slide member to gauge where to install the other slide hardware. Make sure the slide member is level before screwing into place. Then, slide the drawer hardware together, test out the mechanism, and you're done!
Tips to decorate your dream sliding closet door
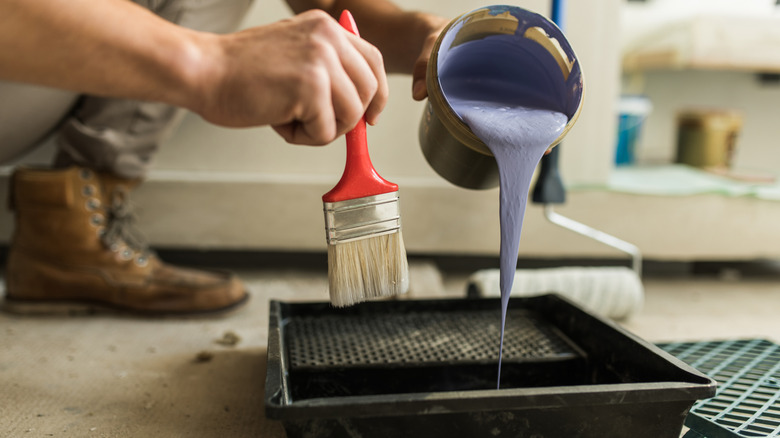
Turning plain plywood into a chic sliding closet door is probably our favorite part of this project. But before you grab the paint, there's one important first step: sanding. For plywood, fill any holes and voids with filler, and use a 120- to 180-grit sandpaper to smooth the surface. Have MDF? You may only need a light fine-grit sanding to prep the surface. Remove all the dust created by sanding before starting to decorate.
Decide how you want to decorate the door. Matching the style of the room is the most effective way to make it feel like the door has always been there. Paint is a great choice to add a fresh color and vibe to a space. If you plan to paint your door, apply a primer beforehand to ensure an even application without any bleed-through. For a more rustic look, use wood glue and screws to add 1-by-4s in a frame around the edge of the door and create an X shape in the center. Add a wood stain to complete the look, or apply wallpaper, like Vintique Floral Wallpaper, to make a statement wall. If the room doesn't have the space for a standing mirror, consider adding a lightweight mirror made to hang on doors, like the Kosmonia Full-Length Tempered Glass Door Mirror. The mirror will also help reflect light, making the space feel airier. For more function, turn the door into a chalkboard wall with a splash of chalkboard paint to doodle or add reminders, another trendy alternative to a traditional barn door that's all too simple to set up.