Say Goodbye To Moldy Shower Caulking With One Simple, Affordable Solution
We may receive a commission on purchases made from links.
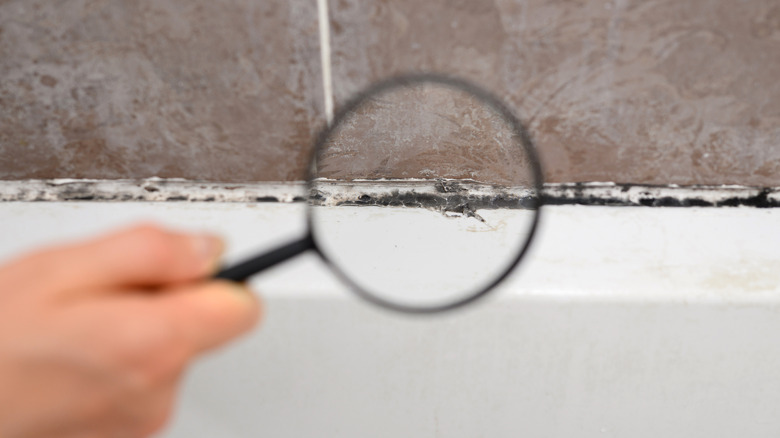
The bathroom is often one of the most challenging spaces in your home to clean. They can be very stinky, which is a major turn-off that makes it a place you'd rather avoid. Add hard water buildup and soap scum residue, and it becomes a time-consuming chore to tackle this space. To make things worse, sometimes you might notice moldy shower caulk areas that don't ever seem to go away. But you're not alone. While there are ways to prevent mold in your bathroom, it is a natural breeding ground for mold, especially in areas where there is excessive moisture, such as caulk lines. There is hope, however, as you can say goodbye to moldy shower caulking with one simple and affordable solution: Removing the caulk completely and re-applying it for a fresh, clean bathroom.
Caulk becomes moldy due to its ability to trap moisture. It is also easy for mold to thrive in caulk because soap and water come together and sit on surfaces, acting as food for these organisms. Sometimes, especially in situations where multiple cleaning methods have failed, it might be best to replace moldy caulk. This is because the mold might also be growing underneath it, which signifies that the caulk has lost its integrity and is now allowing water to get into and behind it.
Other bathroom areas to look for undetected mold include your sink and shower faucets. While mold is naturally in the air, excessive exposure due to large mold infestations on your bathroom surfaces can lead to health problems. You might suffer from allergies or respiratory issues, so it's better to remove it as soon as possible.
How to remove and replace the caulk in your bathroom
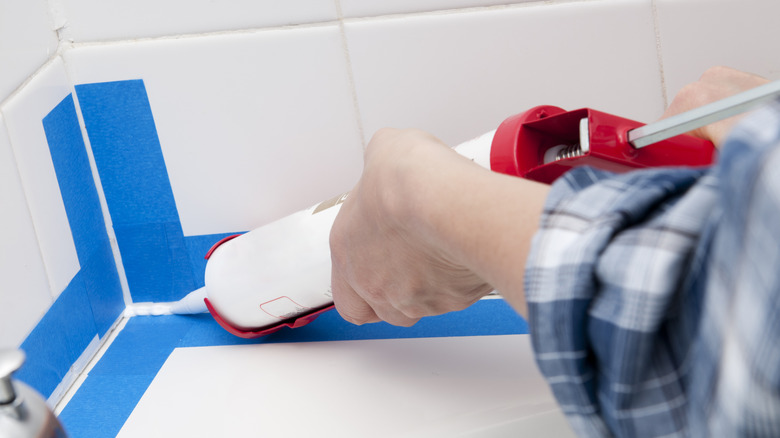
You're going to need a few tools to achieve this easy, affordable solution to your mold problem. First, you're going to need caulk and a caulk gun to replace the old stuff with, such as this GE Advanced Silicone Mold-Resistant Caulk and the highly rated Newborn Octogun Drip-free Caulking Gun. Next, you'll need something to help remove the moldy caulk, like a scouring tool that has a flat and angled side, such as this 3-in-1 Silicone Caulking Tool. You can also use a razor blade or flathead screwdriver, if handy, for scraping.
Use your scraping tool to gently get underneath the link of the caulk. You can scrape it all across and then work to pull the caulk all out at once, or you can remove it in pieces. Once the moldy caulk is removed, you'll want to clean the now-empty area where it was installed to remove any other mold that might be there. You can use a simple solution of vinegar and warm water, or some bleach (just be sure to wear gloves). Let it dry before you apply the new caulk with a caulk gun along the edges. You can use these handy Outus caulking tools and some painter's tape to help set the silicone, and be sure you let it cure as long as the directions state (typically up to 2 days). Finally, you should always take time to deep clean your bathroom to keep the mold from coming back.