Declutter Your Crowded Entryway With One Simple And Stylish IKEA Breadbox Hack

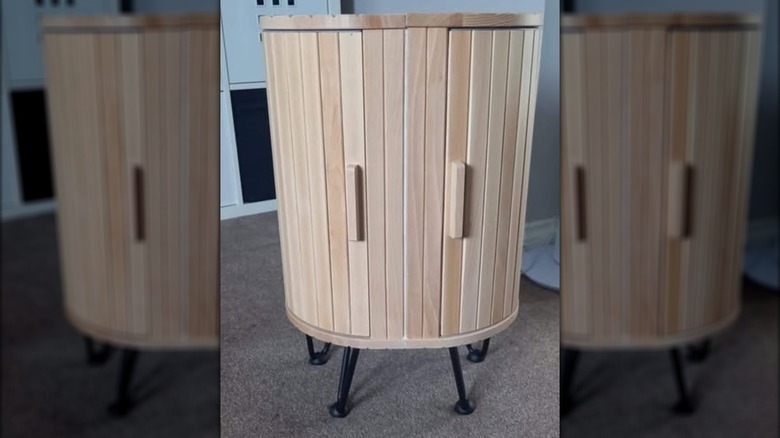
If ever there was a company that encouraged DIYers to MacGyver its original creations into something new, it'd be IKEA. Nowhere is this more apparent than in the DIY that turns two IKEA MAGASIN Bread Bins into one chic entryway cabinet. Once finished, this clutter-catcher is the perfect place to stash items like car keys, errant pieces of mail, and even a compact umbrella or two. However, this DIY isn't just practical. It's handsome, too, making it a logical addition to any entryway that could use a little decorative boost.
As with all simple IKEA hacks, this DIY relies on using a ready-made object as its foundation. In this case, the wooden bread boxes become the body of the cabinet. However, they're too small as is to be a cabinet. They require some wood glue and a couple of Iziusy Stainless Steel 6-inch Straight Braces to keep them stable. To work with the braces, you'll also need a drill.
Additionally, to make your bread-basket-turned-cabinet a respectable height, it requires some legs to stand on. What kind of cabinet you're hoping to make determines what type of furniture legs you'll use for this. For example, if you're going for an industrial, borderline rustic style decor, you may want to experiment with some SMARTSTANDARD 16-inch Hairpin Furniture Legs to give it an industrial vibe. However, the sky's the limit – straight legs, round knobby legs, even converted pipe legs would all work for this. Finally, while the IKEA bread basket is lovely on its own, you may want to give it a bit more decorative flair. For that, you'll need some paint or stain and some brushes.
Creating the entryway cabinet
On its own, an IKEA MAGASIN bread bin won't be big enough to hold much. As such, you'll fuse two of them together for this project. Even still, this will make for a cabinet that's on the small-ish side of things. It may not be appropriate for a grand foyer, which can measure 20 feet or more. However, if you live in a tiny space, say a 300-square-foot apartment, a cabinet of this size will be a perfect place to keep small items organized.
@ikeahacksandideas IKEA MAGASIN BREAD BIN DIY HACK How beautiful is that?😍🙌 Video by (Please send me a message if you know the creator!) ➖➖➖ Our Hashtags ➖➖➖ #ikeahacks #ikeahacksforkids #ikeahacksdiy #ikeaideas #ikeaplaykitchenideas #ıkeaideas #ikeahackideas #ikeahome #ikeahomedecor #ikeahomedeco #ikeahometour #myikeahome #ikeahomefurniture #ikeahomes #ikeahomeview #ikeahomedelivery #ikeahomeoffice #ikeahomestories #ikeahomeph #ikeahomemanila #ikeahomefurnishing #ikeahomedecorjohor #ikeahomestyle #ikea
This project starts with you coating the bottom of both of the bread bins with wood glue and then sticking them together. You'll need to make sure to line up the tops and the bottoms because once the glue dries, what are the sides of the bins now will become the cabinet's top and bottom. Once the glue is dry, you'll turn the cabinet on what will eventually be its top and fasten two of the metal braces to the bottom. The braces should stretch across both bread boxes. The purpose of these is to reinforce the glue.
It's only after you have the braces screwed on that you'll add the furniture legs to the bracketed side. This side of the modified cabinet will become its bottom, so you won't see the braces once you turn it over. However, before you add the legs, you'll want to paint or stain the piece. This will mean less clean-up because you won't have to remove any paint spills on the legs.
Making the IKEA bread box cabinet even more luxe
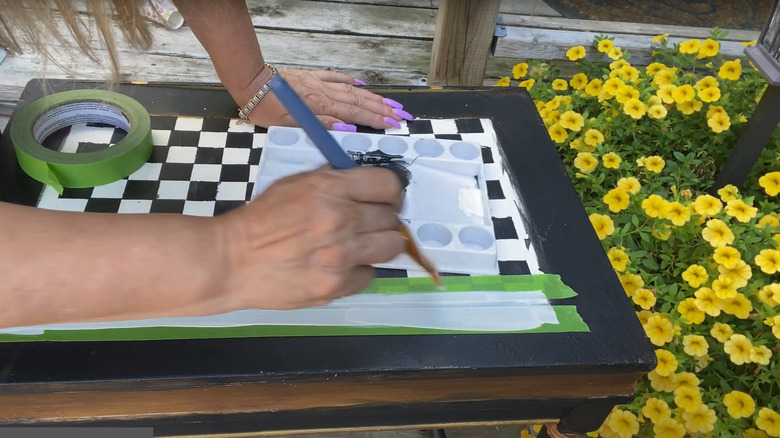
This IKEA bread box cabinet might be small in stature, but it has the potential to be mighty in terms of making a statement in your decor. One simple way to do this is to give it a really bespoke paint job. For example, paint most of the cabinet black, and then add some visual interest by painting a black-and-white checkerboard pattern across the top and down the front. Create a visual juxtaposition to the checkerboard pattern by standing the cabinet on four WEICHUAN Black Round Solid Wood Furniture Legs. These embellishments turn the table into a MacKenzie-Childs dupe, thanks to the addition of the black and white checkerboard pattern and black legs.
Or, you can really turn up the industrial vibe by mounting the table on a set of black pipe legs. Top it with a black CONCA Industrial Steampunk Table Lamp, complete with an Edison bulb. While the lamp is freestanding, it has a wooden base, which means that you can make it a more permanent part of the table with the help of a few long screws and your trusty drill. Or, if you'd like something a little less permanent, but still highly functional, add a set of Mikasa Gourmet Basics Industrial-Style Baskets to the top of the cabinet to stash mail and other items in. In the latter case, you're ending up with more ways to clear away the clutter in your entryway that works with the storage capacity of the cabinet, while still making a choice that augments the IKEA refurb's decorative style.