DIY A Rustic Fall Planter With Items From Dollar Tree

When the crisp autumn air comes, there's nothing cozier than styling your home to match the season. Breaking out your Halloween and Thanksgiving decorations is certainly one of the most obvious ways to do this. However, these sorts of pieces are not always fitting for the entire fall season, since so many are dedicated to specific holidays. To get decorations that last from late September until the end of November, you'll often have to make them yourself, and DIYing a rustic fall planter is a great place to start. TikTok creator @sigala_swag shows you can do this the quick, easy, and inexpensive way with the help of Dollar Tree's Harvest Theme DIY Wooden Decor and Crafter's Square Rectangular Wooden Crates, both of which are available for $1.50 or less per piece. If you paint them and attach a cutout to the back of a crate with the help of a few popsicle sticks and some hot glue, you'll get the perfect holder for your seasonal faux plants.
To give your planter a rustic autumn aesthetic, you'll need brown and gray acrylic paint and a clean dish sponge. To complete the look, you'll also need to pick up some faux autumn leaves or flowers if you don't already have them, bringing warm yellows, reds, and oranges to the design. A bundle of Dollar Tree Floral Gardens 6-Stem Assorted Sunflower Bushes, for example, are a perfect choice since their color is realistic and natural. Your completed planter can fit in just about anywhere in your home, from the kitchen to the living room or perhaps your entryway. It will also look elegant alongside vintage fall decor items that are always in demand at thrift shops.
How to assemble your DIY fall planter
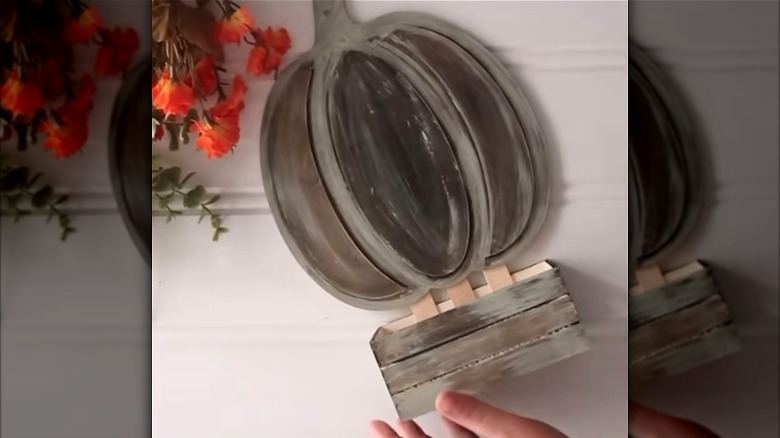
To get started, pick which of Dollar Tree's wooden cutouts you're going to use for this project. The pumpkin shape is a classic choice, but you could just as easily work with the leaf if it better suits your home's aesthetic. Dollar Tree also brings in plenty of tabletop signs and other decor that will work perfectly for this fall-themed DIY. Use a brush to coat your cutout and your crate with brown paint. Let them both dry. Then, work on a thin layer of gray paint with your sponge. Cover the surfaces of the crate and the cutout slowly, and leave plenty of brown visible beneath the gray. The goal in combining these colors is to create a distressed look with visible lines, rather than a smooth finish.
Next, hot glue three to four popsicle sticks to the inside of your crate, along one of the longer edges. The sticks should be standing up vertically. Finally, attach the cutout to the popsicle sticks to create the backing for the planter. More hot glue should do the trick for this step, but if you're after a stronger hold, try using E6000 or superglue. Just watch out for mistakes commonly made when using superglue, like using too much. From there, all that's left is to fill up the planter with your faux plants. If you want, you can tie an orange or brown ribbon to the top of the cutout to make your decor piece to make it just a touch more eye-catching. You could also put a few pinecones in with your plants to get a more rustic vibe or find other cinnamon-colored decor ideas that look delightful alongside your planter.