How To Easily Get Rid Of Mold On Popcorn Ceilings And Make Them Look Like New
Although they often get a bad rap, there are several things to appreciate about popcorn ceilings. For example, the texture hides dents, cracks, and other blemishes, and they are highly effective at absorbing sound. However, one of the biggest drawbacks to popcorn ceilings, outside of their dated appearance, is how difficult they are to clean. This can be especially true if your popcorn ceiling develops mold. While removing mold from your textured ceiling requires some prep work, the solution is easy and relatively stress-free. Simply spray an antifungal solution like bleach on the stubborn stains and let it sit there for a while. It will eliminate your mold problem with minimal fuss.
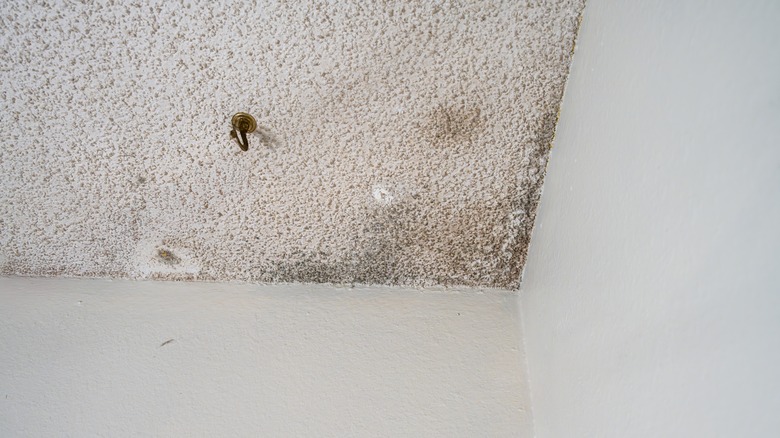
Just as popcorn ceiling texture holds onto dust, the rough surface also encourages mold growth. The material is particularly vulnerable if it suffers water damage or is applied in a humid environment, such as a bathroom. Being able to identify mold in your home and get rid of it for good is crucial for preventing potential health issues, such as allergies and respiratory issues. Mold typically presents as green, brown, or black patches on a popcorn ceiling. These spots generally don't go away with regular cleaning, and you may see them spread. You might smell a musty odor in the room, too.
Prepare for popcorn ceiling mold removal
If you spot mold on your popcorn ceiling, you probably want to remove it as soon as possible. However, it's important to prepare properly for the cleaning process if you want to do it safely and effectively. Popcorn ceilings in homes built before the ban in 1977 may contain asbestos, a fibrous mineral commonly used as a building material until it was linked to serious health issues like asbestosis and lung cancer. If you have asbestos in your ceiling, you need to engage the services of a professional abatement company. The best method for testing your popcorn ceiling for asbestos is to take a core sample of the ceiling and send it to a lab for analysis.
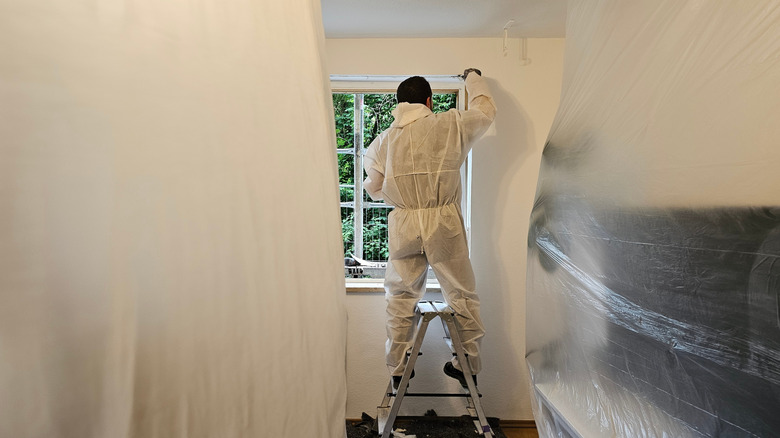
Once you know you're in the clear for asbestos, gather the protective gear you'll need to stay safe around loose mold spores and whichever antifungal agent you choose to use. This includes latex or rubber gloves, a face mask or N95 respirator mask, and safety goggles. You may also want to wear disposable coveralls to prevent the spores from spreading to the rest of your home. To protect the furniture and other items in the room, cover all the surfaces, including the floors, with plastic sheeting. Make sure to close any vents in the room before you begin and open all the windows to ensure adequate ventilation.
Use an antifungal solution to remove mold from your popcorn ceiling
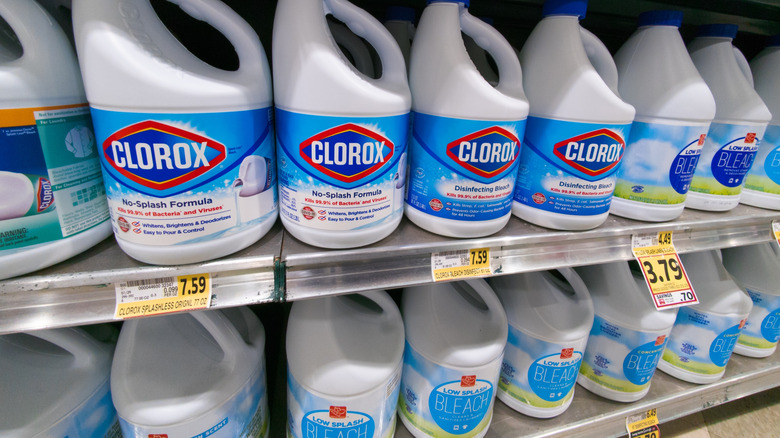
The key to removing mold from a popcorn ceiling is using an antifungal cleaning solution that you don't need to scrub into the surface with too much pressure. The popcorn texture crumbles easily, so if you are too rough with the ceiling, pieces may break off. Bleach is a professionally recommended option because its active ingredient, sodium hypochlorite, is effective in killing viruses, bacteria, and, importantly, fungi. Mix one part bleach with three parts water in a spray bottle to create an anti-mold cleaning solution.
If you don't like using bleach-based cleaning products, white vinegar is an all-natural alternative. It contains acetic acid, which inhibits the growth of some common mold species. White vinegar can be used on its own in a spray bottle or mixed with water to dilute its pungent aroma. Oxygen bleach powder diluted in water is another, gentler option.
Before you apply the antifungal solution, clean the dust and dirt off of your popcorn ceiling using mild dish soap and warm water. Wipe carefully to help loosen mold from the ceiling's nooks and crannies, and allow the surface to dry completely before applying your antifungal spray. Apply your bleach or vinegar solution to the ceiling, thoroughly wetting all the areas with mold stains. Use a sponge to dab the surface to ensure all spots are soaked, then allow it to sit for about 30 minutes. Afterward, rinse the area with a cloth dampened with warm water, and allow it to dry.