This IKEA DIY Turns A Basic TARVA Dresser Into A Vintage Dream
Finding the dream vintage dresser to complete a room can feel like, well, a dream — one that you can't quite make come to life. Instead of spending hours scouring thrift stores and antique shops for the perfect piece, use this nifty DIY to transform the basic IKEA TARVA dresser into a stellar statement piece.
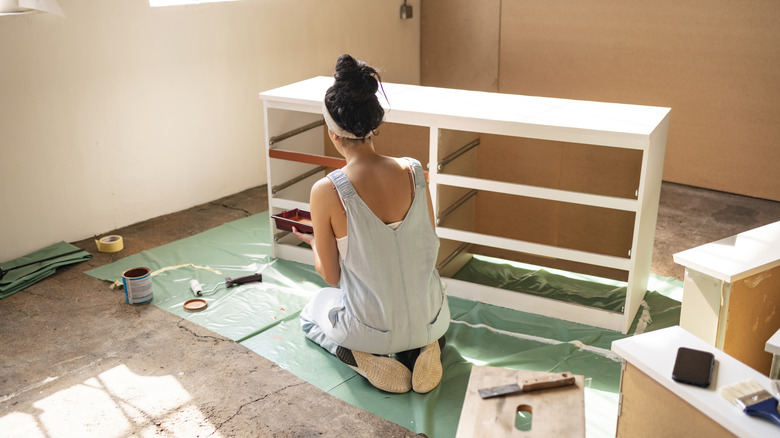
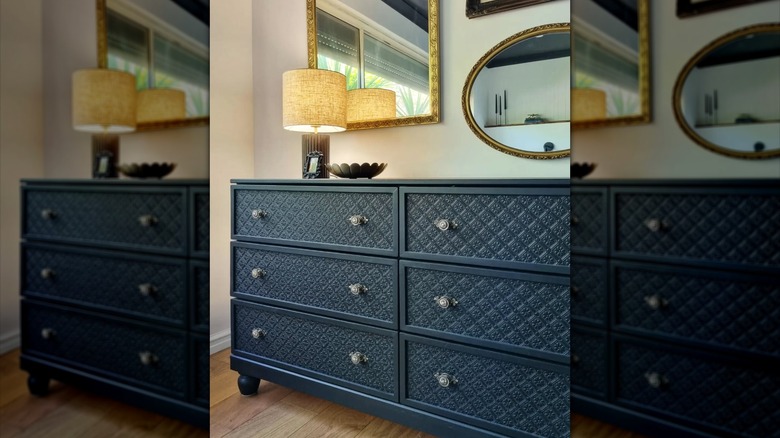
At first glance, the TARVA chest of drawers isn't much to look at, but that's where its magic lies. Made of untreated pine, this unassuming yet timeless chest of drawers is the perfect base to DIY the vintage dresser of your dreams — and that's exactly what two clever Instagrammers did. By swapping out the legs with salvaged ones, attaching trim and paintable textured wallpaper to the drawer fronts, and adding paint and new hardware, @mismatchedhome transformed the plain TARVA dresser into a stunning, vintage glam-inspired piece.
While this may not be a DIY project you can start and finish in one weekend, it's worth the time to create the perfect piece. Starting with an already-built TARVA dresser can help cut down on the work time and, if you find one secondhand, may even help you save around $100. Don't forget to have fun with it; that's how all the best DIYs are created!
How to turn a basic dresser into a vintage showpiece
An easy way to make standard IKEA furniture look stunningly vintage is by swapping out the legs. Follow the assembly instructions until it's time to install the legs. You'll still need a section of the existing legs to fill the corner spot, but you'll want to cut it flush with the bottom of the dresser so you can add your own legs. Position the provided legs where they should go, and mark a line where the leg meets the bottom of the drawer. Then, cut it with a miter saw. Check that the smaller blocks sit flush with the dresser bottom, then screw into place. If you're replacing legs on an existing dresser, remove the legs to cut to size if possible. If not, carefully trim them down. Now you can screw your new vintage-style legs into place.
Up next is the textured wallpaper. Measure the drawer fronts, and cut your textured wallpaper, like Brewster Textured Vinyl Wallpaper, to size. Follow the wallpaper's instructions to activate the adhesive, then smooth it onto the drawer fronts. Trim the wallpaper to fit the drawer front perfectly.
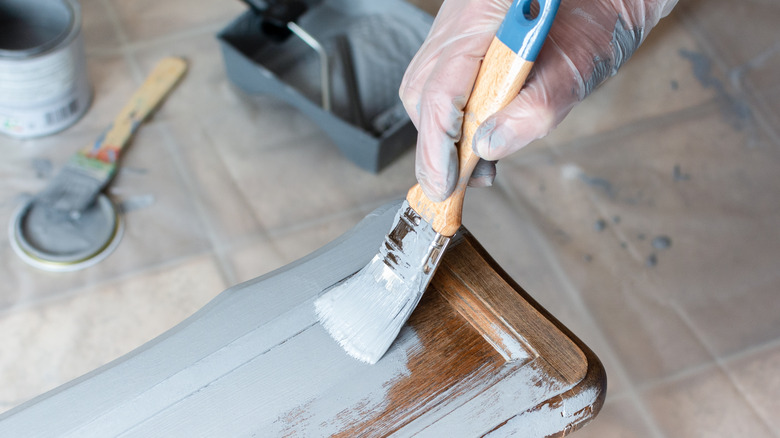
For a clean look, measure and cut thin pieces of trim with a jig saw, then attach it around the drawer front with wood glue. Gently sand with 120-grit sandpaper if needed, then add a coat of universal primer to the wood. Apply your paint — water-based latex or enamel are great choices — with a small roller, let dry, and add a second coat. Attach your new drawer pulls, and enjoy your vintage-inspired piece.
Play with textures, colors, and hardware to evoke different eras
The brilliant thing about this IKEA DIY is that you can adjust it to fit whatever vintage era works best in your home. If you want your IKEA piece to look like mid-century vintage rather than vintage glamour, swap out the wallpaper and trim for fluting made from cut half round molding, then stain and seal it. Or, simply stain the drawers, swap the legs for thinner ones, and add a long thin drawer pull, like these Goldenwarm Gold Cabinet Pulls.
Or, if you'd rather head back further in history, create an antique apothecary chest-inspired dresser. Instead of wallpaper, pick up more trim, cut it down, and arrange it to create four fake mini-drawer fronts on each drawer. Stain it a darker brown, then drill screw holes and attach drawer pull rings, like the Headsitg Antique Drawer Pull Ring, to finish the look. For a lighter, airer vintage vibe, use white chalk paint and wrought-iron drawer pulls and legs to create a French country look. For a little extra oomph, consider adding a subtly textured paintable wallpaper, like Norwall Manhattan Comfort Natalie Series Wallpaper. In short, no matter what era you decide on, this IKEA DIY is exactly what you need to create your dream vintage dresser.