13 Things To Do In The Fall To Keep A Fruit Tree Healthy Over The Winter
We may receive a commission on purchases made from links.
As temperatures dip, your fruit tree is shifting gears, slowing top growth and prepping its roots and buds for dormancy. Fall is when you set it up for a calm winter and a strong spring. Your aim is to put the tree to bed for the season. You'll want to make sure it's had plenty to drink, has enough of the right nutrients to last it through the winter, and it's protected from pests, weather damage, and diseases. That way, you'll get healthier spring growth and a better yield at harvest time.
Even though I'm a permaculture grower, I still do plenty of prep work for my fruit trees in the fall to give nature a helping hand and get them ready for a safe, healthy, dormant winter. Key rules to remember include only working when the soil is workable, not frozen or waterlogged. If you must water when it's cold, do it early so there's time for water to penetrate deeply or sprays to dry before the temperature dips low at night. And don't get too enthusiastic with pruning, feeding, and mulching to keep your trees healthy through the winter season.
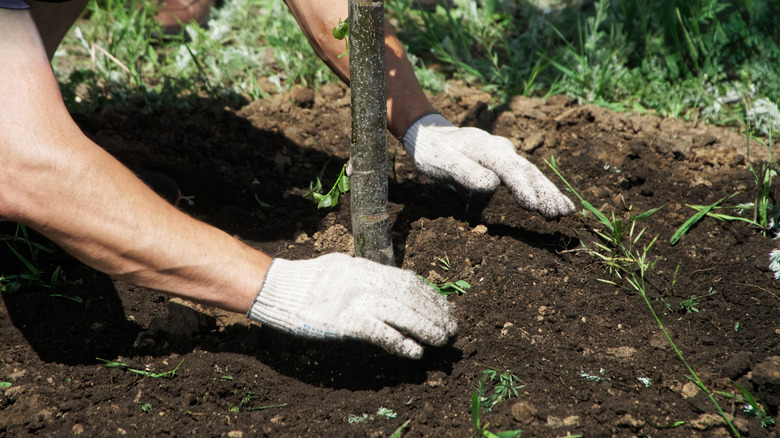
Give your fruit trees a deep soak before the ground freezes
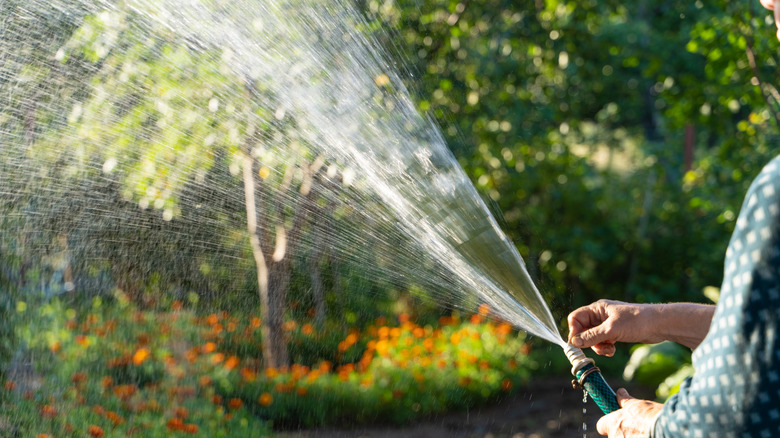
Dry roots are far more prone to winter injury, especially in windy exposures or low-snow winters. A slow, deep watering in late fall helps the soil profile enter winter evenly moist, so roots don't desiccate under cold, dry winds. It also buffers those wild freeze–thaw cycles that can heave fine roots.
Pick a thawed day with air temperatures well above freezing and water your trees. Lots of people make the mistake of just watering right around the trunk, which is the least important spot. Instead, you actually need to water the whole root zone, with the drip zone being the most important. Think about how a tree's roots spread out from the trunk. In a mature tree, the root zone has the same size or reach as the tree's canopy. So you can see that a couple of inches of water poured right against the trunk really isn't going to get the job done. The tree's drip line is located further out around the tree, where water runs down from the outermost leaves. And it's where the majority of the key feeder roots live, waiting to take up water and nutrients.
You need to water thoroughly and slowly so that the water penetrates deeply (up to about 12 inches) instead of just running off. On big trees, you use a product like this 50-Foot Soaker Hose to circle the drip line, letting it run until watering is done. Just plan to finish early enough that surface moisture isn't icing overnight, and remember to drain and coil hoses when you're done.
Add a donut of mulch after the first freeze
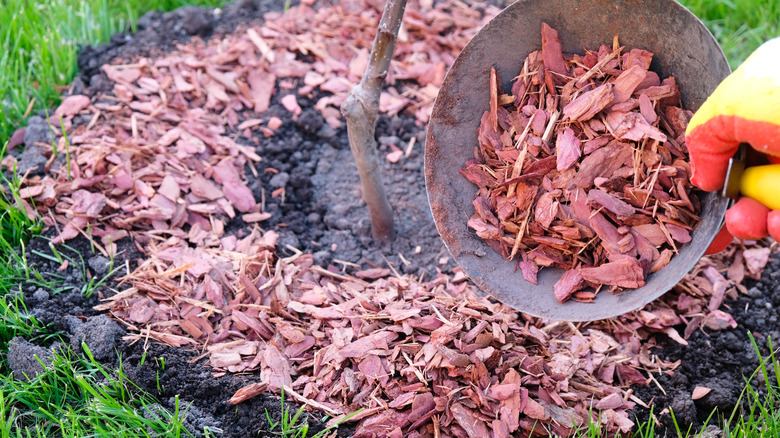
Mulch is your winter shock absorber. After a few hard freezes, a 2- to 4-inch layer of shredded leaves or wood chips over the root zone buffers freeze–thaw swings and reduces soil heaving. It also keeps spring soil moisture steadier and protects shallow feeder roots.
Timing and placement matter a great deal. Just don't pile the mulch like a volcano. Remember, you're not really feeding the tree at this point; you're basically insulating the roots. Wait until the ground has frozen to lay down the mulch "donut," and keep it a few inches off the trunk to avoid rot and rodent hideaways.
I use a combination of leaf mulch, well-rotted manure from a local farmer, and straw. I've also used wood chips and homemade compost. The key is bulky organic matter that's insulating and slow to break down. For younger trees, a deep layer of mulch is essential, as the ground is often loose and open. This lets frost penetrate deeper, making root injury more likely. If you're in a very windy site, a quick rake-in or light wetting keeps leaf mulch from blowing off.
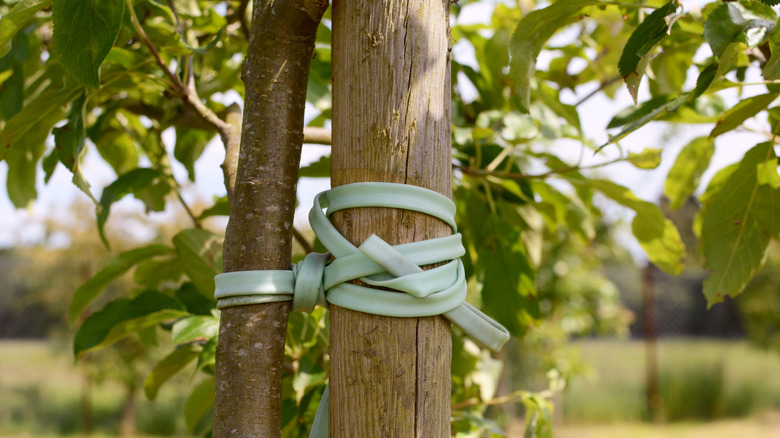
Protect trunks from sunscald and frost cracks
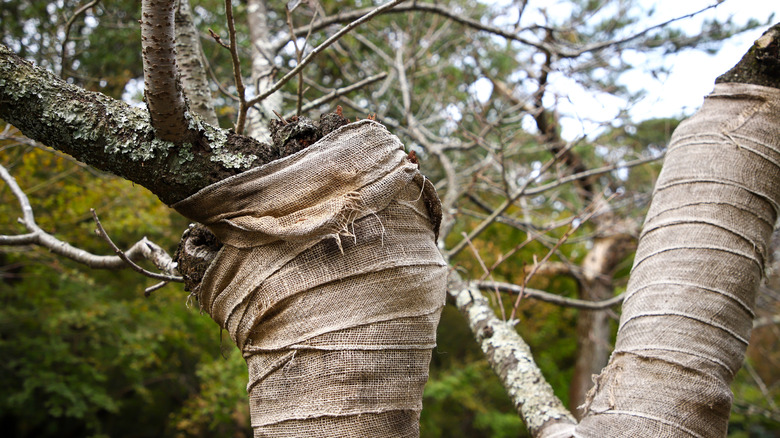
On bright winter days, thin bark can warm up enough to wake cells on the sunny side. Then, after sunset, they refreeze fast and die, which is called winter sunscald. Late-winter freeze events can also trigger long vertical splits called frost cracks. Young or thin-barked fruit trees, like citrus, are prime targets. As long as the frost doesn't penetrate too deeply, cracking isn't usually fatal in and of itself. But it does provide an easy root in for pathogens and insects that can kill a previously healthy tree.
To avoid these problems, wrap trunks from just above the soil line to the first branches with a tree wrap in late fall, then remove it in spring. Just make sure to use breathable, pale-colored covers, like 100-Foot Burlap Tree Wrap Roll, and remove them before new growth flushes to avoid harboring moisture and pests. Also, when installing tree wraps, make sure you don't pull them so tight that they girdle the tree, causing further issues.
Install critter guards and tidy vole habitat
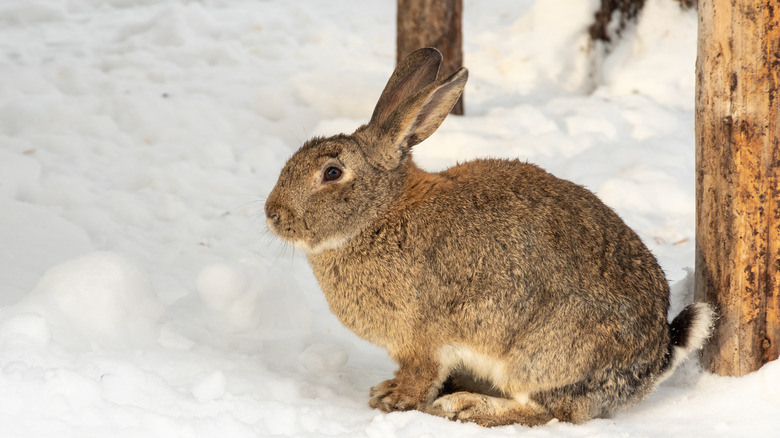
Winter is buffet season for mice, voles, rabbits, and deer. Under a blanket of snow, rodents can girdle the bark right around your trunk, which is a death sentence for young trees. Deer browsing also strips buds and young shoots, and if they're desperate enough, they'll strip the bark, too, and can stunt or kill trees. Fortunately, there's an easy way to protect trees from nibbling deer and rodents.
Fit a cylinder of hardware cloth around each trunk from the ground level to between 18 and 24 inches. Leave a gap of a few inches all around the trunk so you don't risk girdling, and wildlife can't reach through and access the tree. You should also use something like Glarks' Garden Stakes and Staples Kit to anchor the hardware cloth so it can't pull loose. Keep mulch and groundcover pulled back several inches from the trunk, and avoid tall grass right against guards because voles and mice love cover. In deer country, add a taller seasonal fence or individual cages until trees are out of browse height.
Rake leaves and remove mummy fruit for disease control
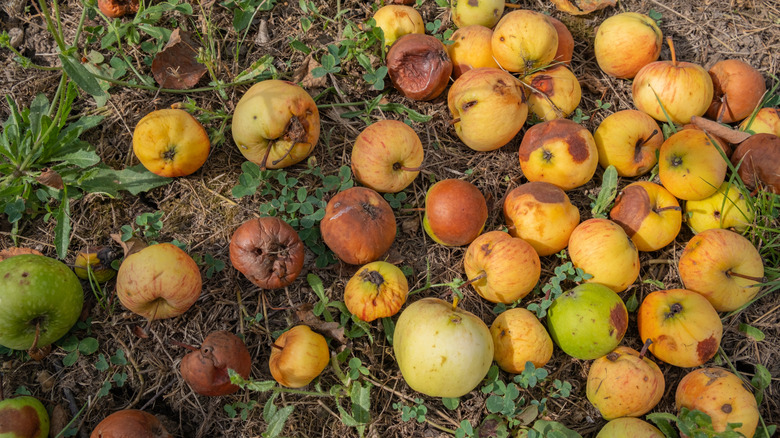
Fallen, infected leaves and those shriveled "mummies" are the perfect overwintering spot for pathogens like apple scab, brown rot, and cedar apple rust. If they overwinter under the canopy, spores are primed to reinfect as soon as spring weather turns favorable. Rake up leaves and mummies and remove them from the orchard area. Also, prune out fruiting cankers and dead fruiting spurs you can reach safely, disinfecting tools between cuts when working diseased wood.
Hot composting (sustained high temps) can work, but only if you reliably hit and maintain the temperatures needed. In my experience, it's better to dispose of infected matter than try to compost it or bury it, because you just end up infecting the new area of compost or soil. And if you ever want to grow a plant or tree that's susceptible to that particular disease or fungus in that area, there's a good chance that it'll still be present and infect the newly planted varieties. Plus, you can reinfect the first area by using tools in both locations without a thorough cleaning in between. So, generally, I find it better to burn infected material, then use the ash to make soil amendments when needed.
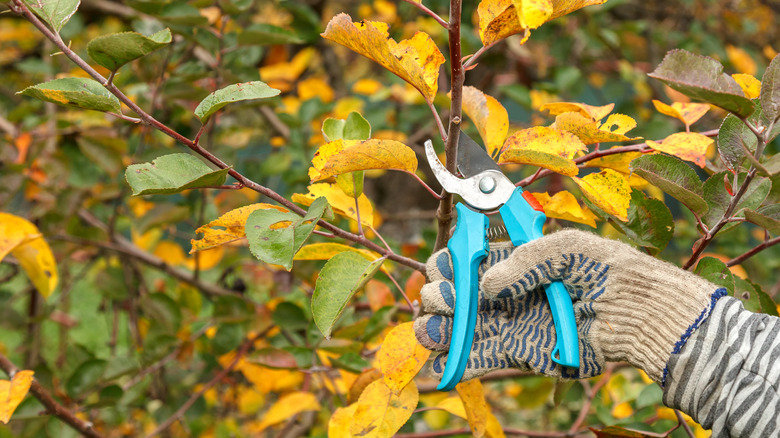
Prune damaged and diseased limbs
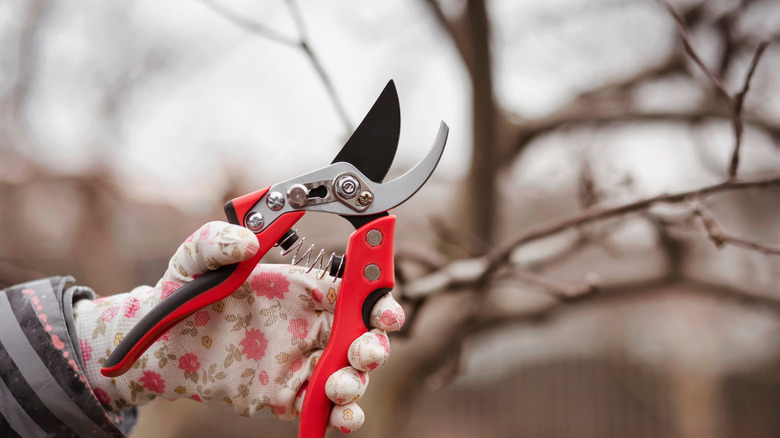
As a rule, don't do structural pruning in the fall. Fresh wounds may not seal well, and heavy pruning stimulates tender growth that winter kills. But do remove broken, rubbing, or clearly diseased branches now to lower the chance of winter breakage and spread. And, while evidence and advice are mixed, if you must prune in the fall, you can use a simple homemade pruning paste from beeswax, olive oil, and essential oils to protect the wound as it heals. I generally add cinnamon and lavender oils to protect against bacteria and fungal pathogens.
Keep fall cuts conservative. Take out hangers and hazards, dead or diseased wood, and any branches actively spreading blight. And remember to thoroughly clean your tools between cuts so you don't risk spreading infection. Save your hard structural pruning for late winter, when trees are fully dormant and respond with stronger growth and better fruiting wood.
Apply dormant oil and copper in late fall
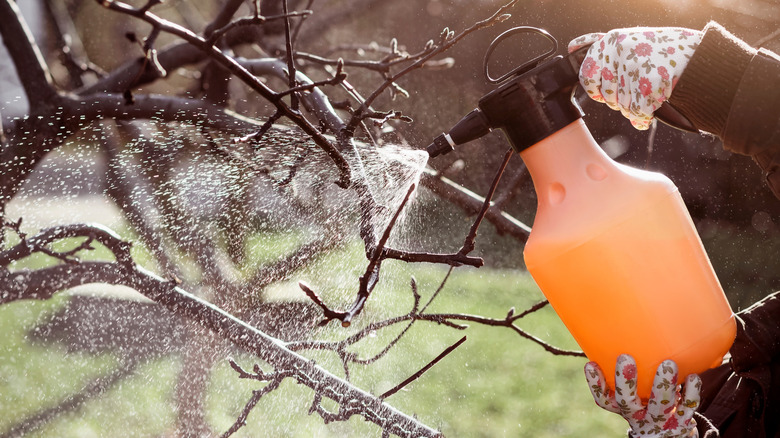
Dormant oils smother overwintering scale, mite eggs, and other pests. Copper knocks back many fungal and bacterial diseases. They're most effective when applied at the right dormant windows. In many climates, that's a copper spray around Thanksgiving (after leaf drop) and a horticultural oil spray in mid-winter on a mild, calm day. But always follow your product label and local timing.
Choose a stretch of above-freezing weather with no wind or rain in the forecast and thorough coverage of bark and branch crotches. Don't tank-mix products unless your label specifically allows it. Avoid spraying stressed or droughty trees and never spray if a hard freeze is imminent. Ideally, spray early in the day so the spray has time to dry before nightfall.
Check stakes and ties and remove or loosen as needed
Forgotten ties can slowly bite into bark and cambium as trunks expand, causing girdling that compromises nutrient flow and can kill your tree. Over-staking is a problem, too. A tree that can't flex won't develop the strong taper it needs.
In the fall, go and look at every one of your fruit trees. If it's been in the ground a full season and stands on its own, remove stakes and ties. If a young tree still needs support, re-stake low and flexible so the trunk can move, and swap tight ties for wide, soft ones. Loosen anything that's starting to press into bark, and never loop wire directly around a trunk.
Soil test now and plan pH/nutrient corrections
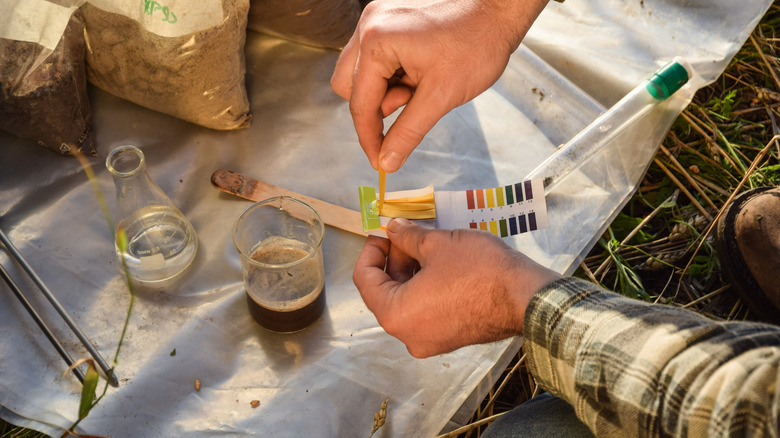
Fall is prime time for soil testing. Apples and pears prefer slightly acidic soils. Stone fruits also prefer well-drained, mildly acidic to neutral sites. Lime (to raise pH) and sulfur (to lower pH) act slowly, so applying in the fall based on test results gives the amendments time to work before spring growth.
Order a test, sample the root zone properly (depths, multiple cores), and send it off. Skip nitrogen this late, as it encourages tender leafy growth, which you really don't want as the tree is trying to prepare for dormancy. Potassium is often fine to correct in the fall because it supports root health. When in doubt, hold fertilizer, and focus on pH and organic matter first.
Improve drainage in low spots
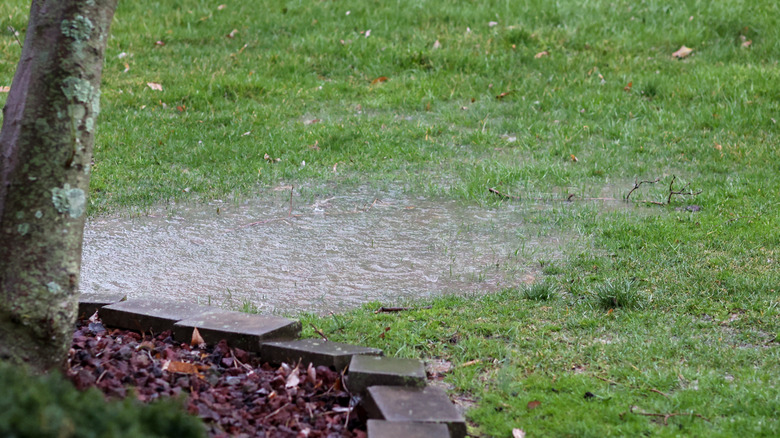
Standing water results in low oxygen, stressed roots, and rot. If your tree sits in a soggy pocket, winter wet can do more damage than cold. Redirect roof downspouts away from the drip zone, cut a shallow swale to move water off the site, or, in heavier fixes, add a small berm to lift the root zone a few inches. In some landscapes, a subsurface (French) drain is worth it. You can also encourage surface runoff and redirect it to a rain garden.
Reshape the grades so water moves around the tree, not across the trunk. Incorporate coarse organic matter in the wider bed, not just the planting hole, to build structure over time. For severe cases, get a local pro to design drains that won't just send water to your neighbor. Soil structure and content are the foundation of your tree's health. So, improving it by adding lots of organic matter will only benefit your orchard and the rest of your garden.
Handle snow and ice the right way
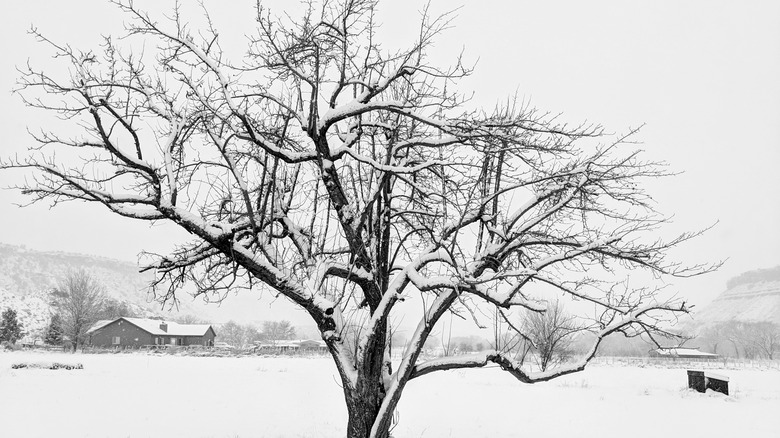
Heavy, wet snow loads bend limbs, and ice can lock branches together. Resist the urge to shake ice, though, as it can snap wood. Let ice melt naturally. For dry, fluffy snow, you can broom upward gently to lighten branches, but sweeping downward can break them.
Keep de-icing salts far away from root zones. Salt spray and runoff burn buds and roots and can ruin your soil. Instead, I use sand or grit for traction and never apply de-icing salt or products. Where road salt is unavoidable, set burlap screens or snow fencing to deflect spray on the windward side.
Keep a weed-free circle to reduce stress
Grass and weeds compete for late-season moisture and nutrients. They also hide rodent runs. Plus, a clean, mulched ring also warms faster in spring, helping roots wake evenly.
Edge a 2- to 3-foot circle for young trees (wider for mature canopies). Maintain it with 2 to 4 inches of organic mulch, keeping it off the trunk, or with shallow hand-weeding. Skip landscape fabric as it's awful for the soil biome, and keep string trimmers away from bark to avoid damage. Just get in there with a good pair of gardening gloves and a hand trowel and clear it manually.
Do a quick winter readiness inspection

A five-minute walk now can save you a five-hour headache in February. Look for scuffed bark from summer stakes, rubbing branches, low spots in the mulch, pest galleries, and burrows. Note variety, planting year, and any issues. Next spring's decisions get much easier when you've got a simple log.
I keep a good old-fashioned journal, like The Gardener's Logbook. You can also use an app like The Old Farmer's Almanac Garden Planner. This is helpful to note potential problems, what I did this year, and what I plan for next year for each fruit tree. I also include soil test results and any signs of damage or disease. Once you get started with garden journaling, it becomes an invaluable habit. I use my journal throughout the year, making notes of soil amendments, mulch application, and yield, among other things, to help track what works best for my fruit trees.