12 Tips On How To Winterize Perennials – For Decades Of Flowers
We may receive a commission on purchases made from links.
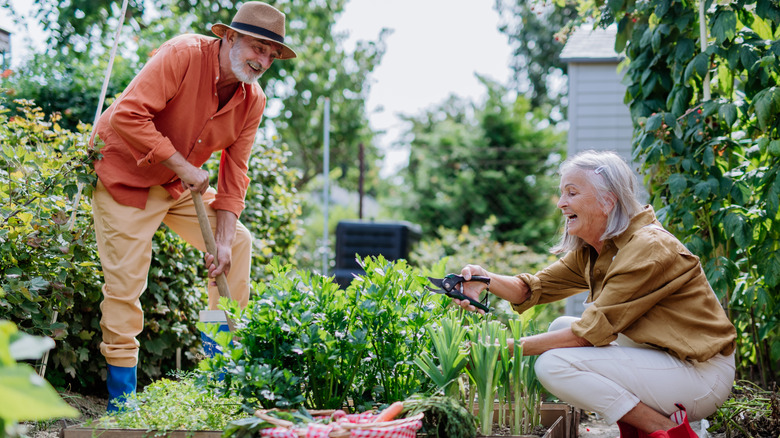
Yes, it's true that perennials come back year after year. But to keep your plants healthy and producing flowers for decades, you'll need to give them a bit of help. I'm a master gardener who specializes in organic and permaculture growing, and in the autumn, you'll find me outdoors doing all kinds of fall garden chores as I put my garden to bed for the winter. And that includes winterizing my perennials. Taking the time to get this right means your plants will keep coming back stronger and healthier each season, for many years to come.
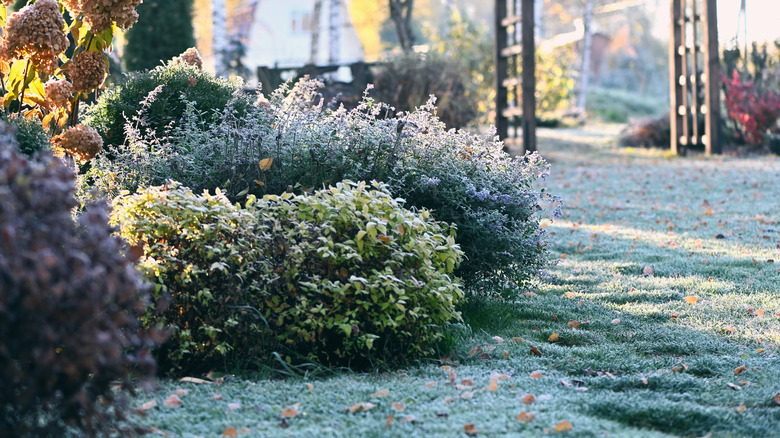
Winter preparation protects crowns and roots, cuts disease carryover, and sets your plants up for a head start and fuller, vigorous blooming next year. Fall is the perfect time, as cool air and still-warm soil let roots keep growing while the stems and foliage rest and prepare for dormancy, so they go into winter stronger. Be smart and only work with the soil if it's moist and crumbly, not frozen or waterlogged — this helps you avoid soil compaction and root injury. Time your jobs to your first hard freeze, give your perennial a final deep soak before that frost hits, remove diseased foliage, and add loose winter mulch after the ground starts to freeze. Lastly, be selective with cutting back so you protect crowns, feed birds, and keep some hollow stems for pollinators.
Know your zone and your frost pattern
Start with your USDA Hardiness Zone so you know the typical winter lows your plants must survive. Use the USDA Plant Hardiness Zone Map to get the right zone for your exact area. Plan your work around your first hard freeze, roughly 28 degrees Fahrenheit (−2 degrees Celsius), so the last deep watering, labeling, and disease cleanup are done before repeated hard frosts set in. Don't leave it until the last second, though. Mother nature is unpredictable and tricky, and she can throw an unexpected frost at you with no warning.
Pay attention to microclimates, too. South-facing walls and raised beds hold warmth and delay frost, while low, high, and open spots freeze first, especially if they're exposed and in a windy location. So, plan around this and take care of your more at-risk plants before you turn your attention to those warmer spots. Only work soil that is friable, meaning crumbly and loose. If rain is coming, let it soften the ground, but if the soil is heavy and sticky, wait. It's best to mulch after the surface starts to crust, so you reduce frost heave through the worst freeze–thaw swings.
Stop fertilizing in early fall, so plants can harden off
Pause nitrogen in early fall, so plants shift their energy into roots and toughening up tissues — nitrogen tells the plant it wants to produce new, lush foliage. But pushing new, soft growth now weakens the plant and frost will kill off that new growth anyway. It can also delay dormancy and puts the plant at risk of cold injury.
If you are planting or dividing any perennials late, use a little finished compost to improve structure, but forego high-nitrogen fertilizers until spring, when you want to divert the plant's energy to new top growth. If you're a novice, it's worth investing in a simple soil test like the Rapitest Soil Test Kit that can guide you on what (if anything) to add. In colder zones, stop feeding by late August or early September. In middle zones, quit fertilizing by late September, and in mild zones, by early October, so you are not triggering tender shoots within about six weeks of your first frost.
Water deeply all the way up to when the ground freezes

Dry roots suffer more winter injury than properly hydrated ones, so give newly planted and drought-stressed perennials a slow, deep soak before the soil freezes, ensuring moisture reaches the full root zone. Moist, but not soggy, soil holds heat better than dry soil, and helps buffer freeze–thaw cycles that can damage roots and, for first- and second-year plantings, cause frost heave.
Aim to water to a depth of 8 to 12 inches. Use a slow release hose like this Rocky Mountain Goods Soaker Hose for 30 to 60 minutes, or water in passes and check depth with a small hole with a trowel. The soil at the bottom of the hole, assuming you dig to 8 inches, should be moist, not dry or sodden. If a mild spell hits and the soil is unfrozen, but dry below the surface, water again and then let plants rest. Ideally, water before midday, so the water has time to penetrate deeply before temperatures drop and you run the risk of water freezing on the surface.
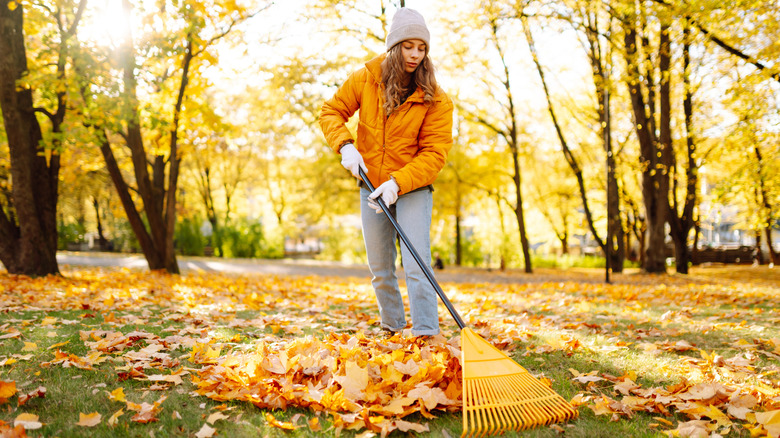
Be picky with cleanup to remove disease, but keep useful, healthy matter
Start with a disease pass and throw infected foliage in the trash. Peonies with botrytis, mildewed monarda, garden phlox, and any leaves with obvious spots or rust need to go now to lower the risk of spring infection. Disinfect your tools after dealing with diseased plant matter with a product like Rapid Protectant 70% Isopropyl Alcohol Spray or a fresh 10% bleach solution, and dry them after, so you are not spreading pathogens around your garden.
Personally, I don't bother trying to cold or hot compost infected waste, because if it doesn't get hot enough all the way through to kill the pathogens, the whole compost pile and anywhere that compost is used will be infected. It's just not worth the risk. This is why it's strongly advised against to add diseased plant matter to your compost. I actually burn any infected plant parts. But I do so in a controlled manner, in a burn barrel, well away from any plants I worry about infecting, just in case.
After a hard frost, remove or rake up dead and fallen leaves of plants like hostas and other leafy tender perennials, as they can shelter slug eggs, causing your whole garden more problems once spring arrives. But in the garden, clean does not mean bare. Leave healthy leaves and stems where they will not smother crowns — a thin layer of shredded or loose leaves protects crowns and feeds soil life. I like to run the mower over healthy leaves to shred them, then sprinkle them around the crowns or bases of perennials and other plants where they or the soil need a little boost. But do avoid thick, matted, whole leaves that trap moisture, as they can rot plants.
Cut back heavy, floppy, and wet foliage
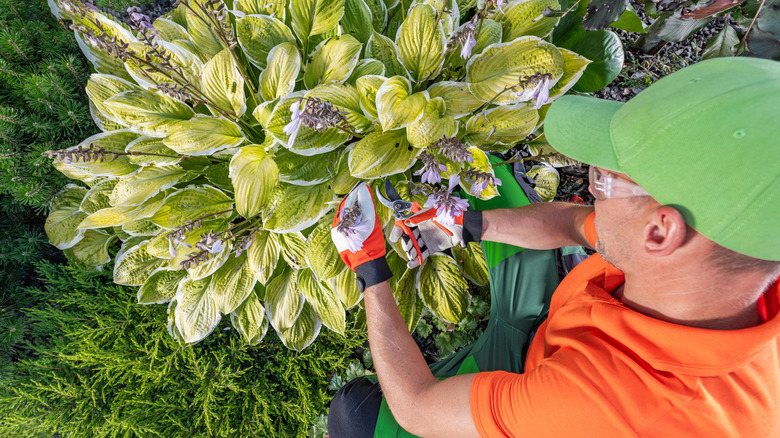
Cut plants that carry lots of disease or that flop into wet mats. Hosta, peony, daylily, and bearded iris are all smart choices to cut back once they die off in fall, because removing their spent foliage reduces the risk of disease, promotes good air flow, and keeps crowns clean and dry. If you let the leaves rot beneath the plant, even if those leaves were healthy when they fell, you're creating a warm, damp environment that plant pathogens, especially fungi, thrive in. They'll arrive and multiply rapidly and be ready to infect your plants in the early spring. Similarly, many insect pests like to overwinter under thick, heavy, wet layers of rotting leaves. It's really not worth the risk, especially when a few minutes with the shears and a rake will prevent the issue.
Don't go crazy with the chopping though. Some borderline hardy perennials, like red hot pokers and some species of daisies, actually do better if you leave them intact to overwinter, as they have more protection against the cold. These ones, you can tidy up in spring when new growth emerges.
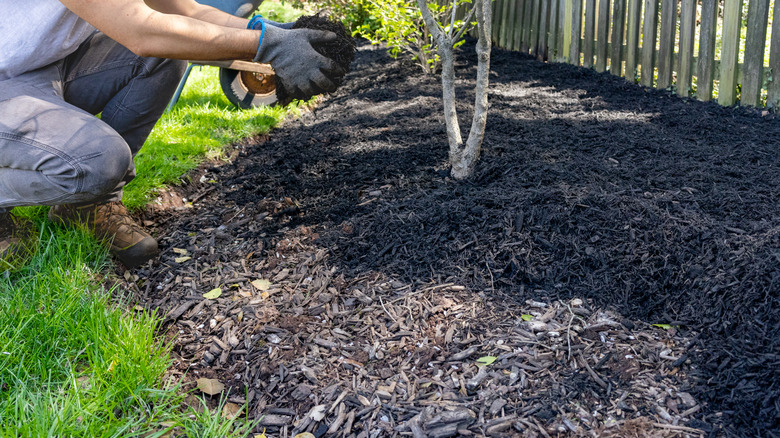
Mulch once the soil begins to freeze and the plant enters dormancy
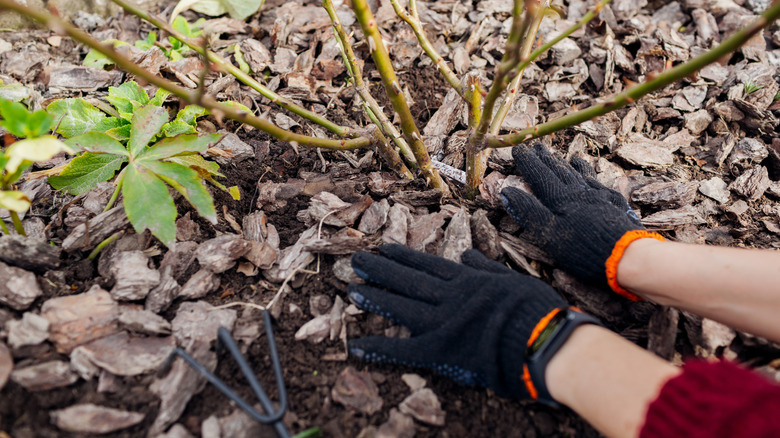
Mulching winter flower beds is all about insulation. You need a mulch that provides protection, while also letting the soil breathe. It also needs to slowly break down into the soil to release nutrients and increase organic matter. Good materials include shredded leaves, clean straw, pine needles, and evergreen boughs. When I can get it, I actually use a base layer of sheep fleece, as it's a fantastic insulator and weed suppressant, and many farmers struggle to offload their fleeces, so the price is often minimal. Then I top with straw or wood chips, depending on the plant or bed I'm mulching.
Wait until several hard frosts or when the top inch of soil begins to freeze, then add a loose, airy layer. This timing lets plants enter dormancy first and then locks in steady, colder soil, which reduces the freeze–thaw cycles that push crowns up and snap fine roots. Keep mulch pulled back from the crown by an inch or two so the growing point does not rot or soften.
Aim for 2 to 4 inches deep. Too thin and you do not buffer temperature swings adequately; too thick and you trap moisture and starve crowns of air. Shredded leaves settle evenly and feed soil life as they break down. If your perennials are in a windy, exposed location, use boughs or a light net to keep mulch in place. In spring, peel mulch back in stages as the weather stabilizes, so the crowns can wake up without sudden exposure that invites sun scald or late frost damage.
Prevent frost heave, and fix it fast when it happens
Frost heave happens when bare soil freezes and expands. Then, when it thaws, it contracts. Repeating that cycle over winter can force shallow crowns upward, tear young roots, and leave plants uprooted, damaged, and exposed. Fresh perennial divisions, late plantings, clay soils, and open, windy beds are at the highest risk of frost heave. As are plants with shallow roots, like coral bells, seathrift, and coreopsis. The best prevention is correct winter mulch applied after the first hard freezes, so the soil stays cold and stable, rather than bouncing up and down all season.
Walk your beds after thaws. If you see raised crowns or gaps under a clump, do not wait for spring. Press the plant back into full soil contact, add loose soil to fill voids beneath, cover the roots with topsoil, and re-mulch so the crown is cushioned and covered again. Leaving a crown exposed for even a week in bright, windy weather can desiccate fine roots, which are the first to fail in winter. In very windy sites, a short, temporary windbreak on the windward side of a vulnerable bed cuts temperature swings and surface drying so heave is less likely.
Label and map your garden before the snow flies
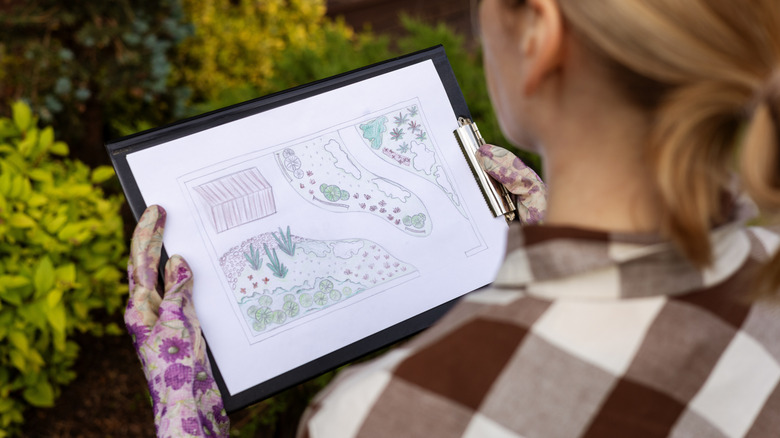
Beds shrink visually in late fall, and crowns can look like bare soil — that is how people step on next year's bloom. Label your new plantings with UV-resistant tags pushed in at a slight angle so freeze–thaw is less likely to heave them out, and draw a simple bed map that marks divisions, tender spots, and any areas you are leaving for habitat. Keep a photo on your phone so you can check it during winter path clearing and early spring cleanup.
Mapping also protects habitat decisions you make now. If you left stems for native bees or seed heads for birds, note those zones and plan to delay cleanup there until consistent mild weather returns in spring and the overwintering critters have a chance to emerge. If you are tracking a big bed, add colored flags for tender, new, or marginally hardy plants so you remember to check moisture and wind exposure after cold snaps. Simple visual reminders reduce mistakes when you are moving fast in cold weather.
Overwinter container perennials properly by prioritizing insulation
Roots in pots get colder than roots in the ground, because the container is exposed on all sides and loses heat faster, so even hardy perennials can still fail when left above grade in winter. The safest move is to shift containers into a winterized greenhouse, an unheated garage, shed, or cold frame where temperatures stay cold, but do not swing wildly with sun and wind. If you do not have indoor space, heel the pots into a leaf pile or a garden bed up to the rim so the soil mass buffers the roots. Or cluster pots together and wrap the group with leaves and burlap, like this Koretech 40-inch by 40-foot Burlap Roll, to create a shared insulating envelope.
Moisture control matters as much as insulation. Water deeply before the ground freezes, so the root ball starts winter hydrated, then keep it barely moist. Check about once a month and add a little water only if the medium is dry and unfrozen below the surface. It's important dormant plants don't stay too wet, as they'll rot. Also, keep pots out of direct winter sun and off bare concrete, which heats by day and chills fast at night, and can cause damaging freeze–thaw swings.
Protect evergreen perennials from winter sun and wind
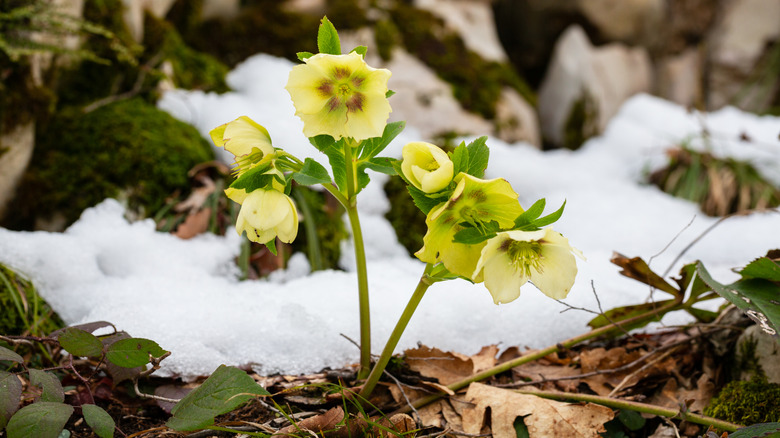
Evergreen perennials such as heuchera, hellebores, some ferns, and creeping thymes can lose water on bright, windy winter days, even when the soil is frozen. This is known as winter burn. You can help prevent this by watering well before the ground freezes (so roots start winter hydrated), then laying a light, airy mulch around. When doing this, avoid covering the crown, as you want to slow surface drying without trapping wetness on the growing point.
In exposed sites, set a short burlap screen on the windward side to break the gusts that pull moisture from leaves. That small barrier can cut burn more effectively than heavy coverings that hold damp against foliage. It's also a smart strategy to protect vulnerable plants from storm damage and snow accumulation.
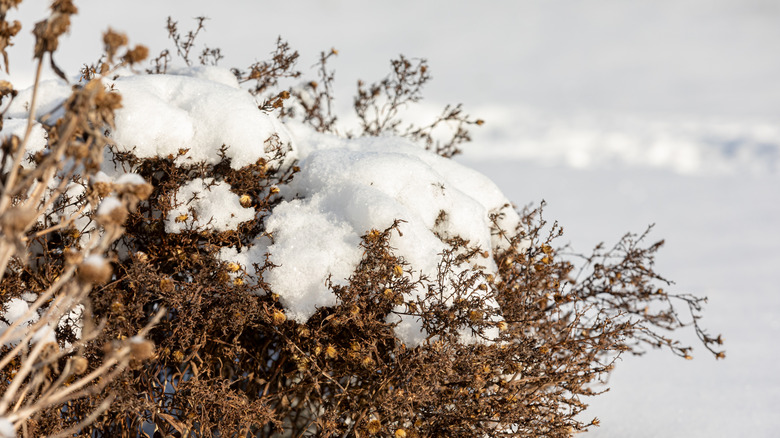
Use snow as free insulation, but keep salt away
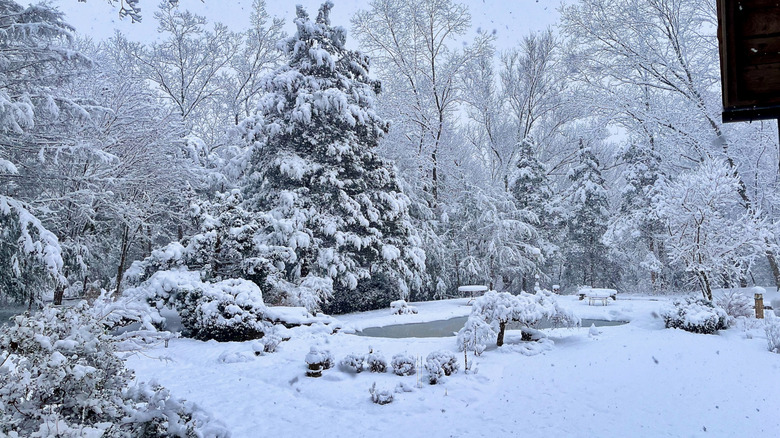
Clean snow is one of the best winter mulches you can get. But try to avoid heavy, wet snow piled deeply on evergreen crowns because it invites rot, especially in a mild or rainy winter. If ice storms or wet snow bend or bury perennials, don't intervene — let the snow melt away naturally or you risk doing more damage.
A loose snow cover traps air, slows evaporative loss from the soil, and buffers crowns from sharp temperature swings. After storms, you can toss clean snow over perennial beds to blanket vulnerable spots. Just don't pile it too thickly on crowns and avoid dumping plowed road or sidewalk snow onto beds, because it often carries de-icing salts that injure buds and roots and can linger in the soil into spring.
If you need traction near plantings, use sharp sand or wood chips, and keep any chloride salts well away from soil where perennials grow. In tight spaces where splash is unavoidable, build a small snow berm along the edge of the bed to divert salty meltwater away from crowns, or burlap screens are another great option.
Keep rodents out of crowns without harming helpful wildlife
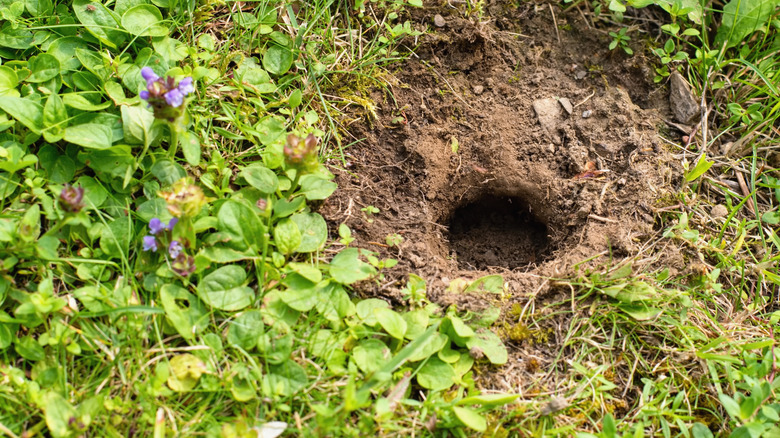
Voles and other small rodents love thick winter cover and will tunnel through cozy mulch to gnaw at the tender crowns of perennials. Keep mulch pulled back an inch or two from the crown so there is no snug tunnel right at the growing point, and check for runways during thaws so you can interrupt activity early. Where chewing is a pattern, set hardware-cloth guards as simple collars around vulnerable plants, and use snap traps in covered boxes, so pets and non-target animals cannot reach them.
Good sanitation also makes a difference. Keep paths trimmed, remove thick weed mats, and avoid stacking firewood right against perennial beds, so you are not building winter housing next to your crowns. It's best to skip poison baits and glue traps in ornamental beds, as they can harm predators that keep rodent numbers in check. Plus, they are cruel and are not needed when habitat and trapping are handled properly.