The Range Hood Upgrade That Will Give Your Kitchen A Touch Of Vintage Charm
We may receive a commission on purchases made from links.
A simple upgrade that can radically transform the look of your kitchen is boosting the appeal of your range hood. Often, the range hood is a bit of an eyesore. For fans of retro aesthetics, some of the gadgets and light-up features on modern range hoods can detract from the vintage vibes. While there are plenty of expert tips for choosing the perfect range oven for your kitchen, how can you modify the one you already have? It's possible to upgrade the look of your existing range hood without sacrificing functionality. One option is to create a beadboard façade around the range hood that suits the surrounding cabinetry.
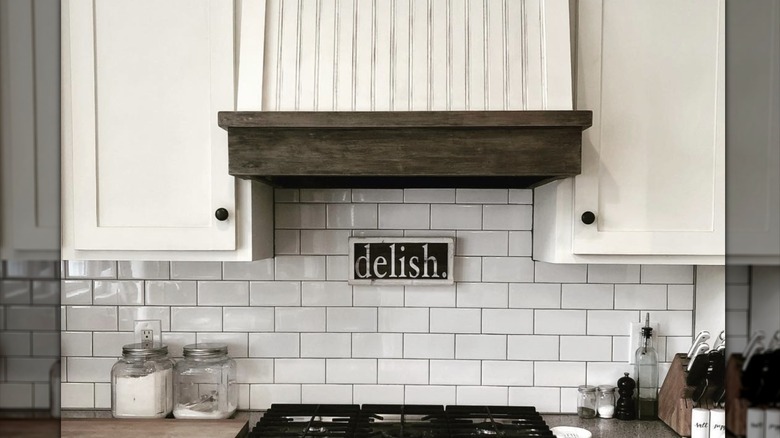
Some folks have opted to hide or disguise their vent hood with a DIY wooden frame. Some homeowners used stained plywood and trim, or stones and mortar, to achieve a modern or rustic look, respectively. However, vintage enthusiasts might prefer to do something more unique by upgrading the range hood with beadboard panels. Beadboard can also serve as a backsplash or side paneling. By installing it as paneling and as a range hood, you can create a seamless look. This allows the range hood to become a focal point of your design without standing out too much from the other elements in your kitchen. Paint the beadboard the same color as the cabinets or other wooden accents, and add vintage kitchen accessories, which are making a comeback, to transform your kitchen into a cozy, antique cottage dream.
How to transform your range hood with vintage-style beadboard
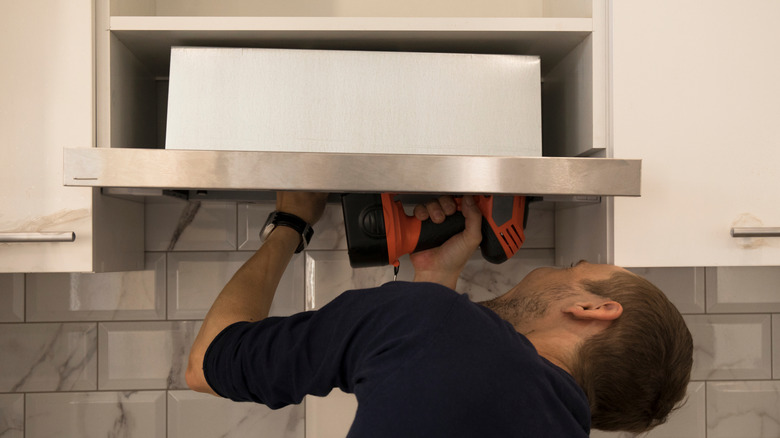
If you're craving tips and tricks to give your overly modern kitchen more vintage charm, you can follow in other homeowners' footsteps by DIY-ing a range hood cover. It's possible that you're starting the project with an existing range and vent system installed. However, if you don't have an existing range hood, you can still DIY one. Begin by purchasing a range hood, then measure it and the surrounding area. Draw a mockup of what you want your finished design to look like. Next, mount the vent hood per the instructions provided and begin building a custom surrounding frame using two-by-fours for mounting and one-by-ones for the frame. When installing a ducted vent (if there wasn't one prior), you'll also need to cut a hole for the vent escape and install ductwork, mounting plates, and a vent cap. Connect the duct to your vent hood and ensure it's functioning properly.
If you already have an existing vent system, you can move straight on to mounting the new vent and building the frame. Once mounted, add your beadboard façade. Simply use a nail gun to attach the beadboard panels to the frame. Once it's assembled, prime and paint the panels. If you prefer a different material than beadboard, you can add alternative wood paneling like plywood, wooden slats, or decorative trim to create custom wainscoting or refine the edges.