14 Easy Ways To Prep Your Raised Garden Beds For Winter So They're Ready Next Spring
We may receive a commission on purchases made from links.
A good bit of prep work now makes life much easier next spring, and makes your raised garden beds healthier and more productive. I'm a master gardener, and this time of year, you'll find me outdoors putting my raised beds to bed for the winter so they're ready to go when spring arrives.
My approach is simple. Cover the soil, remove disease while keeping habitat, and focus on soil structure and health. That means top-dressing compost without overdoing it, using mulch or a cover crop to shield the surface, winterizing irrigation, and planning rotations now so you can drop plants the moment the soil warms.
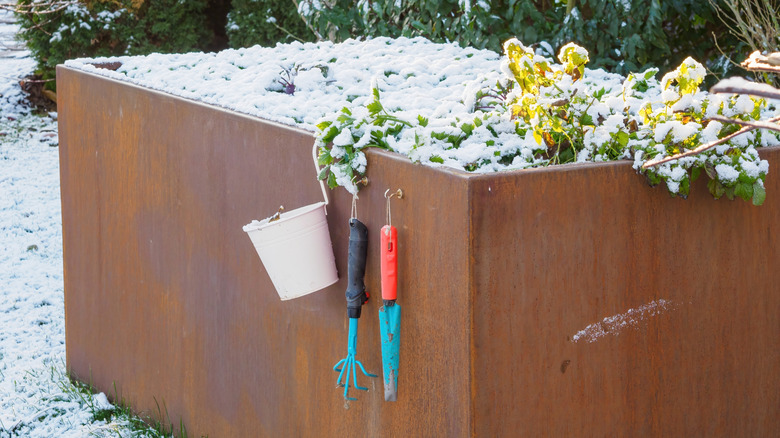
Strip out diseased plants, but keep the good habitat

Anything showing blights, mildews, wilts, borers, or cankers should leave the bed before winter, or you risk letting those pathogens and pests overwinter right where you'll replant. Do removals on a dry day so spores and bacteria are less likely to spread. Bag and bin diseased foliage, fruit, and stems. Don't compost them. Even if you use hot composting, it's not worth the risk, in my opinion. In my neck of the woods, supervised fires are permitted this time of year. So I usually break out the burn barrel, like this galvanized steel one from Amazon, and burn off diseased organic matter well away from my growing areas, as I don't want to risk airborne pathogens or spores making it back to my productive beds.
If the plant's stems and crowns are healthy, you can leave the clean roots to decay in place. That slow breakdown supports microbes and improves tilth without bringing in fresh material that could harbor problems. When you're unsure, err on the side of caution. A plant with powdery mildew or late blight can carry over on debris and reinfect young crops in spring. Focus on removing the problem tissue and leave intact habitat like leaf litter at the bed edges where it won't smother soil. Beneficial insects and ground beetles need somewhere to ride out winter.
Cover bare soil now (mulch or cover crop)
Bare soil loses structure fast in winter. Rain and snowmelt hammer the surface, fine particles wash off, and freeze–thaw cycles lift roots and crack aggregates. Covering the bed solves all three issues. It keeps soil temperatures slightly warmer and more stable. This is especially important for overwintering perennials. And, in spring, mulch helps the soil warm earlier, so your crops can get a bit of a head start. Keep mulch an inch or two back from crowns and stems to discourage rodents and so you don't inadvertently smother them.
Mulch after the soil cools in late fall so you're insulating a cool, not warm, soil profile. This reduces vole activity and reduces the risk of frost heaving. Spread a loose, even layer of shredded leaves or clean straw about 2 to 4 inches deep. On a dry day, I mow over the leaves repeatedly to shred them before adding them to the bed. Keep mulch an inch back from crowns and stems to discourage rodents and so you don't inadvertently smother them.
A word of caution: avoid using hay, because it's full of seeds that will cause you problems for years to come. And don't use wood chips on the bed surface, as they are problematic when you want to plant again in the spring. If you plan to use a cover crop, skip this step and go straight to seeding.
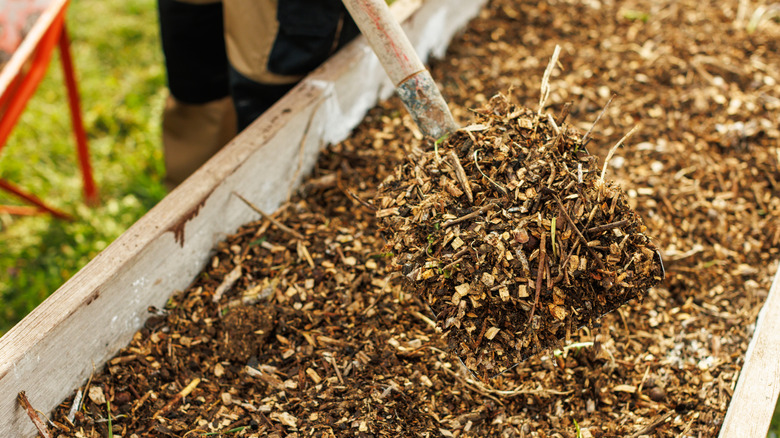
Add compost (but don't overdo it, and don't work wet soil)
A thin top-dressing of finished compost in fall feeds microbes through the off-season and leaves you with a friable, plant-ready surface in spring. Aim for about 1–2 inches spread across the bed. You don't need to till it in. Instead, let nature do its thing and break down the compost naturally. A gentle compost blanket also acts as a mulch layer, although I still recommend adding some straw or leaf mulch on top of the compost to avoid losing nutrients.
Make sure you don't go crazy and add a 12-inch layer, and only use well-rotted manure or compost so you don't upset the nutrient balance. Avoid working compost into soil when beds are wet or tacky. Press a small handful. If it clumps and smears, wait. Working wet beds collapses pore spaces, creates clods, and slows spring warming. It essentially ruins your soil structure, starves microbes and other soil life of oxygen, and causes compaction that requires a lot of effort to correct. Top-dressing is kinder to the structure, and you can let worms do most of the incorporation.
Seed a winter cover crop

Cover crops, or green manure, are sacrificial crops like hairy vetch, rye, or oats that you sow in fall to overwinter in your beds. Then you turn them directly into the soil in spring when you're ready to plant. In winter, they protect bare soil from erosion and runoff. And, in spring, when you turn them back into the soil, they provide valuable nutrients and organic matter.
Cover crops pad the surface against rain, grab leftover nutrients before they leach, and keep a lattice of roots running through your bed so the soil structure stays open. There are lots of cover crops to choose from. In most cold regions, cereal rye is the hardy workhorse that germinates in cool soils and survives winter. Oats are useful as a quick cover that winter-kills, leaving an easy mulch that you can plant directly through in spring. Spread the seed over a raked-smooth surface, press for soil contact, and water once if it's dry. Try to sow before your ground freezes hard.
Plan your termination early so spring planting isn't delayed. A simple approach is to mow or cut the cover crop low and lay it flat, then give yourself about three weeks before transplanting heavy feeders. That buffer reduces temporary nitrogen tie-up as the green manure quickly breaks down.
Test your soil and plan spring corrections
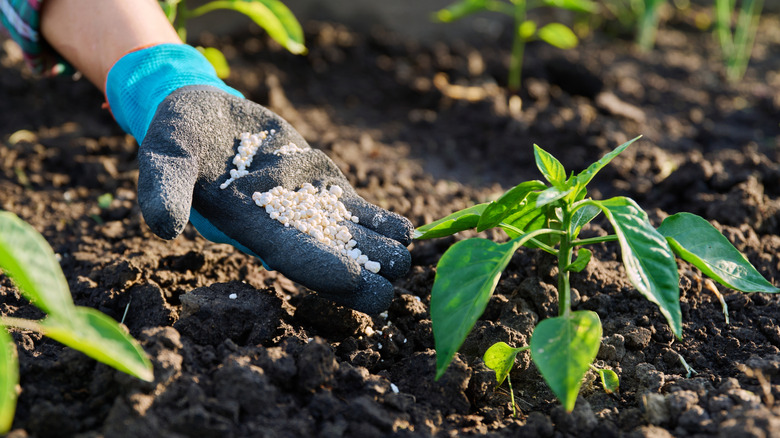
A quick fall soil test tells you what's really happening in your raised beds so you aren't guessing with fertilizer next year. You'll get pH, organic matter, and key nutrients like phosphorus and potassium. If your pH is low, a fall application of natural potassium like bone or fish meal, or comfrey tea has the whole winter to absorb and rebalance, so you hit spring closer to the sweet spot. Likewise, if phosphorus is already high (common in beds fed heavily with compost or manure), you can focus on structure and mulches instead of adding more fertilizer.
Take small subsamples from several spots in the bed, mix them in a clean bucket, let them air-dry, and submit the composite. Follow the lab kit instructions for best results. Most home gardens only need a full lab test every few years unless you're troubleshooting specific growing issues. Send samples now so results arrive before the ground freezes, and use the lab's specific recommendations rather than generic rates.
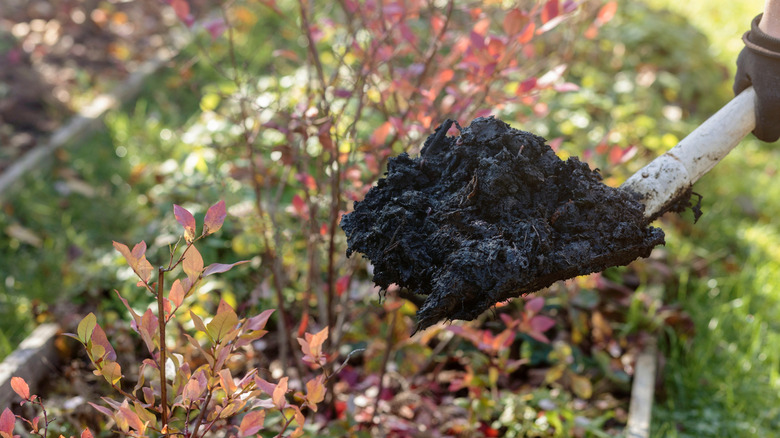
Top up bed mix and confirm depth
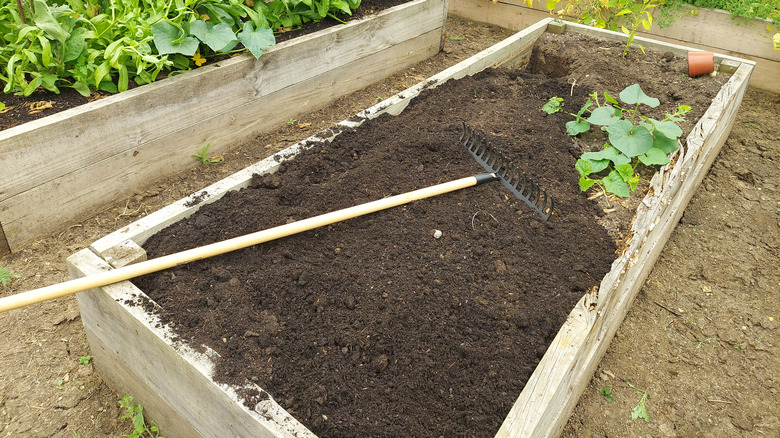
Raised beds settle. Topping them up in fall restores volume for deeper roots, warmer soil, and better drainage next spring. Aim for a balanced blend rather than straight compost. I use a mix of homemade compost and screened and blended topsoil to avoid compaction. Level the surface so water spreads evenly, then re-establish gentle "shoulders" on the edges to reduce wind scouring.
Shallow-rooted greens do fine at 8 inches or more, while tomatoes, peppers, and squash appreciate 12–24 inches for strong anchoring and consistent moisture. If you're adding a lot of new mix, water the bed once to settle it before mulching or cover-cropping. If you're trying root crops, you really want a depth of 24 inches.
Adding organic matter boosts nutrients and maintains good soil structure and health as well as increasing the sheer volume of the bed. During fall, before the ground freezes, and before I mulch, I trench compost wherever soil needs a boost, including in my raised beds. This means that I dig a trench (or multiple trenches) down the center of each bed after I finish harvesting, and then add my fruit and vegetable peelings, and cover them up with soil. They rapidly break down, and by spring, you've got a beautiful, compost-rich bed with extra volume that's ready to plant up.
Protect overwintering crops
Plenty of cold-hardy crops and ornamentals will hold through winter or bounce back early in spring if you protect roots and reduce wind exposure. Garlic, leeks, carrots, spinach, and kale are common picks for raised beds. Mulch is the base layer. After the soil cools, tuck 2 to 4 inches of clean straw or shredded leaves around plant bases to buffer freeze–thaw cycles and keep weeds in check. For carrots and leeks, that mulch becomes a harvest blanket. Just pull it back to dig what you need and replace it after. In windy spots, add a breathable cover to cut desiccation and buy a few degrees of protection on cold nights.
If you're expecting a long, dry, windy spell, add a burlap screen made from a burlap fabric roll anchored to posts and positioned strategically to break the wind and avoid desiccation. If there's a particularly cold spell in the forecast, you'll need to add a frost blanket or row cover, just temporarily. You don't want to keep hardy overwinter vegetables too warm and pampered, as they won't do well.
Winterize hoses & drip irrigation

Water left in hoses, drip lines, filters, and emitters expands as it freezes. That can split tubing, crack fittings, and clog emitters with shattered debris, which is exactly what you don't want in April. Shut off the water supply, open end caps, and let gravity drain as much as possible. If your system has a filter, pressure regulator, or backflow preventer, remove or protect those components and store them somewhere dry.
For buried or long runs, a gentle compressed-air blowout clears lingering water. Just stay within the manufacturer's pressure limits for drip (many systems run under 30 psi) so you don't pop emitters or fittings. Coil hoses loosely and keep them out of UV and ice to extend their life.
Clean and disinfect raised-bed structures (trellises, cages, stakes)

You've probably heard you should sanitize pots and garden tools, but the same idea applies to anything that lived inside your raised beds this season. Trellises, tomato cages, bean teepees, and wooden or metal stakes can carry fungal spores and bacterial films that set you back next spring. Start with a physical clean. Knock off soil, cut away string or plant ties (discard and replace them next year), and scrub smooth surfaces with a stiff brush and a drop of dish soap. Rinse well so disinfectants can reach the surface. Porous wood won't disinfect as completely as metal or plastic, but a good clean plus dry winter storage still reduces risk a lot.
After scrubbing, use a proven disinfectant and give it contact time. A 10% household bleach solution (1 part bleach to 9 parts water) or 70% isopropyl alcohol, like MaxTite 70% isopropyl alcohol spray, are common options. Soak or wipe, then allow several minutes before rinsing and drying. Oil metal where needed to limit rust, and store everything off the ground so it stays dry.
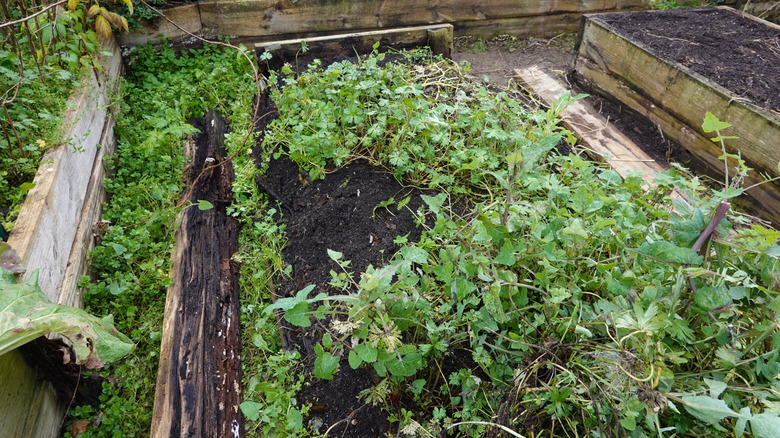
Knock back weeds & winter annuals
Winter annuals like chickweed and henbit sprout in cool weather and sit quietly under snow, then explode in early spring, right when you want to plant. If they set seed, your raised beds inherit a bigger seed bank that makes every task harder next year. Remove seedheads you can see, deny light to fresh germinators, or occupy the surface with a cover crop so weeds don't get a foothold. Hand-pull light infestations and remove any plants already in bloom.
Where weed pressure is higher, mulch right after you clear crops, or use a dark, UV-stable tarp (occultation) for 4–8 weeks to starve tiny seedlings of light while the soil biology keeps working. This is my favorite no-dig method of smothering weeds in the fall. You can let the tarp sit until a week before spring planting if you want to, without harming the soil. You'll need to weigh it down, though, to stop the wind from lifting it.
Plan and label next year's rotation

Rotation is one of the easiest ways to cut disease and pest pressure, and to maintain soil health and nutrient balance in intensively planted raised beds. Many pathogens and insects specialize in plant families, so moving crop families around interrupts their life cycle and balances nutrient drawdown.
Make a simple map of each bed and group crops by family. Tomato, pepper, eggplant, and potato are all Solanaceae, for example. Cabbage, broccoli, kale, and radish are Brassicaceae. Squash and cucumbers are Cucurbitaceae. Onions, garlic, and leeks are alliums, and beans and peas are legumes. Aim for at least three years before a family returns to the same bed.
If a bed had heavy-feeding tomatoes this year, plant a legume or leafy greens there next year. Move the tomatoes into a bed that hosted lighter feeders. Try not to plant heavy feeders in the same bed two years in a row, like following tomatoes with pumpkins, even if they're from different families, because the soil hasn't had a chance to recover and rebalance from the previous greedy crop.
Inspect and repair bed structures
Winter can turn small weaknesses into big failures. Loose corners, cracked boards, and settling edges let soil wash out and make a perfect entry for rodents. Walk each bed and check fasteners, joints, and contact points with the ground. Replace rotted or split lumber, add corner brackets if boards are bowing, and use exterior-grade screws so your repairs last. You'll be surprised at how quickly lumber can degrade in a raised bed setup. If your beds sit on a slope, consider a low swale or edge board to slow runoff. This is also the moment to add or tighten hoop anchors for row covers.
Good design details make maintenance easier year after year. Keep wood out of standing water, use rot-resistant materials where you can, and think about access if you're planning to add new beds. Pathways should be wide enough for a wheelbarrow, and beds should be narrow enough (typically 3–4 feet) to reach the center without stepping in.
Keep wildlife out of beds

Rodents are busy in winter. Pocket gophers, voles, and mice tunnel under raised beds, chew roots, and pop up right where you plan to plant in spring. The most reliable protection is exclusion. If you're building new beds, line the bottom with ¼–½-inch hardware cloth, like this 1/4-inch welded galvanized mesh, before filling. Overlap seams by a couple of inches and fasten them so there aren't gaps. Bring the mesh an inch or two up the inside walls so burrowers can't find the edge. That wire floor stops gophers from entering from below while letting earthworms and water move through.
For existing beds you don't want to empty, skirt the outside with hardware cloth as an L-shaped barrier: bury the vertical portion against the bed and the horizontal "apron" outward 6–12 inches to intercept tunnels. Keep grass short and dense with mulch pulled back from bed edges to reduce runway cover for voles, and use tight-weave guards on the stems of young perennials or garlic rows where nibbling is worst. Clean up thick cover, protect trunks and crowns with hardware cloth, and use physical barriers around prized plantings.
If your vole problem is pretty bad and you've employed all these other techniques and still need help, you can use live traps baited with a peanut butter and oatmeal mix or apple slices. Remember to check the traps daily so you're not leaving a caught critter to starve. And release them at least half a mile away from your garden — preferably, in a wild, grassy area where they can enjoy their natural habitat without bothering other gardeners.
Extend the season smartly
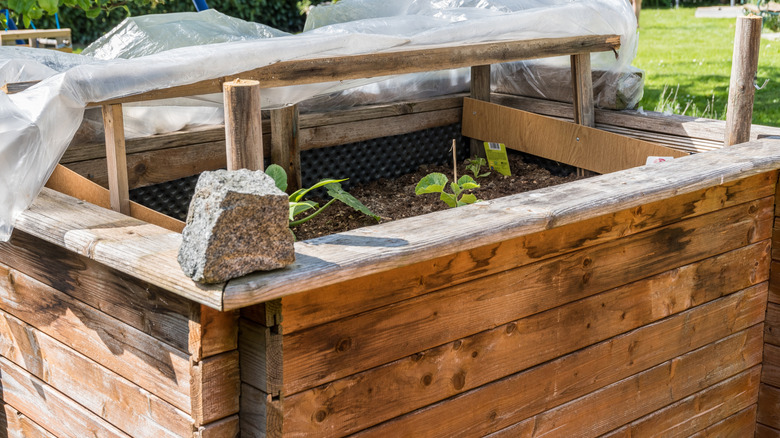
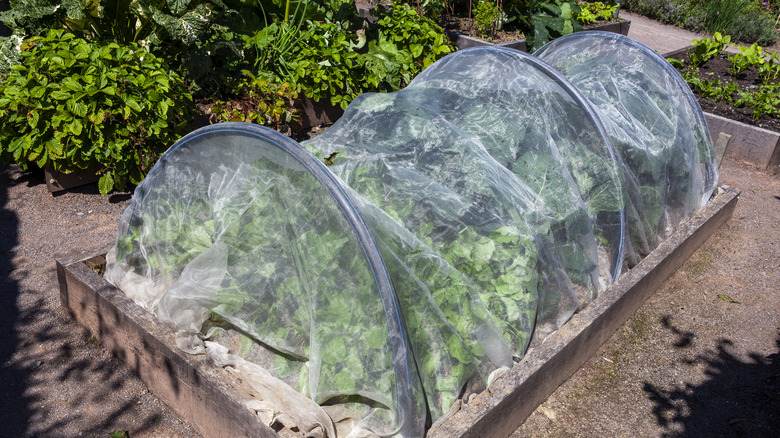
Simple protection can keep greens and roots harvestable for weeks longer and help fall transplants settle before deep cold. Start with floating row covers that are light, breathable fabrics that add a few degrees of frost protection while letting rain and light through. These 10-foot by 30-foot row covers are a good starting point. Install the fabric on hoops instead of laying it directly on leaves to prevent abrasion, and secure the edges with boards, sandbags, or soil so wind doesn't lift it. Vent on mild days to release humidity and heat; a quick midday lift keeps foliage dry and reduces disease. Combining a fabric cover with a 2- to 4-inch mulch around roots gives you both air and soil insulation.
For colder snaps, a low tunnel made from hoops and plastic film (or a heavier frost blanket) buys you more heat but needs consistent venting to prevent overheating on sunny days. Many gardeners "double cover," which is where you use a fabric row cover under plastic for a larger buffer, opening the plastic first when the sun is out. I like this technique and have even used a layer of bubble wrap over the fabric row cover to trap more heat, which worked like a charm.
Cold frames are another low-tech tool: a box with a clear lid. I make mine out of anything suitable, like an old window or door with glass panels. For raised beds, you can add a "lid" on them to create a cold frame. Add hoops and tough, clear plastic, or add a hinged frame with a glass or Perspex lid on top to turn the bed into a cold frame. Crack the lid on bright days to avoid leaf scorch and excessive condensation, and close it before sunset to hold warmth.