DIY A Fall-Inspired Lantern Using Dollar Tree Supplies

Rectangular lanterns make charming yard or home decorations, but they don't always fit your fall decor. If you're looking for a fall piece that's seasonal but not spooky, this Dollar Tree DIY for a silhouetted box lantern might be the perfect fit. You will need two decorative wooden planks with pumpkins, a small square wooden picture frame, glue, wood rings, two packs of square assorted wood boxes, three wooden Jenga pieces, spray paint in your chosen colors, and an electric candle or light.
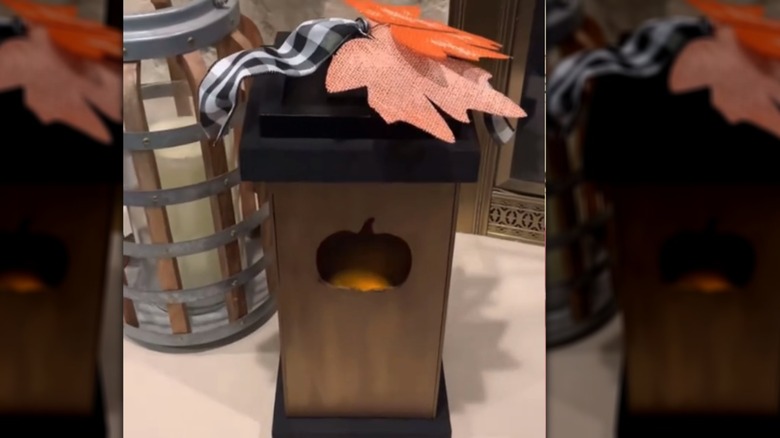
You can also buy some fall-themed decorations from Dollar Tree to add to the look, such as a few leaves or a bow. Don't worry about what to do with all the extras Jenga pieces. There are some really fun DIYs that will use up the rest of them, including making stunning succulent planters you can DIY using Jenga blocks.
This is a bit of a hands-on DIY, so you will also need some tools. You'll need a tool that can cut the wood into nice, even pieces. You could potentially use a precision knife, but it needs to be long enough to cut through the wood easily. A tip for cutting like this is to cover the area you want to cut with painter's tape, which makes it easier to get a clean cut. A glue gun is also essential for assembly.
Setting up and designing your fall-inspired Dollar Tree DIY lantern
Since the wood planks are what will make the sides of your lantern, you want to take each plank and cut it evenly in half. Then, glue them together to make a box. While that is drying, figure out which of the wooden square boxes will fit at the top. If you want to paint the top of your lantern and all the pieces, now is the best time to do so.
When you're ready, take the wooden frame. Pull everything off except the square itself, including the little metal pegs, the back, and any hanging attachments — then glue it to the center of the box's bottom. Next, take your three Jenga pieces and attach them in the middle of the frame. For the final step, glue the wooden ring to the top of the three rectangular pieces so it sits perpendicular to them.
Now's a good time to spray paint the lantern's body. Make sure you get the inside and the outside well, so it looks good even through the silhouette. Then, you can glue the second wooden box to the bottom of the lantern so that it has a base. It's best not to attach the top, so you can get to your candle whenever it needs to be replaced. Add your decorative touches, and your fall lantern is complete.
You can make your own silhouettes if your Dollar Tree doesn't have the planks with the cut-outs

Unfortunately, it appears that these specific designs are not available in all Dollar Trees. You can make your own silhouettes if your Dollar Tree doesn't have the planks with the cut-outs. All you have to do is pick up some of their Crafters Square Wood Planks.
Of course, they don't come with a silhouette, so you'll have to make them yourself. The easiest option is to draw out the shape you want. Then, use a small jigsaw tool to cut it out. A jigsaw is quite handy for a lot of amazing home DIY projects, so it's a useful tool to keep around.
Unfortunately, like cutting the planks in half, you also have the possibility of the tool chipping your board. This may leave one side of the wood looking rough. Position the rough side facing inward to hide imperfections, and lightly sand if you prefer a smoother finish. Though the tool may seem daunting, there is a no-fuss jigsaw trick for cutting out the middle of wood, which involves choosing a thin blade and going slowly.