Turn A Dollar Tree Cutting Board Into A Wall Sconce That Looks Luxurious With A DIY
We may receive a commission on purchases made from links.
As the days grow shorter and the air crisper, it's natural to want your home to feel warm, cozy and inviting. If you enjoy decorating and love a good DIY project that doesn't stretch your budget, this easy Dollar Tree craft will be perfect for you. It's an affordable way to add a soft glow, a touch of handmade charm, and a comforting autumn ambience to your home.
You won't need many materials to get started with this fun do-it-yourself craft. With just a cutting board, like the approximately 10-inch by 7-inch Cooking Concepts Bamboo Cutting Board from the Dollar Tree, a glass and candle of your choice, adhesive, painter's tape, and other supplies, you can create a completely customized and expensive-looking wall sconce that will suit your own personal style and light up your home long after the sun has set. This amazing hack makes this simple cutting board one of the best underrated Dollar Tree items you should stop overlooking.
This project comes together quickly and affordably, so if you'd like to create another one to make a handsome pair, either for a hallway, bedroom, or another space, you can do so without a worry about going over your budget. Once you complete this craft, you'll want to look into how to decorate with sconces so you can find the perfect spots to showcase their soft glow.
How to DIY a Dollar Tree sconce
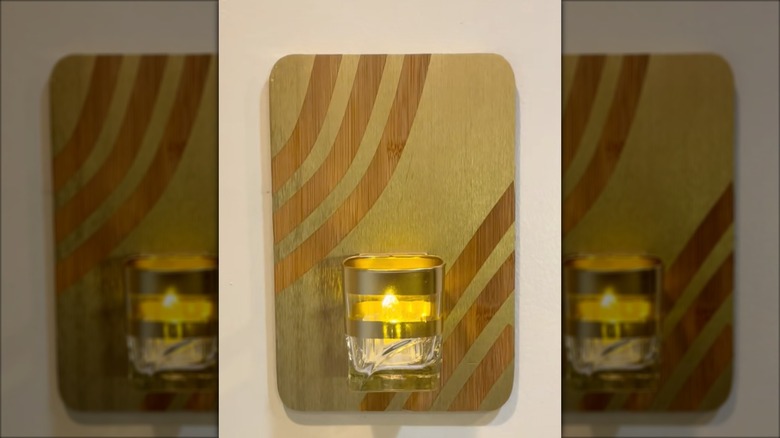
To DIY this stylish wall sconce with a few unexpected Dollar Tree products, either leave the wood as-is or choose a finish to match your decor — such as a deep walnut stain or a coat of metallic gold spray paint. For a personalized look, mask off parts of the board with painter's tape before applying your paint or stain. Once the layer of paint or stain is dry to the touch, carefully peel off the tape to reveal your design and allow it all to dry fully. If you like, also add a decorative touch to the glass by spray-painting stripes in a matching or complementary color — simply wrap the painter's tape around the glass in even bands, leaving the areas to be painted exposed and then spray-painting the vessel.
Next, adhere four small wooden pieces, such as these ½ inch craft cubes by Woodpeckers, to your cutting board using a strong adhesive like E6000. These cubes will add dimension to your sconce and provide a platform for the glass. Place two cubes where the flat surface of the glass will rest at the top and bottom. Apply a small amount of E6000 to the flat side of the cubes that faces outward and then press the glass into place. Let it set for at least 24 hours before moving your sconce.
Once it's dry, mount your new sconce on the wall using picture-hanging strips, such as these by Command. Then, insert a small battery-operated candle, and you'll have a beautiful new decor item that will bathe your home in relaxing light all season long.