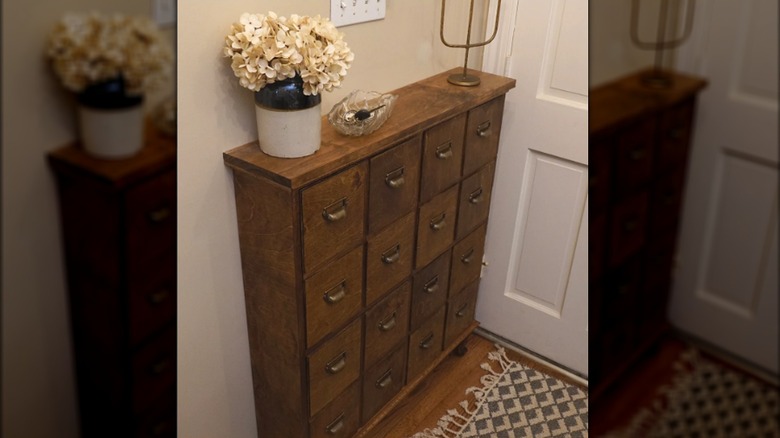
Declutter Your Entryway For Good With This Apothecary Cabinet Shoe Storage DIY
We may receive a commission on purchases made from links.
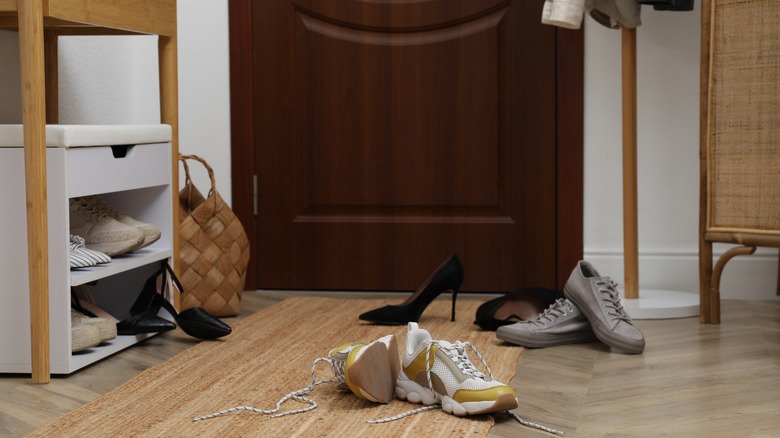
Your entryway can quickly become a "drop zone" for things, including many pairs of shoes. If you have a smaller or limited space entryway, then it likely tends to get cluttered with a lot of shoes, which can feel both overwhelming and stressful. You need to find a way to maximize space in your crowded entryway. Perhaps you're looking for additional storage or cabinetry, but haven't been able to find something that fits or suits your personal style. You can declutter your entryway for good with a DIY involving constructing and customizing a four-drawer apothecary cabinet for shoe storage.
To build this cabinet, you'll need to purchase some items. The primary wood will be slabs of thick plywood boards for the frame and drawers, like Woodpeckers baltic birch plywood. Get some thinner plywood squares for the front and four drawer slides, such as these URBEST ball bearing drawer slides. You will also need a pair of wooden legs to elevate your cabinet and some trim to finish it. Don't forget screws and some wood glue for securing the pieces.
Consider a dark stain to apply to the wood for an authentic look. Or, instead of stain, paint the cabinet teal or blue with a worn feel for a rustic look and to make a bold color work in your entryway. You could also paint it white and weather it to play into an older farmhouse aesthetic. You'll also need some etch tape and hardware for the drawers. If you're looking for a rustic and straightforward apothecary vibe, get these WEICHUAN antique bronze label frame drawer pulls. This DIY cabinet will help your small entryway feel bigger and more elevated.
How to make this DIY shoe storage cabinet
To make this DIY, your first job is to measure and cut the boards to create the frame for the cabinet. You want to ensure that it fits snugly against the wall without sticking out too far into your entryway space but is still large enough to fit shoes. Once you've built the main box frame, use more plywood to divide the box into four equal spaces. Then, construct the drawers with more plywood to fit into each space, attaching each one to the main frame using drawer slides.
Once the drawers are constructed, apply edge tape on the front of each drawer to divide it into four equal squares. Glue four small plywood squares to complete the look of four apothecary-style drawers, instead of just one. Then, screw a board to the top of the cabinet and the legs at the bottom front. Add trim detail to the bottom, top, or sides for a finished look. Finally, apply your stain all over and let it dry.
To secure the back of your cabinet to the wall, use an L-shaped bracket like the HOME MASTER corner bracket. While the back is supported by the wall, the legs hold up the front. Once installed and in place, you can add your shoes or other entryway items into the drawers and out of sight. Consider incorporating labels in the hardware to categorize your shoes or items. Get creative with some handwritten stencils for a vintage vibe. Place your decor at the top for a gorgeous piece that will keep your entryway clutter-free.