12 Fall Garden Mistakes That Are Hurting Your Perennials' Chances Of A Successful Spring
We may receive a commission on purchases made from links.
In the fall, your perennials are getting ready for dormancy. Depending on the plant and where you live, some need nothing more than a little tidy-up and maybe a bit of mulch. Others require more specialized care. But doing the wrong thing to the wrong plant at the wrong time can mean it won't survive the winter —or it'll pull through, but lack vigor and health.
Even a master gardener like myself can get things wrong if I'm not careful. Common mistakes I've seen (and probably done myself over the years) include adding too much or too little water and mulch. Not mapping or labelling plants, and then standing on them or damaging their dormant crowns because I forgot where they live, is a mistake I won't repeat. And we've all been guilty of working when the soil is too wet. But just a little bit of planning and forethought can help you avoid most of these mistakes and have beautiful, healthy perennials next spring.
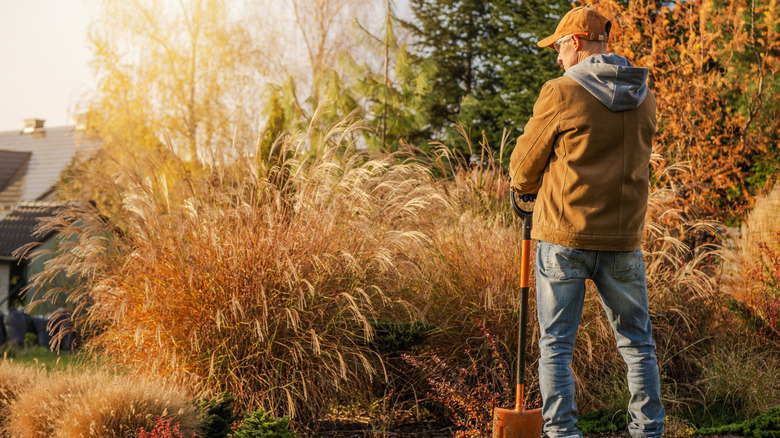
Cutting back and pruning at the wrong time
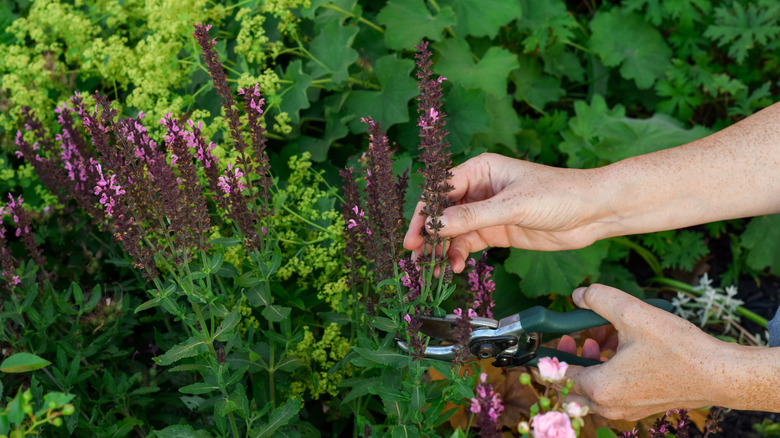
While most people use the terms cutting back and pruning interchangeably, there is a subtle, but important difference. Cutting back is reducing overall plant size, with a particular emphasis on reducing the volume of foliage, like you'd do with phlox, hostas, or coral bells. Pruning is more precise. You might prune off dead and diseased stems, a broken or infected branch, or prune to shape or change the structure of the plant. In fall, the three D pruning rule applies: dead, diseased, or damaged. Woody perennials like lavender require pruning in fall, as do fruit bushes and ornamental trees.
Whichever technique you're using, getting the timing right is super important for plants that are settling down for winter. Check directions for your specific perennial, but in general, put off intensive pruning until winter when the plant or tree is fully dormant. You can and should, however, prune off broken and infected stems as soon as you spot them.
If you've got a perennial that dies back when the temperature drops, cut back when you see the first signs of yellowing or die back. But don't move too early or you'll encourage new leafy growth that likely won't withstand winter and can weaken the plant for spring. You also want to leave healthy, tall stems and seedheads in place for habitat and to catch snow, which acts as an effective insulator. Avoid cutting too close to crowns unless you're prepping bulbs, corms, or tubers that need to be lifted and stored dry and bare.
Leaving diseased foliage in place
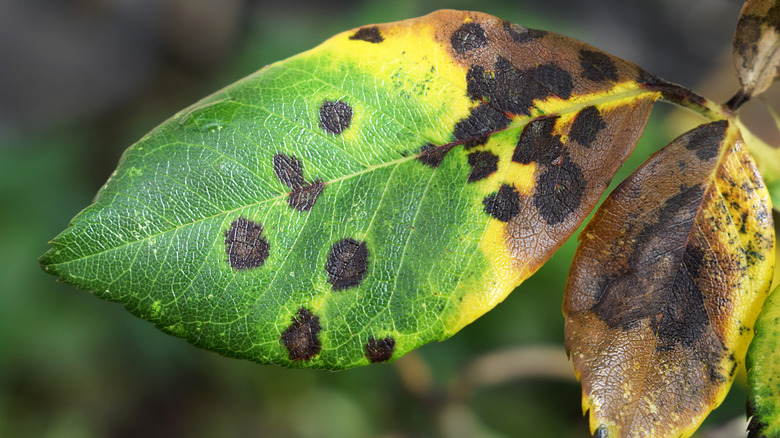
Missing or neglecting diseased foliage results in harboring and potentially spreading the pathogens to new growth and other plants. Even if the leaves have fallen, they still pose a risk, as they decay and the fungus and bacteria overwinter in the soil, ready to attack tender new growth in spring. So, instead of waiting to treat a disease, be proactive and do everything you can to prevent pathogens like powdery mildew from taking over your garden.
Remove all foliage with any suspected signs of disease, especially leaf spot, powdery mildew, botrytis, and similar issues common to perennials. Bag them and treat them like trash, or burn them safely away from potentially at-risk plants (if fires are permitted in your area). If you are clearing diseased foliage, make sure you clean your tools, boots, and gloves before you tend to healthy plants so you don't inadvertently spread the pathogens.
Skipping a deep fall watering
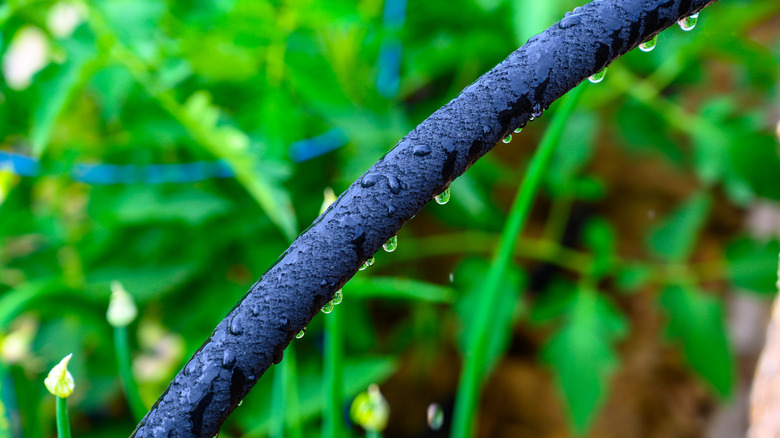
Unless you're lifting and dry-storing bulbs, you really do need to give a slow, deep watering to perennials in fall, before the frosts hit. A thorough, slow soak with something like this Haeteir Flat Soaker Hose ensures the water penetrates deeply and provides sufficient hydration to the whole root zone. Choose a dry day that's warmer than 40 degrees Fahrenheit, and preferably in the morning so that the water has time to soak in and the surface dry off a little before nightfall. Don't flood the area, though, as water will just run off and pull topsoil with it. Hence I recommend a soaker hose, to provide slow watering. Aim to give enough water to wet the soil around 6 to 8 inches down.
For most plants, this should set them up for the winter. But if you have a particularly dry winter or late fall, you'll need to repeat the process on a warmer day when the ground isn't frozen solid. Additionally, containerized plants, first-year plants, and recent divisions tend to need more water more often, so check them for signs of drought stress regularly. The same goes for plants in exposed locations. Harsh winter wind tends to dry out soil and desiccate plants surprisingly quickly. This is particularly true of first-year perennials and plants growing in raised beds. If you find that the wind is drying out your plants too fast, mulch them and set up a simple wind break to reduce damage and exposure.
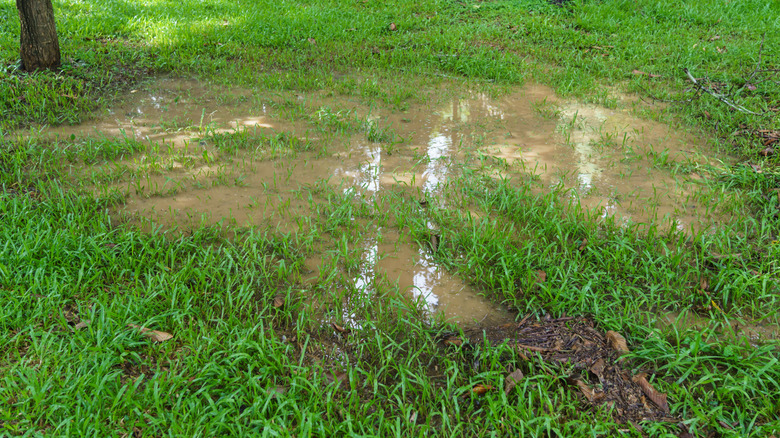
Just as too little water is bad, so is too much. You don't want to apply so much water that your plants are sitting in puddles. Being constantly wet or freezing is not good for plant roots and can kill them quickly or cause root rot. This is also why you shouldn't water when the ground is frozen, as it can't soak in properly.
Being overenthusiastic with your mulching or skipping it altogether
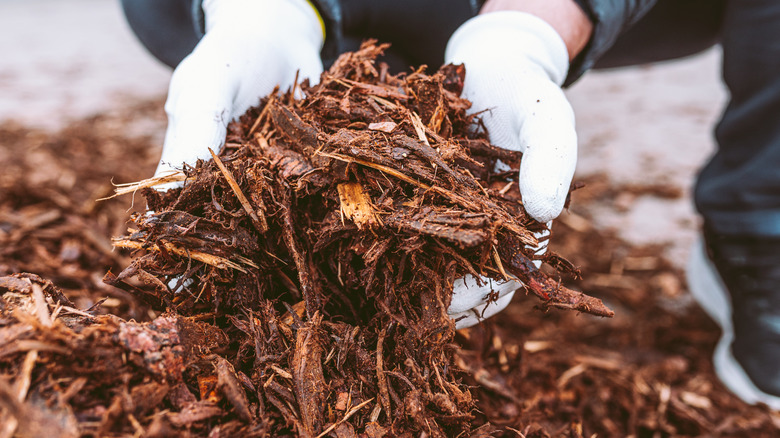
Mulching is great and very much encouraged, but you can easily get it wrong. Piling mulch right up against the stems or crowns seems like a good idea, because you provide more insulation and block weeds. But it actually hinders instead of helps. Mountaining mulch around plants traps moisture against stems, softens collars, provides shelter for rodents, and can suffocate crowns. It also invites fungal and bacterial pathogens that multiply in warm, damp conditions with low airflow.
Instead, leave a gap of a couple of inches between the crown and the mulch. This "donut" method insulates and protects roots and soil, while letting crowns and stems breathe. Apply a layer of 2 to 3 inches of breathable mulch in a ring around your plants. There are plenty of good choices for mulch in your garden. I like well-rotted manure, shredded leaves, and straw as biodegradable mulches that I want to turn into the soil in the spring. Around well-established perennials where I know I won't be digging or planting, I prefer natural wood chips that will break down and release their nutrients slowly, and I'll only need to replace them around every five years.
Wait until the soil has cooled and the first frosts begin, then apply your mulch. This keeps soil temperatures more stable and reduces the risk of repeated freeze-thaw cycles. If you mulch too early, you start with soil that's too warm when the first frosts arrive, and this can cause young and tender plants to lift out of the soil, exposing their roots to killing frosts. If you go with light mulch, like straw or shredded leaves, you'll need to "pin" it by wetting it and, if it's in a windy site, adding some heavier materials like planks of wood, bricks, or logs. After storms and particularly cold spells, inspect your mulched plants, reapply where it's blown off, and gently re-firm lifted crowns, add more soil, and then a layer of mulch.
Fertilizing late with high nitrogen
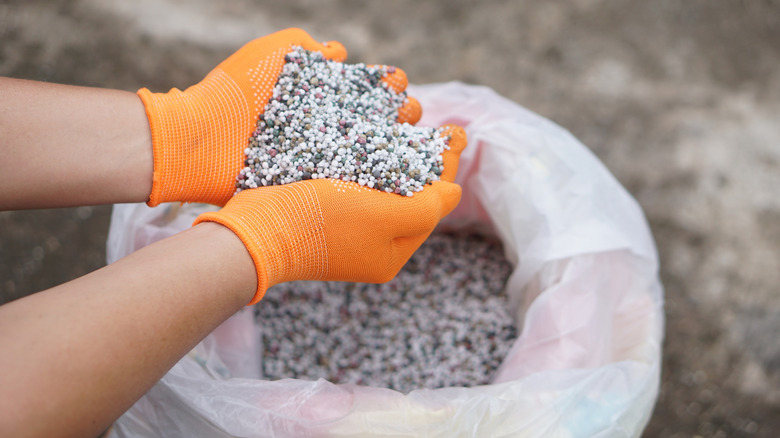
Yes, your perennials need nitrogen, but not when they're heading into winter dormancy. Nitrogen encourages rapid foliar growth. So if you apply it in fall, your perennials will end up producing lots of new, weak, leafy growth. Not only will this growth be killed once winter cold arrives, but it wastes your plants' nutrient and energy reserves, depleting them right as they're heading into winter, when they rely on those reserves to survive. While it might not kill the plant outright, it'll definitely weaken it, which you'll notice in spring.
Stop high-nitrogen feeds in late summer and, if you're concerned about the nutrient balance, perform a soil test in fall with a Luster Leaf Rapitest Soil Test Kit that will give you results for nitrogen, potassium, phosphorus, and pH before you make any blind corrections. Concentrate on soil health all year by adding plenty of homemade compost and nutrient-rich organic matter. If soft growth is already present, as it was for many of my perennials last year as we had a late out-of-season warm spell, don't add nitrogen to try and stimulate it. Don't prune it either, as that just encourages more growth. Instead, leave it alone to harden off and hopefully either die back quickly, or go into winter strong enough to survive.
Dividing or planting too late
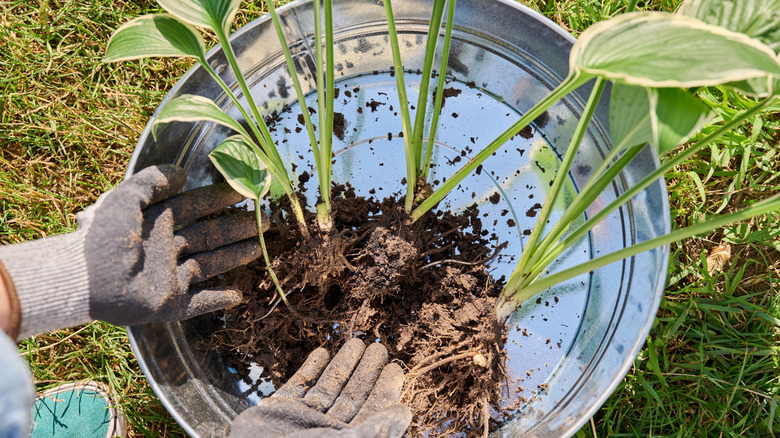
Yes, for most perennials, fall is the best time to divide and plant them, but doing so too late means they won't have time to establish themselves and anchor their roots deep into the soil before frost arrives. Ideally, perennials need to be planted four to six weeks before your first predicted frost. And if it looks like you're going to get an early frost, cover new plantings with a frost blanket to offer a bit of extra protection.
Whether you've got a division or a potted plant to set, plant them at the same depth as their original planting. For plugs and potted plants, you should be able to see the soil line on the stem or crown, so you can easily plant to the same depth. And don't be tempted just to risk it. You're better off heeling the pots deep into soil to insulate them, or house them in a cold frame or unheated greenhouse. For divisions, just leave them in the ground and divide in the spring.
Letting weeds and aggressive self-seeders set seed
Fall is when weeds can really take hold if you're not careful. Watch out for serious seed producers like nettles, docks, and chickweed. Try to catch and remove them before the seedheads dry and are ready to release. If you're too late, I strongly recommend covering the worst offenders like dock leaf heads with a bag and securing the bottom with string before you cut them down, as a simple jostle can send hundreds of seeds spreading across your beds.
One season of unchecked weeds going to seed can cause you problems for several years, as they create a seedbed that just keeps coming, can steal nutrients from your perennials, and can eventually smother them. The same applies to plants you love, but don't want to spread unchecked. Some ornamentals spread their seed just like weeds, so those also need keeping in check.
If you know you've got a seed problem, one quick chemical-free fix is to let them sprout in fall. This is the stale seedbed technique. You let them spend their energy and emerge, just to the tiny white thread stage, then you scuffle them with a hoe if you're working between plants you want to keep. But, if you're working on a bare patch, you can burn them away with something like the Quanie Propane Weed Torch. If you have time before the first predicted frosts, you can then rake over the soil and repeat the process.
Working wet soil and ruining soil structure
When fall is slipping away quickly toward winter and your garden to-do list is getting ever longer, it's really tempting to just get out there and do it, no matter the conditions. You see the rain finally stop for a day or two and want to get the work done before more rain arrives. But, working with wet soil is one of the biggest and most destructive mistakes you can make.
Walking over and trying to work with wet soil compacts it. This presses all the air out and destroys the structure. You'll end up with heavy, clay-like soil that's almost impossible to work, and it takes a great deal of effort and time to fix. Plus, compacted soil suffocates plant roots and kills off a lot of beneficial microorganisms, because it removes air and creates anaerobic conditions. Compacted soil also takes far longer to warm up in the spring and anything new you plant in it will struggle and only produce shallow roots.
If you're not sure, test the soil. If you take some and rub it between your fingers and it is a slick, shiny ribbon, or clumps into a ball of clay, it's too wet. If it crumbles or holds its shape, you can go ahead and work. If you must walk on wet patches, lay boards to spread the weight and keep wheelbarrows to pathways or boards only. If it's too late, you need to start the process of fixing your compacted soil. Top dress with plenty of organic matter like homemade compost or well-rotted manure, as both of these will break down and add rough organic matter to the soil and improve structure. Don't till it, either. At most, once things dry out a bit, use a fork to lift the soil gently and work in some of the top-dressing or some straw to start to open the structure back up.
Skipping tool sanitation

You probably didn't think cleaning was part of the deal when you first started gardening, but it's actually very important. You should always clean and then disinfect your tools if you've been working with diseased foliage. But you should also do it at the end of the season when you're putting the tools away for the winter. If you don't, you risk moving fungi, bacteria, and eggs, carrying them over to spring, and then infecting the soil or new growth.
First, knock off as much debris as you can, then give them a scrub with hot, soapy water and a stiff brush. Next, use a 70% isopropyl alcohol, like the Rapid Protectant 70% Isopropyl Alcohol Spray, or a 10% bleach solution to spray or soak blades and tines. Once you're done, dry them off so the sanitizing solution doesn't corrode the metal parts. I like to give my tools a light coating of natural linseed oil right after to prevent rust. It's also a good idea to repeat this process with other equipment, like stakes, hoop houses, and cages that you lift and reposition each year.
Forgetting labels and maps
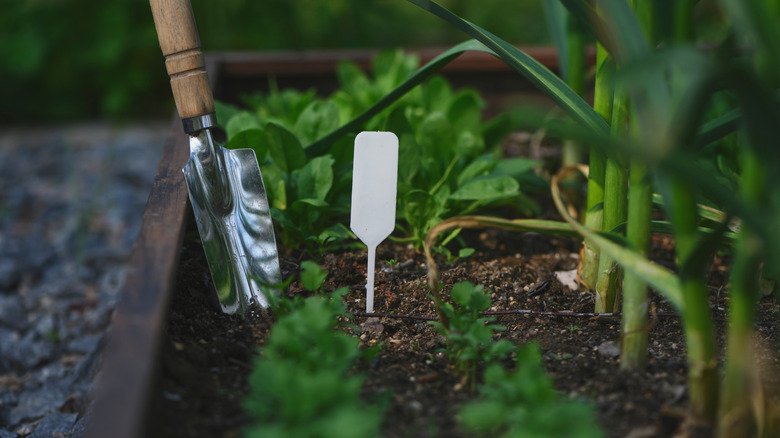
When everything's in full bloom, and even when it's dying off, you may think it's obvious where all your plants are and that you'll remember. And then winter hits, you've cleared all the foliage, the wind has blown the mulch around, and you actually have no clue what you planted where. Take rhubarb, for example. It's a hardy edible perennial that's extremely easy to grow and to identify when it's producing those lovely pink stems and huge green leaves. But once those are gone, the crown blends right into the soil and, especially when young, you can inflict severe damage with one misplaced step.
So, it's better to put small stakes or labels wherever you've got perennials overwintering. Just to be safe. I also like to keep a garden journal where I map my plantings, so I can find them quickly and plan new plantings, rotations, and pruning for the coming season. Journals are also useful for keeping a record of which plants showed signs of struggling, any pathogens or infestations you encountered, which are due for division, and which are thriving.
Ignoring wildlife pressure

I specialize in permaculture and working with nature, but that doesn't mean I want deer, rabbits, voles, and other wildlife stripping my garden bare. If your garden is healthy and abundant, you'll notice a serious uptick in wildlife pressure in late fall and into winter. As food becomes scarce, wild creatures will make their way to your garden and eat whatever they can find. I never use or recommend bait or kill-traps, because they're cruel, aren't that effective long-term, and cause damage to unintended victims, too. Instead, I use longer-lasting defenses. Cages, fencing, and stem guards all work well to keep deer from reaching young trees and vulnerable perennials. If you grow fruit bushes of any variety, put a cage over them.
It's also a good idea to put more tempting plants close to the house. For example, if your perennial collection includes day lilies, hostas, and hydrangeas, these are all plants deer love, so you're better off planting them closer to the house, where there's more human activity and deer are less likely to approach. I'd also strongly recommend still adding protection for your plants, too, as deer can be incredibly destructive. Sage, on the other hand, is one of the best flowering deer-resistant plants, as are rosemary and lavender, so you can grow those anywhere without concern. For rodent control, your best option is to make the area inhospitable. Keep mulch pulled back from crowns and clean up fallen debris from around plant bases. This limits cover and stops them nesting close to at-risk plants.
Not protecting tender and potted perennials
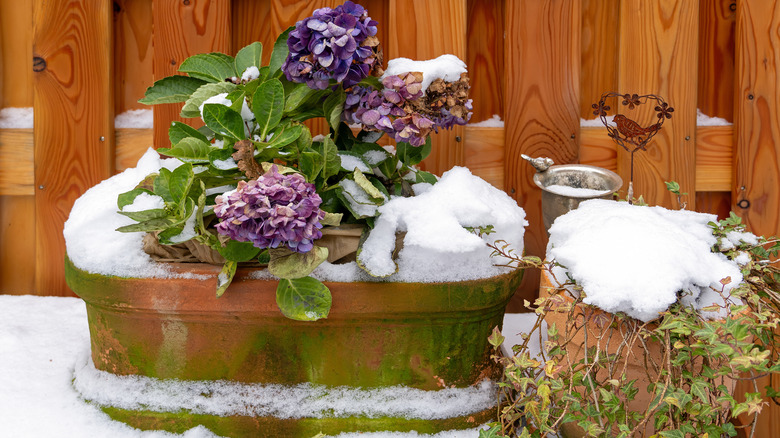
Containerized plants are less hardy than those in the ground, because pots aren't as insulating as open ground. Therefore, roots are more exposed to temperature swings and deep winter freezes that can kill off delicate roots. You can heel pots into soil or mulch around them to provide insulation, or move them to an unheated greenhouse or sheltered spot that ideally stays between 20 and 45 degrees Fahrenheit.
Group pots together for shared warmth and consider wrapping the pot exteriors in garden fleece or even bubble wrap under an outer layer of burlap (which is my go-to choice) to keep temperatures just a couple of degrees higher through winter. You can also double-pot them by adding a larger exterior pot and insulating material like straw, bubble wrap, or burlap between the containers. Whatever option you choose, make sure you keep the containers off bare concrete, as it will draw heat right out of the soil and cause faster freezing.