12 Perennials To Overwinter In The Fall For Strong And Healthy Plants In The Spring
We may receive a commission on purchases made from links.
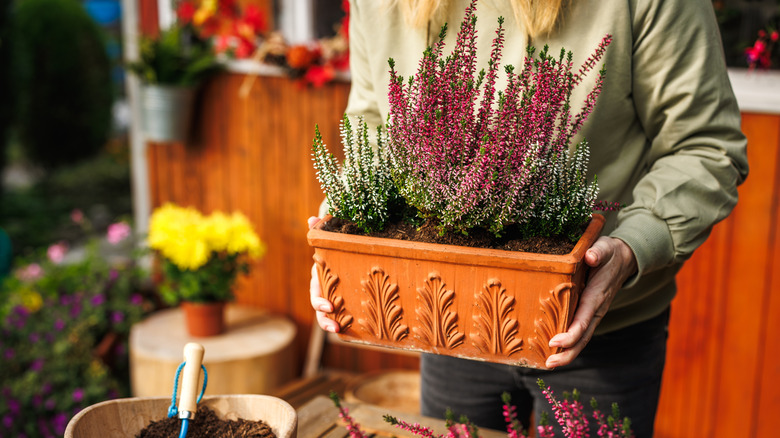
Some perennials are hardy and survive the winter without any intervention. Others, depending on the zone they're growing in, need some help. Tender and borderline-hardy plants can look spectacular all summer, but be killed off by one deep freeze if you haven't given them the right pre-winter treatment. Geophytes like dahlias and gladioli need lifting, curing, and to be stored dry. Tender shrubs and herbs like lantana and agapanthus need shelter, especially if containerized. Even some plants that stay in your garden beds all winter, like borderline-hardy garden mums, need some insulation after the ground freezes.
As a master gardener, I've tried many different techniques to overwinter all kinds of perennials to carry them safely into spring. Do remember, though, that your hardiness zone also plays a part in which plants need help and which can tough it out. In more temperate climates, some plants, such as rosemary, can make it through winter with no intervention. But in colder zones, those same plants need insulating or bringing indoors.
Dahlia: Lift tubers and store cool and dry
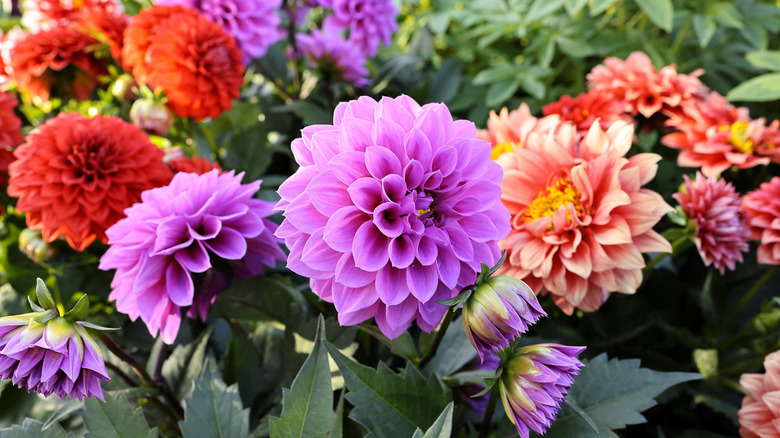
Dahlias are not frost-hardy in cold-winter zones. They can survive the occasional mild frost, but deep freezes will kill the bulbs. When the foliage gets frost-struck and starts to turn black, cut the stems back to between 4 and 6 inches. If the soil is still heavy or wet, wait a couple of days before lifting, as the tubers are less prone to damage when the soil is drier.
Use a garden fork and dig well away from the stems so you don't accidentally spear the tuber clump. You want to shake off any loose soil, but don't wash them. Just set the tuber clumps to cure in a single layer somewhere cool, dark, and airy for a week. An unheated garage and a cardboard box will work just fine. Avoid anything plastic or non-porous, as that will trap moisture underneath the tubers, and you're aiming to reduce moisture to prevent winter storage rot.
Once the skins feel dry, trim off the roots and obviously damaged pieces. You can also divide now if you want, ready for spring planting. If you do, just make sure that each division has at least one visible "eye," which is where the new growth will appear from. Pack the tubers into ventilated boxes and add peat moss, vermiculite, or wood shavings. I find banana boxes from the grocery store with holes poked in the bottom work well. When adding the packing material, make sure you pack it between the tubers and over them, so they don't touch one another.
It's a good idea to label them by color and cultivar for a precise planting plan for spring. Store the box in a dark, frost-free place with good air circulation that stays around 40 to 50 degrees Fahrenheit. Once a month, pull back the packing material and check the tubers. If any are soft or smell bad, toss them in the trash. If the tubers start to go wrinkly, repack them, then lightly mist the packing medium (not the tubers directly). This provides just enough moisture and humidity to keep them healthy without wetting them and inviting rot.
Canna lily: Lift rhizomes and store between 40 and 50 degrees Fahrenheit
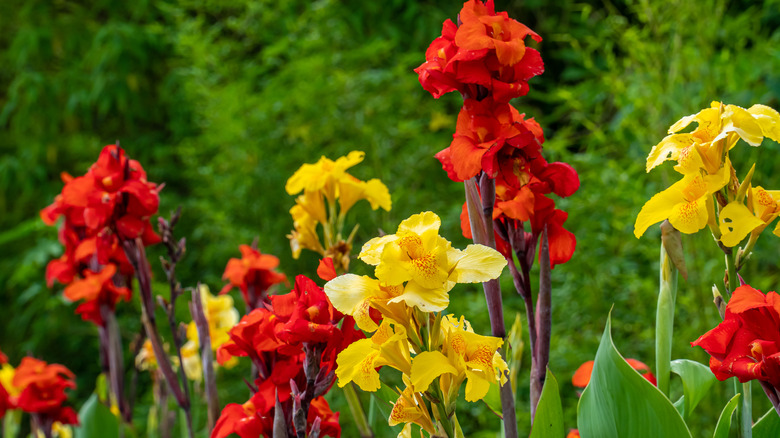
Canna are, technically, tropical heat-tolerant perennials, and are only winter-hardy in USDA Hardiness Zones 7 through 10. So in climates where the soil freezes even briefly, their rhizomes rot or are killed outright. Therefore, if you don't want to grow canna lilies as annuals and you live outside of these zones, you have to lift and protect them for the winter. Once a frost causes the foliage to collapse, cut them back and lift them just like dahlias.
Give them a shake to remove some, but not all, of the loose soil, as they do best in dormancy with little soil around them. Let the rhizomes dry just long enough for the surface to cure, which only takes a couple of days in a shaded airy spot. If you leave them longer, you risk the rhizomes losing too much moisture, in which case they'll rapidly shrivel up, using all of their reserves, and won't grow well (or at all) next spring.
If your canna clumps are huge, you can divide them now, splitting them along natural joints. Keep only the firm, eye-bearing pieces and toss the rest. Pack them with just enough packing medium to keep the rhizomes from touching, without packing tightly or smothering them. You can also store them in paper bags with a little packing medium. Don't store cannas, or really anything you're trying to overwinter, in sealed plastic, as it encourages condensation and rot.
Check on them monthly — you're looking for soft spots and signs of rot. With cannas, you can trim out and discard these spots if you catch them early, then dust the wound with a little powdered sulfur, like Bonide Sulfur Plant Fungicide, or cinnamon to help it heal and reduce the risk of further rot or fungal pathogens. And if the rhizomes start to wrinkle, lightly moisten the storage medium without wetting the actual cannas.
Gladiolus: Cure corms and store dry and cool
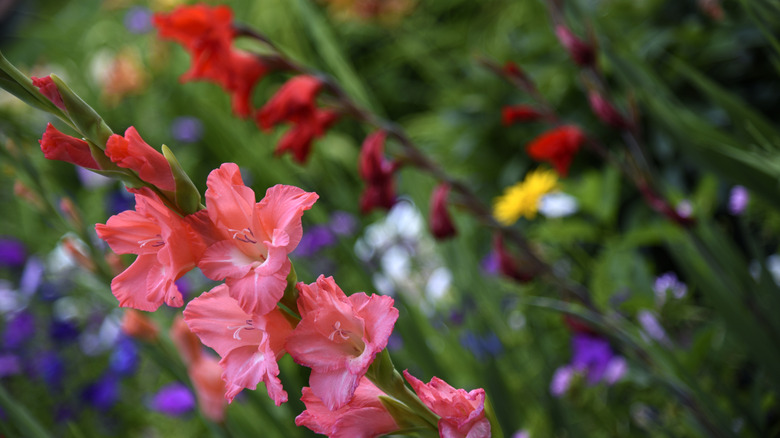
Glads are popular summer-blooming perennials, and they won't overwinter in frozen ground. But, interestingly, their corms like to be overwintered cooler than many other perennials that need lifting for the winter. Dig them up when the foliage starts to yellow in late fall. Or, if frosts hit your area early, lift them when the flowers die back. Be careful and gentle — you need to try to keep the old corm, new corms, cormels (or cormlets), and basal plate intact.
Before curing, trim the foliage to just a couple of inches and brush off excess soil, but don't wash them. Cure the corms in a reasonably warm, but airy, location for two to three weeks, depending on how quickly the skins, basal plate, and "mother" corm dry out. If you cure them in cardboard boxes, you'll need to turn them every few days. I hang bulbs in pantyhose. Pop a corm into the pantyhose, leave some room, then tie a knot and add another. Repeat until all your corms are secured, then suspend the filled pantyhose somewhere with good airflow. Mine hang from a beam in my garage.
After curing, you'll see the new corms have now developed a dry protective skin and the mother corm has shriveled up. At this point, you should be able to snap off the stems and the old corm with light pressure. You can also remove and keep the cormlets for propagation, but just be aware that grown from cormlets, glads can take two years to flower. You can now store them in mesh bags, like these SRXES Mesh Onion Bags, or ventilated trays (or reuse pantyhose). Remember that they prefer cooler conditions, so you need to store them between 35 and 45 degrees Fahrenheit in a dry, but frost-free, spot. Make sure there's good airflow to avoid issues like botrytis and basal rots.
Elephant ear: Lift the corms or keep as houseplants
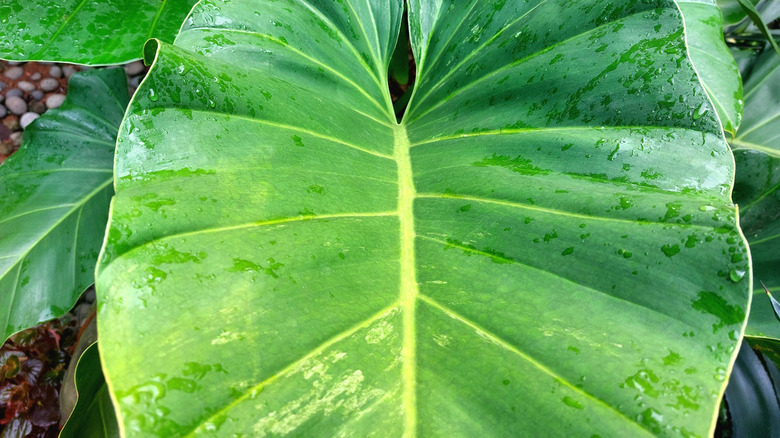
Elephant ears are cold-tender. You have two options here: You can store the corms (or tubers, depending on species) or keep the plants actively growing indoors. I personally prefer to work with the natural cycle, so I'll let them go dormant for the winter. In this case, you cut the foliage back to a couple of inches and lift the corms gently. Knock off the loose soil, but leave the roots on for now. Place them in a cardboard box with holes punched in the bottom so that they dry out.
After a week, you should be able to gently twist and snap the remaining portions of the stems off. As you do so, you'll notice you also take a papery layer off the top portion of the corn. This is normal. Put them back in the box and give them another week to cure. At this point, the corms should be dry enough for you to pull or cut off those long, straggling roots, leaving no more than a quarter inch of root. Yes, you can use a medium like wood shavings or peat moss, but for elephant ears, one of the most effective options is simply to wrap each dry corm or tuber in newspaper or brown paper and store in a dark, dry place between 55 and 60 degrees Fahrenheit. And, of course, check for soft spots or signs of rot every month or so. If you do find a small soft spot, cut it out and coat the wound with cinnamon or sulfur.
Some varieties, like 'Black Magic,' don't have corms or tubers, so for these types, you'll need to bring them indoors, unless you want to treat them as annuals. Bring the pot indoors before frosts hit, remove all but the two largest leaves, and give it plenty of light and temperatures between 65 and 75 degrees Fahrenheit. Only water when strictly necessary, because even though it still has leaves and is still alive, the elephant's ear is semi-dormant, so it doesn't need a lot of water. As houseplants, they appreciate steady warmth and struggle in drafty conditions.
Tuberous begonia: Cure and store just above freezing

Tuberous begonias are beginner-friendly, but need a clean, cool dormancy, and they don't like being coddled. Before a hard frost or when you see stems start to go yellow, lift the plants and gently knock the excess soil from the tubers. Store the dry and cool in a single layer for two weeks. Then twist and snap to detach the remainder of the stems and roots. Just be careful not to gouge the surface of the tubers. It's important to remove all the plant material from the tubers to avoid rot setting in.
Once they're dry, store your tuberous begonias dry and dark. Wrap them in newspaper or paper bags, or cover them in dry wood shavings, perlite, or peat moss. I generally use sawdust and then spritz it lightly if the tubers start to wrinkle too much. Tuberous begonias are more at risk of mold than many others, so be sure to check them every month and remove affected pieces. You'll also need to increase ventilation, as mold tells you there's too much humidity and not enough airflow. Even though they struggle in cold climates, they prefer cold storage, between 35 and 45 degrees Fahrenheit.
Caladium: Provide warm, dry storage
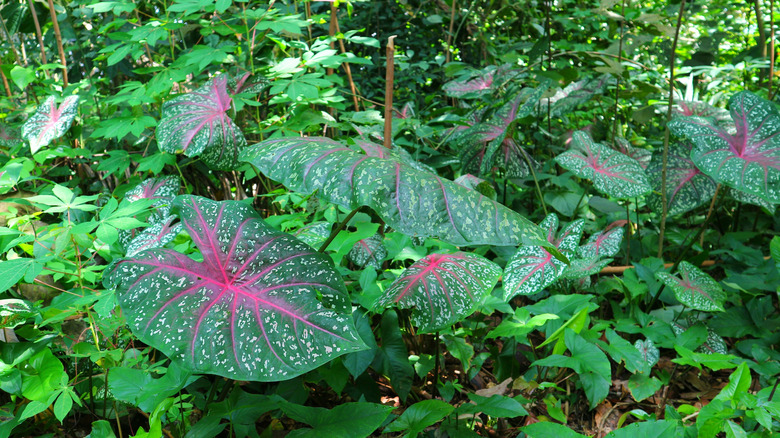
Caladiums need warmer storage than most other perennials. Lift them just before the first predicted frost, or as the leaves start to turn yellow. Don't remove the foliage or roots yet — brush off the soil gently and don't wash them. They need curing for around two weeks, like several other perennials we've already covered. Once the skins have dried off, remove the withered roots and foliage, then leave for another week to fully dry before you put them away for the winter.
Caladium bulbs do not like moisture, nor do they like cold conditions. These fussy bulbs like to be snuggled warm and dry all winter. Pack them loosely in dry peat moss, vermiculite, or sawdust, and store them in a dark, well-ventilated place that stays fairly consistently between 60 and 65 degrees Fahrenheit. And, in the spring, wake them late. Remember they are heat lovers so if you plant them out too early, they'll just rot in the cold soil.
Agapanthus: Move container plants to a bright frost-free room
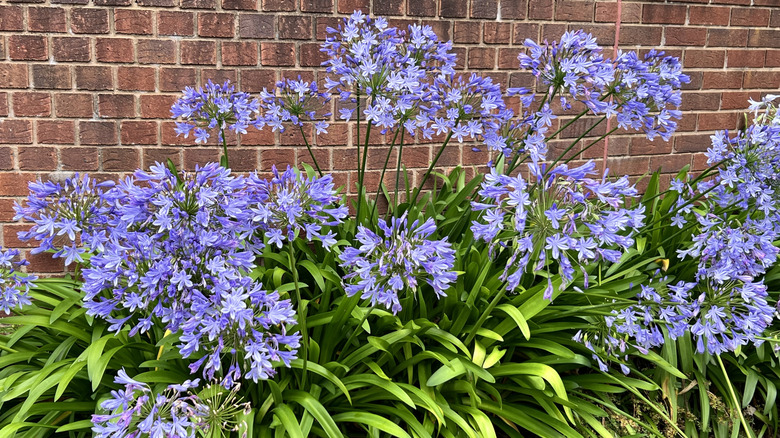
Even in mild climates, people tend to grow agapanthus in containers because cramped roots encourage the plants to bloom. If you live outside of Hardiness Zones 7 to 11, you'll need to bring your agapanthus plants indoors for winter. Move them before the first predicted frost into a cool, bright, frost-free space. An unheated conservatory, sunroom, enclosed porch, or by a bright garage window are all solid choices. Avoid heated rooms, as too much warmth will cause floppy leaf growth and weaken the plant.
Before you bring it inside, trim off any dead, diseased, or tattered leaves. It's also a good idea to clean off the outside of the pot, including the bottom, to avoid bringing in any pests. Don't be tempted to repot unless the roots are causing the pot to crack open. And, if that's the case, only move the plant gently to a pot one size up with minimal disturbance. Save major repotting or division for spring when the plant is actively growing.
Once cleaned and situated indoors, let your agapanthus rest. Don't fertilize and only water lightly when the top inch of soil is dry. Even though you can see green foliage, the plant is actually semi-dormant. It's essentially in maintenance mode, so doesn't need as much water as it does when it's actively growing.
Pineapple lily: Lift bulbs and store cool and dry
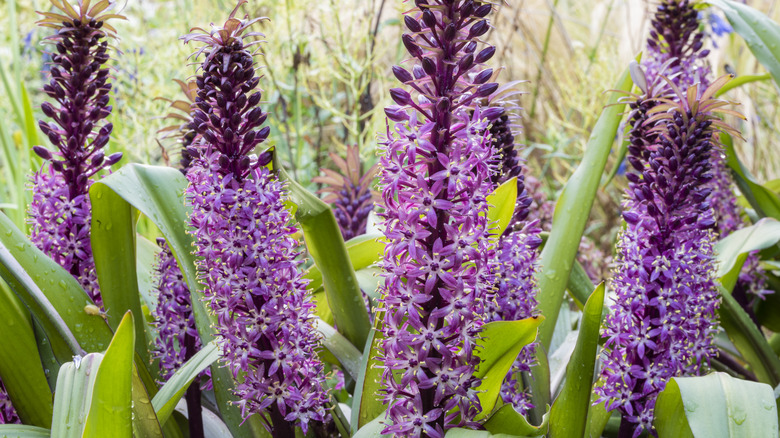
Most pineapple lily cultivars are only winter hardy in Zones 7 to 10. Outside of these zones, you'll need to lift the bulbs and keep them safe from frost for the winter. Once you see the foliage turn yellow , you know the plant is pulling back its energy and getting ready for dormancy. At this point, cut back the foliage to just an inch or two, then lift the bulbs carefully with a fork. Shake off as much loose soil as possible, then lay them in a single layer in a cardboard box or on newspaper in a well-ventilated space for a couple of weeks, until the skins feel dry and firm. Then remove the remainder of the stems and trim the roots short.
You can wrap the bulbs in newspaper or pack the box with shredded paper, sawdust, or a similar packing medium to keep them protected, but not touching one another. If they're already containerized, remove all the dead foliage, clean the container to get rid of any hiding pests or their eggs, then move it to a frost-free, but not overly warm, room, such as your garage or an unheated greenhouse.
Lantana: Overwinter indoors dormant or as a houseplant
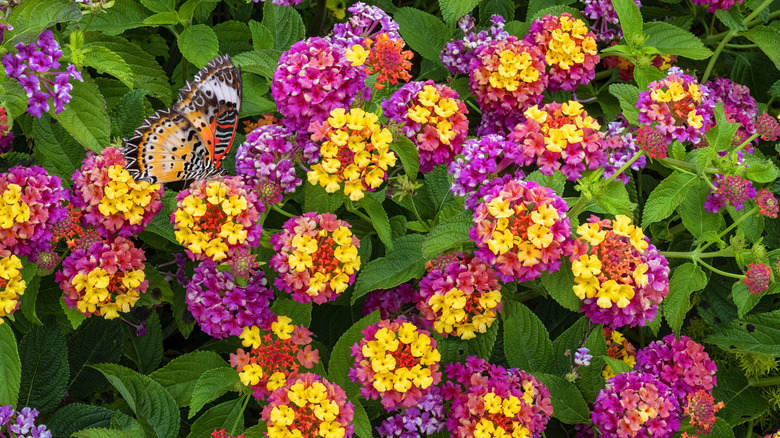
Lantana behaves like a shrubby perennial in warm climates, but won't survive hard freezes in cold zones. Bring the plants indoors before the first frost and decide if you want to let them enter dormancy or if you want to go for active growth. Both options are viable if you don't let the roots stay too wet, but letting them go dormant is the easier option and the best choice for continued plant health.
If you want to keep them as a house plant, you'll need to add supplemental light like YENTBOKJ Grow Lights to give enough hours of brightness. Place it in a steadily warm room and a pot with sharp, free-draining potting mix. To let the plant go semi-dormant, cut back spent, tattered, or weak foliage (and expect further leaf drop) and situate it in a sunny location that stays between 50 and 60 degrees Fahrenheit. Only water very sparingly to prevent stems from shriveling.
Hardy fuchsia: Mulch in place or containerize
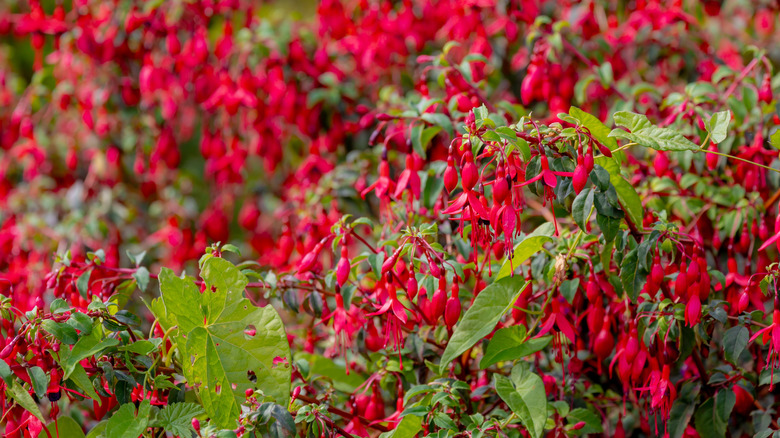
So-called "hardy" fuchsias handle mild winters in the ground. In my neck of the woods, the most I have to do is cut back the foliage a little and add a deep layer (4 to 6 inches) of mulch. The best mulch for your garden beds depends what type of bed it is. For established perennial beds, go for wood chips, as they are long-lasting but still biodegradable. In beds you work regularly, go with straw, compost, well-rotted manure, or shredded leaves. If there's a particularly hard cold snap, then I add a frost blanket for a little extra protection. I also leave dead stems pretty tall so that they catch any snow, as additional and effective insulation. You can also add a burlap screen to act as a wind break if your fuchsia is in an exposed, windy spot.
If you're going to containerize your fuchsia, dig it up a few weeks before the first frosts, trim it back lightly, pot it in a container large enough to accommodate the roots without cramming them in. The fuchsia will need a cool, frost-free space with plenty of light. Also be sure that the pot isn't sitting on concrete or metal, as it'll pull the heat away from your plant and damage the roots. Keep the plant barely moist, as you're just preserving the root system.
Garden chrysanthemum: Mulch crowns after the ground freezes
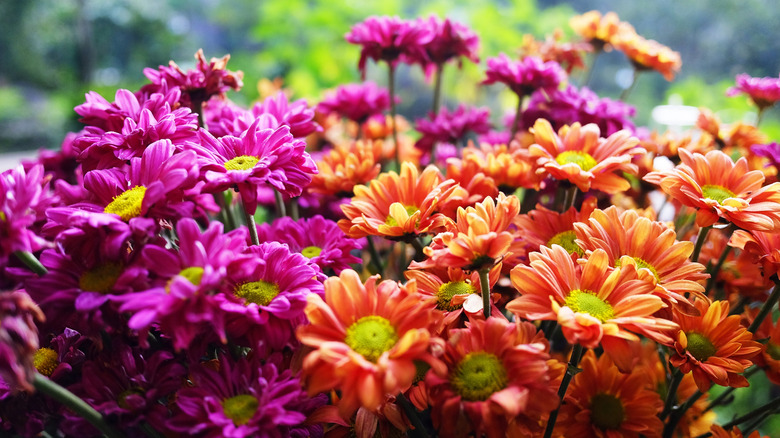
Garden mums are fairly resilient and don't need lifting, but they still need a little bit of care and protection. Established plants and early first-year plantings do better than those recently planted, because their root systems are deeper and more knitted-in. Wait for frosts to blacken the plants, then mound 4 to 6 inches of straw (never hay) or loose shredded leaves over the crowns.
Leave stems, unless they're diseased, as they'll catch snow and add an extra layer of insulation. Make use of burlap screens in exposed sites and frost blankets for sudden hard frosts. Whenever you're overwintering perennials outdoors, it's a good idea to keep plenty of fleece, like this Nonmon Plant Cover Freeze Protection, at the ready.
Pineapple sage: Take cuttings and overwinter indoors
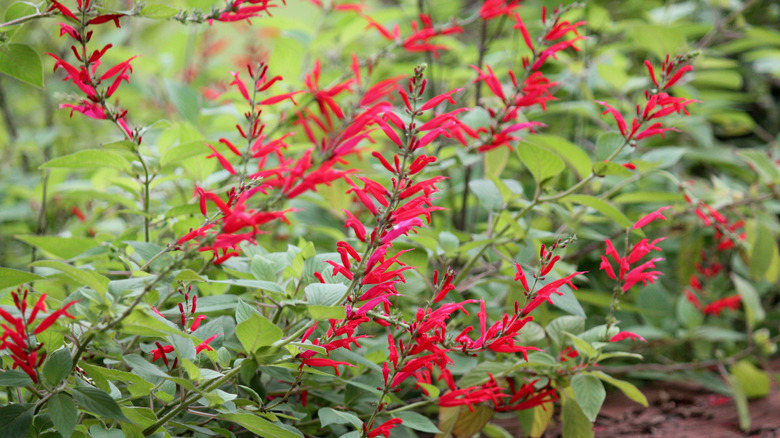
I adore pineapple sage with its bright red flower spikes that attract hummingbirds and pollinators late in the season. But it's a tender perennial and a single frost can kill it off. Because it can be a little fussy, I take cuttings in late summer and, once rooted, pot them up in my conservatory. But I also overwinter the established plants.
You need to dig up and pot the mature plant before temperatures dip below the mid-50s Fahrenheit. Prune off any unhealthy-looking foliage and dead stems, then pot into a roomy container. Water sparingly to maintain root health and position it in the sunniest spot you can find, where there's good air flow and temperatures stay above 60 degrees Fahrenheit. If conditions aren't bright enough, you might have to add LED grow lights.