12 Methods For Melting Ice (& Adding Traction) Without Rock Salt During Winter
We may receive a commission on purchases made from links.
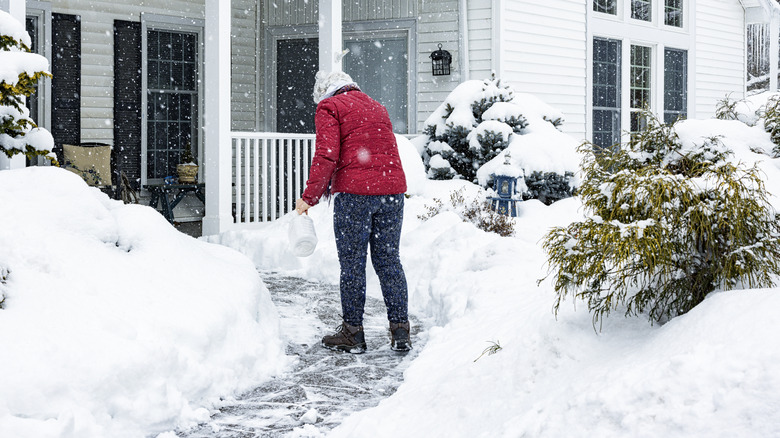
Rock salt is great at preventing slips on concrete, pavement, and more. Add in its cost-effectiveness, availability, and ease of use to the mix, and it may seem like the perfect solution for melting snow off your property. Sadly, there are quite a few downsides of using too much deicing salt in the winter. It is damaging to concrete and asphalt surfaces ,and it pollutes water bodies and soil, potentially harming aquatic life. It can also be toxic to your pets, and it can destroy nearby vegetation across your lawn. Plus, it's not useful beyond 15 degrees Fahrenheit.
That being said, we have created a list of less-damaging alternatives like calcium chloride, CMA, sugar beet juice, sand, and chicken grit to help you out. Don your winter gear, safety goggles, and rubber gloves, and get ready to dive into the 12 best methods for melting ice and adding traction during winter. Each option has its own strengths, so choosing the right one can help you protect your driveway, plants, and pets while keeping walkways safe.
Calcium chloride works well in extremely low temperatures, melting ice fast
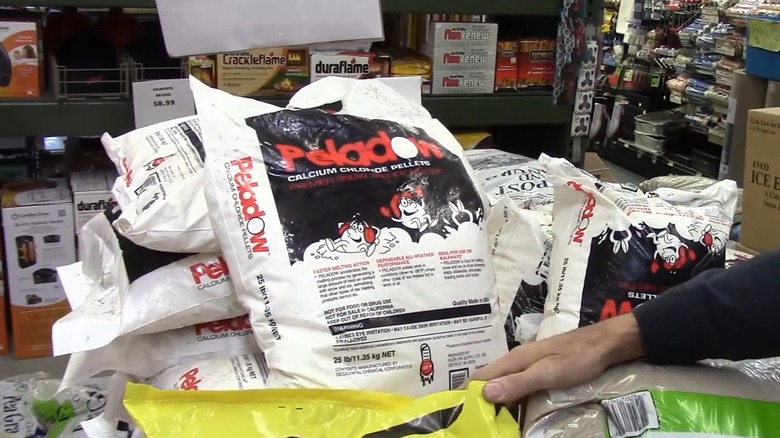
If you experience cold and icy winters, replace rock salt with calcium chloride. The ionic salt is hygroscopic and draws in moisture from its vicinity. It gives off heat when it comes into contact with water, working faster than rock salt to melt ice. You can use it even when the temperature outside dips low — it'll turn snow into liquid brine up to -25 degrees Fahrenheit. Moreover, it's less risky for aquatic life, coaxing homeowners to ditch salt and use this item to melt snow and ice away. Although the initial cost is higher than rock salt, calcium chloride works faster and doesn't require as many reapplications.
You can grab a pail of Home and Country USA store's Calcium Chloride Pellets from Amazon to melt ice from your driveway and sidewalk.Follow the manufacturer's guidelines, and apply calcium chloride before or during a storm to prevent snow and ice from bonding to the pavement. Reapply as needed once accumulation begins, and shovel away loosened slush so it doesn't refreeze as temperatures drop. Use a light, even layer rather than overapplying, since calcium chloride continues to work at very low temperatures. However, it can damage nearby plants and also be dangerous to your pets. Additionally, it can be harsh on stone and brick surfaces and recently installed concrete, and it may rust metal (like your car).
Magnesium chloride is a fast-acting, environmentally safer option but can be slightly expensive

In case the temperature in your region doesn't plummet below about -10 degrees Fahrenheit, use magnesium chloride to melt ice around your home. It'll absorb moisture from its surroundings and transform the snow to brine at a rapid pace. Better yet, it leaves little remnants behind, minimizing the need for cleanup. Plus, it's less irritating to pets' paws, and somewhat less damaging to plants, concrete, stone, and tile.
To use a product like Harris' Fast Acting 100% Magnesium Chloride to melt ice, remove loose ice first. Using your leaf blower is a simple but brilliant hack to clean up snow easily. Then, apply it evenly over the ground to reduce the ice to liquid brine. You can even apply it when snow starts falling to make quick work of the accumulation. Alas, you'll require a substantial amount to clear out your driveway. It's because magnesium chloride rarely leaves residue, so you'll have to apply it more to dissolve fresh snow. This also makes it more expensive than rock salt and calcium chloride. Plus, it won't work if you live in cold regions, since it can't melt ice at the same rate as calcium chloride.
Sugar beet juice products can also melt ice
Don't like the cons associated with chlorides? Sugar beet brine is being used as an environmentally friendlier de-icer in some towns, since its sugars help prevent ice from bonding to pavement and keep rock salt effective at lower temperatures. It's best applied before or during a storm rather than directly onto deep snow, and while gentler on soil and vegetation, it shouldn't be used on brand-new concrete or heavily on garden beds.
Beet-based de-icers used by municipalities are made from processed sugar-beet molasses blended with salt brine, not fresh beet juice. While you can technically juice golden or white sugar beets at home, the mixture isn't as effective as commercial beet brine and can spoil quickly. Instead, you can purchase a commercial-strength beet juice deicer online, like the Eco Solutions Ice Melt. Apply beet brine before or during a storm to help prevent ice from bonding to pavement, but avoid using it on brand-new concrete or in areas where staining might occur.
DIY a warm water, dish soap, and rubbing alcohol concoction

No shovel? Let a DIY mixture take care of your snowy driveway. You just need some rubbing alcohol, warm water, and dish soap to melt the thin layer of ice making it difficult to tread on. The dish soap will keep the refreeze from bonding tightly while the rubbing alcohol will bring down the freezing point of ice. Simultaneously, the warm water will assist in melting snow chunks, de-icing the snow tracks in a jiffy.
Fill a large spray bottle with ½ gallon of warm water, ¼ cup of rubbing alcohol, and a few drops of dish soap. Shake to combine, then spray it over thin ice or frost to help loosen it. The mixture will work quickly on light ice, so keep a push broom handy to clear the slush before temperatures drop and it refreezes. If you're dealing with more than a light snowfall or thin ice, this solution may not work, as the alcohol might not be enough to keep the water and ice from re-freezing into a dangerously slippery mixture, so test a small area first, and exercise caution.
Calcium magnesium acetate is biodegradable and less harmful for your yard and driveway
Calcium magnesium acetate (CMA) is a chloride-free alternative to rock salt. Made of dolomitic limestone and acetic acid, it keeps snow and ice particles from sticking to each other or bonding with other surfaces. This also stops them from re-freezing and turning your pathway slick. It's biodegradable and breaks down into magnesium, calcium, water, and carbon dioxide. These ingredients don't affect the plants adversely — they're much safer for your pets, too. It is also gentler on your concrete path.
Since it doesn't melt ice, apply a product like Natural Alternative's 100% CMA before a storm to weaken the bonding between snow particles. Ideally, you'll require about 6 pounds every 1000 square feet, but stick to the manufacturer's instructions for the exact measurement. Unfortunately, CMA works only when the temperature hovers around 20 degrees Fahrenheit; its effectiveness goes down at temps below this. Further, it relies on the "prevention is better than cure" principle and won't break up the bond if the fallen snow has already bonded with your driveway — you'll have to use a plow or shovel to get rid of the icy slush. However, its biggest downside is that it's quite expensive and can cost several times more than the humble rock salt.
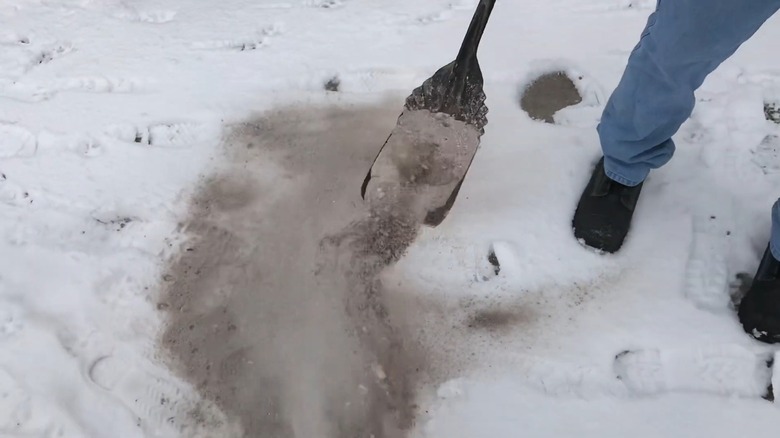
Sand helps create traction in cold regions
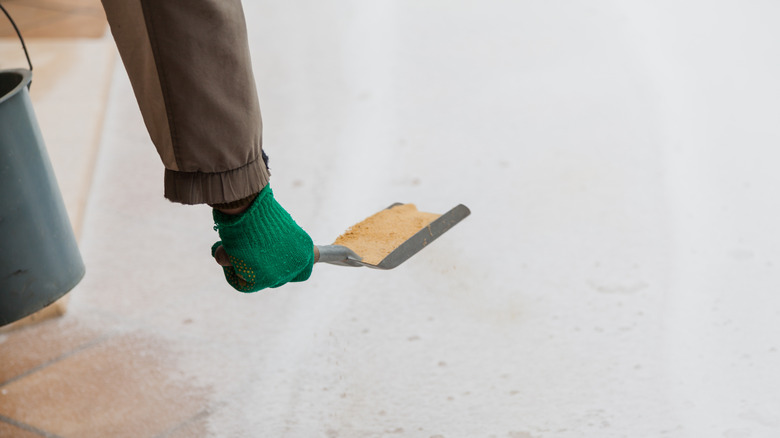
If you don't want to use chemical ice-melts and organic solutions won't work in uber cold regions, get sand. Even though it won't melt the snow, it'll create traction between the ground and the soles of your shoes or your automobiles' tires. The improved grip reduces your chances of slipping or the vehicle skidding on a slippery patch. Plus, it'll absorb the sun's heat (darker-colored sand is better), so it'll prevent the snow beneath from bonding too well with your driveway. Further, it won't hurt concrete or stone surfaces. If it gets washed away, it won't hurt aquatic life or deteriorate the quality of water (However, it might clog your storm drains if you use it too heavily).
Applying sand over snow is as simple as it sounds — get a little in a bucket and use a scooper or a small cup to sprinkle it around your drive- or walkway. You can even apply it to your stairs when you get black ice or when the layer of snow is too thin to be shoveled. Don't forget to wear a mask to avoid triggering any allergies. Also, be prepared for the cleanup, as sand will stick to your shoes and your pet's paws and dirty your entryway and carpets. Leaving it unattended in your driveway will also turn the paths slick once spring arrives, so cleaning your walkway is important, too.
Wood ash is a no-cost alternative to sand
Don't have sand leftover from your previous projects or want to spend money on specialized products? Collect some wood ash from your wood burning stove or fireplace and use that instead. It'll work the same as sand and reduce the slickness of snow, so your shoes and vehicles have something to cling to. Plus, its dark shade will allow it to absorb the sun's heat and work on melting the ice beneath. Just use it sparingly and avoid spreading it on garden beds — the potassium-rich ash can raise soil pH and disturb plant health once spring arrives.
Let the ash in your fireplace or stove cool down completely; you shouldn't see any sparking embers within or it may lead to fire accidents. Scoop it out carefully and store in a dry bucket with a lid — you don't want it getting wet and clumping together. Apply it on your walkway or stairs with a light hand. Try to remain downwind, or the ash might blow right back at you. Additionally, avoid stepping on sprinkled wood ash if you don't want to mess up your clean house. Don't use ashes from pressure-treated or contaminated wood as this can be harmful to the environment. Also try to avoid wood ash from scraps of wood that may have contained any debris.
Wood chips aren't messy and provide traction all winter long

If you'd rather not track sand or ash into your home every day, try out wood chips. They offer traction all winter long since the chips remain in place once applied and usually survive the strenuous freeze-thaw-freeze cycles. This means you won't have to keep applying them as winter progresses. Although you'll have to opt for a thin second layer if there's a thick layer of snow concealing the chips beneath. Once the ice melts a little, they'll resurface again and harden where you initially spread them (or in its immediate vicinity). Many wood chips being sold are treated with magnesium chloride or a pH-neutral brine (Ecoicegrip uses a specific formulation), they can handle freezing temperatures down to around -20 degrees Fahrenheit.
Their application is quite simple; you just have to spread the chips aiming for around eight to 12 chips per footprint. In case you already have a slick layer of ice on the road, use a little rock salt or another de-icing solution based on the weather to melt the top layer a bit. This will create an opening for the chips to establish a stronghold. Before you glide along the wood chip-decorated path, ensure they're bonded to your walking area. When winter gives way to warmer temperatures, sweep the sun-dried chips into your garden or roadside vegetation and they'll decompose naturally over time. Alternatively, vacuum them up and store them for next year.
Chicken grit adds immediate traction to slippery and slick surfaces
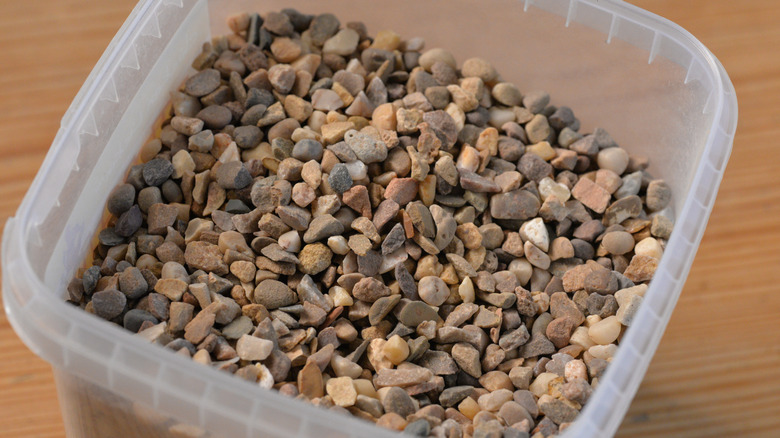
Chicken grit is a good option for people who don't like the mess sand and ash leave behind or the waiting period associated with wood chips. Also known as traction grit or cherry stone, the crushed granite pieces will offer immediate traction and won't require reapplication unless they're intentionally swept away, blown away by a strong gust, or get buried under a thick layer of snow. Plus, they're eco-friendly and more economical than rock salt. You can even save the grit after the weather turns and reuse it the following year. However, you'll have to keep an eye out for your pets since the hard particles might get embedded in their paws and cause pain or injury.
The application process is quite simple. Get a pack of quartzite chicken grit, like Mile Four's 100% Natural Mineral Poultry Grit, and decant a small amount into an old wide-mouthed plastic bottle. Avoid using soluble grit, or dissolve and turn into a slushy mess. You also don't want to buy too large pieces, or you'll have difficulty walking on them.
Create a salt brine solution to keep ice from sticking to your driveway
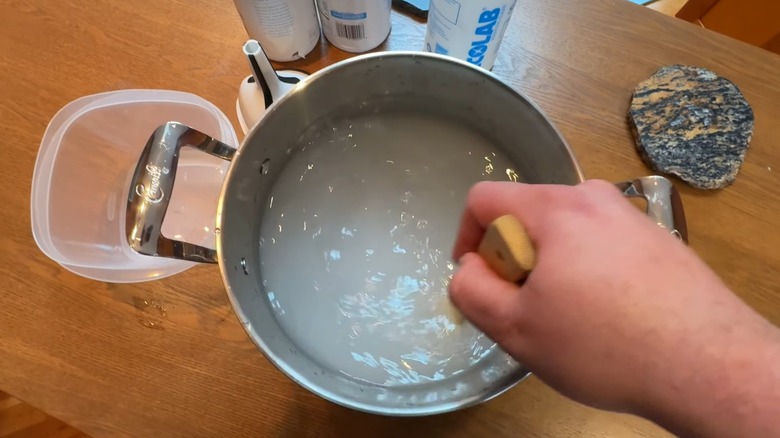
A salt brine solution (made of salt and water) is a great option if you want to keep snow and ice from bonding to your driveway and stairs. In addition to minimizing the chances of you twisting your ankle or slipping on your slippery pavement, this proactive step will make shoveling easier. Plus, this is a more cost-effective method than utilizing rock salt granules as you'll be using about 30 to 50% less salt. The runoff also won't be as damaging to the plants and water bodies. However, the temperature outside must stay around 15 degrees Fahrenheit for it to be effective.
To create a salt brine solution at home, add 1 gallon of water to a pot and warm it up. In the meanwhile, measure out 2.3 pounds of salt and mix it in with a spatula or paint mixer. Ensure you wear rubber gloves, protective goggles, and rubber boots to avoid skin dryness or irritation. Once the brine is ready, pour it into a handheld or pump sprayer and apply it in thin lines set 6 inches apart. The brine will start working immediately and instantly melt a thin frost or glaze of ice (but not thicker chunks).
Prepare in advance with heated mats lining your porch
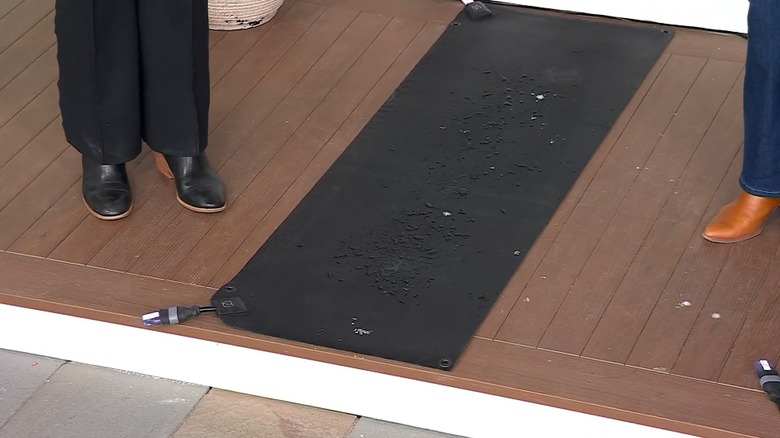
Looking for a low-effort method to melt ice off your porch? You may want to invest in heated mats. You can lay them down before winter arrives and simply turn on the switch when it starts snowing outside. The integrated heating elements give off heat when they're connected to electricity, which, in turn, melts the snow and ice deposited on top of a mat. Moreover, you won't have to worry about the paved or unpaved surface bearing the brunt of the salt or chlorides, or deal with messy choices, like ash and sand.
To get started, purchase a few heated mats for your walkway, patio, or porch. Measure the space (calculate the area horizontally or vertically based on how you'd like snow clearance) and check the mat's dimensions to calculate the exact number of units you'll need. We like Heattrak's Heated Snow Melting No-Slip Mat with Power Unit. There are four different sizes available, so you can pick them per the space you're covering. Plus, you can interconnect them. But ensure that your outlet can take on the extra load before plugging them in. You'll even need a durable and water-resistant extension cord extender in case the outlet is far from your door. In case you have an elevated porch, get a mat specifically for stairs, such as Heattrak's Stair Heating Mats. Despite their advantages, heated mats can be pretty expensive and burn a hole in your pockets if you have a long walkway.
If budget isn't an issue, a heated driveway can be a permanent solution
In case you experience very cold winters and have to deal with snow for a few months on end, upgrade your regular driveway to a heated one. The built-in electric or hydronic radiant heating system will warm up the surface upon ice detection and melt it without manual interference. This modernization may even boost your property's value.
Sadly, the cost to upgrade your driveway is in the thousands. To elaborate, an electric heating system will rack a bill between $12 and $28 per square foot. Excavation costs for your existing pathway will further drive the price higher. You'll also have to hire an electrician to fix wiring or boost your property's load capacity. The ultimate price will depend on your driveway's length and material, whether you'd like automatic or manual controls, and labor charges.