DIY A Sofa Table That Doubles As Extra Living Room Seating
The living room is a central gathering place in the home. Whether you like to chat, watch television, or eat food, it is crucial to have enough seating and surfaces for everyone in your household and guests. Oftentimes, this means pulling chairs from the dining room or folding chairs from the garage, but the mismatched seating arrangements can ruin the atmosphere you've curated. If you find yourself lacking seating frequently, it may be time to explore some cozy living room seating ideas that are off the beaten path to make the room more stylish and comfortable for everyone. One project to consider, coming from Instagram creator @farmhouseish, is that of a sofa table with arches on the front that both look fantastic and are incredibly practical.
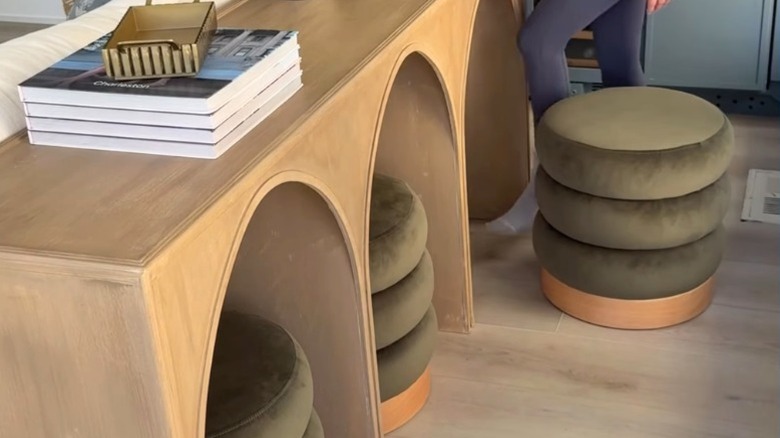
This DIY console table sits nicely behind a sofa, providing extra space for decorations, books, plates, and anything else you need a solid surface for in your living space. Its special feature, though, is the arched design between four table legs. The legs are spaced out, and the arches are high enough to house a stool that might be pulled out when you need extra seating and stored completely out of the way when you don't. Similar tables from high-end brands can cost thousands of dollars, and they may not be the perfect size for your sofa and stools. A DIY option, though, is more affordable and gives you the chance to customize everything from the size and color to the materials. Plus, while it's a time-consuming project, it is doable for an ambitious DIYer with the right tools.
How to DIY an arched sofa table
To build this DIY table, you will need wooden boards (¾-inch edge-glued panels are often more budget-friendly than solid wood), wood glue, 1 ¼-inch nails, decorative wood trim, flexible window trim, paint, and stain. Measure your space to determine the best table size, and plan how to space your living room furniture to get the ideal fit. A standard console table measures 36 to 48 inches wide and 12 to 18 inches deep. The standard height is between 28 and 32 inches. The size should be customized to your sofa, the ideal width being about two-thirds of the width of the sofa. The height should be level with or just below the back of the sofa.
To assemble the table, cut a board to your desired dimensions for the top of the table. Then, cut two additional boards to act as the outside legs. Secure them to the ends of the top with wood glue and nails. Next, you'll make a smaller table to nest perfectly into the first table. Cut another tabletop panel that is 1 ½ inches shorter than the first table top (if using ¾-inch boards). Measure and cut two leg panels to attach to the ends of this piece, cutting them ¾ inch shorter than the legs on the larger table. Measure equal spacing for two more sets of legs for the small table, using two boards glued at their faces to make them (so they're twice as thick). Secure the two middle legs to the table top with glue and brad nails. Slide the constructed small table into the larger one, secure the two nested frames with generous amounts of wood glue between the tops and sides, and nail them together on all sides.
Finishing and styling your DIY sofa table and extra seating
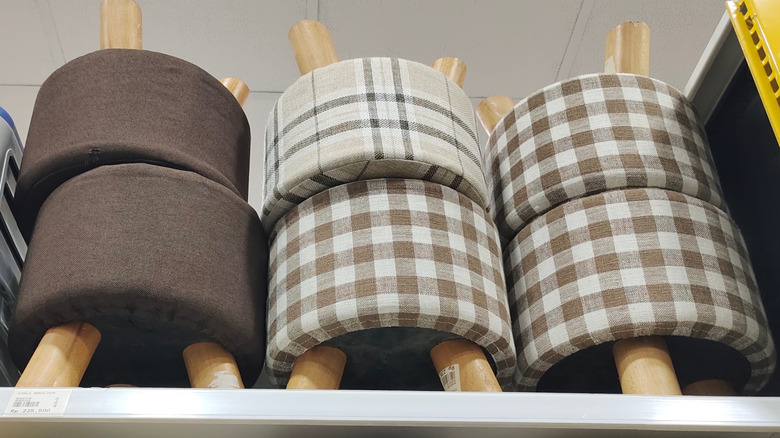
After constructing the table, you can move to the details. Using two pieces of ¼-inch plywood to make the front and back panel designs (cut to match the table's height and width), trace the shape of the arch you want between each leg. Use a jigsaw to cut the form. Start with the smallest potential shape, and test for comfort by holding it in place and sitting on your stool. If needed, expand the arches to give you more legroom and ensure that the stool will slide completely under the table. If you don't yet have seats, consider how you want to decorate with stools in your home so you can choose the right style. Once you're satisfied with the arch shape, add your flexible trim around the arches (ensuring a clean, dry surface) and regular wood trim on the flat edges. The trim should conceal any imperfections and joints and create a polished look. Caulk all of the seams for a clean finish.
Finally, move on to painting or staining. Fill nail holes and imperfections with wood filler, and sand the surface smooth. Painting is a simple option, as you will easily cover the flexible trim that doesn't look like wood. Choose a light neutral color for versatility, or draw the eye by bringing a pop of complementary color to the room. Alternatively, you could apply a gel stain over everything to give it a cohesive, finished feel. When your color dries, add a polyurethane sealing coat to protect your hard work. After all, even though the table can be built for just a few hundred dollars instead of purchased for thousands, you still end up with a gorgeous and durable piece of furniture.