Blend The Eyesore Of A Washing Machine Hook Up With A Seamless DIY
We may receive a commission on purchases made from links.
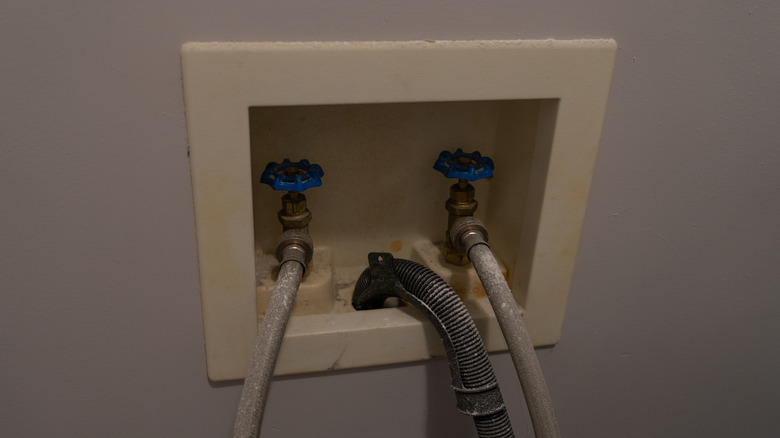
Imagine it: you put the finishing touch on the stylish, efficient laundry room of your dreams. Newly organized cabinets? Check. The right tools easily at hand? Check. Cute detergent dispensers? Check. Everything looks fantastic, except for one thing: the washing machine hook up. Don't panic; thanks to a clever YouTuber, there's a quick and easy DIY to make that eyesore blend right into the background.
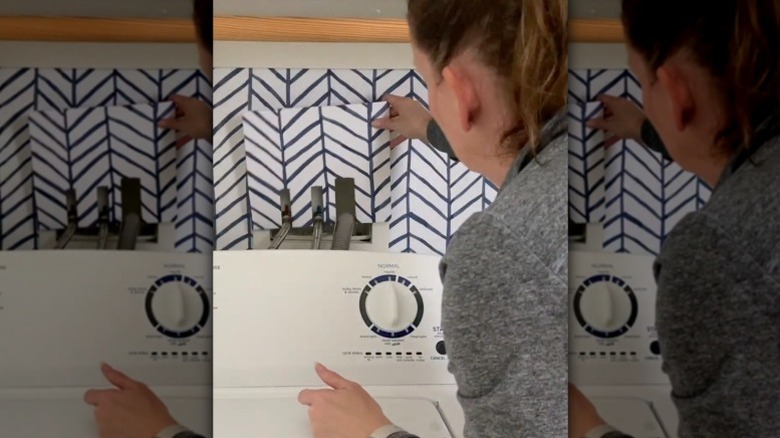
For this DIY, YouTuber The Homes I Have Made cut a piece of foam board to size, covered it with peel-and-stick wallpaper, and used Command strips to hold it in place. The magic of this DIY is in one simple detail: matching the wallpaper on the foam board to the pattern on the wall behind it. This allows the hook up to essentially disappear while still being easy to access quickly if needed.
And, even better, you likely already have everything you need for this simple DIY solution to hide washing machine hook ups right at hand. (Buying everything new? Don't worry; you can pick it all up for under $20.) You'll need a piece of foam board, spare peel-and-stick wallpaper, a spare piece of cardstock, and two Command Strips, plus a craft knife (we love the X-ACTO Precision Utility Knife for this), a cutting mat — such as Fiskars Self-Healing Cutting Mat — or thick cardboard to cut on, your measuring tape, and a pencil.
Use foam board and wallpaper to disguise your washing machine hook up
First, make a template with cardstock. Measure the hook up box, then add an inch (or two for maximum coverage) to the dimensions, and cut the cardstock. Hold it up to check for coverage and trim if needed. Then cut slots for the hoses. Use your pencil to mark the hoses' location and width on the template. The slot's depth is up to you, but we suggest making it at least one inch deep to create a seamless look. Cut the slots, then slide the template in place to check for fit.
Once your template is ready, use your craft knife to cut the foam board. For a smooth edge, keep the blade at a 45-degree angle and use medium pressure. You may have to slice a few times to make the cut, but it's worth it.
To make sure your DIY blends in, position your leftover wallpaper against the wall until the pattern aligns. Mark the edges with a pencil, then lay the paper pattern-side down and, adding a half-inch margin, trim to size. To make it easier to fold, cut small diagonal lines at each corner. Slice a vertical line 75% of the way up the slots, then make a perpendicular line to create a T shape for effortless folding. Do a test fold and add diagonal cuts if the wallpaper bunches. Then remove the wallpaper's backing and adhere it to the foam board. Using Command Strips or double-stick tape designed for wallpaper, like tesa Mounting Tape, to secure the cover in place for a seamless disguise.

