Get Your Garlic Garden Started This Winter Using Only A Bowl Of Water
Winter often feels like the end of the gardening season, but it doesn't have to be. Many vegetables, herbs, and other plants can be started indoors during the colder months. Not only does this give the plants a head start, but it also saves them from the biting frost outside. Garlic, too, can be grown in such a manner during the winter. The best part is that it can be done with nothing more than a bowl of water. This method leverages basic hydroponic concepts. This simply means growing plants in water rather than soil. As you might have already experienced before, if you store bulbs in an area with high humidity, they sprout.
It is one of those winter storage mistakes that many people make when storing bulbs. However, it is not as simple as it sounds, and you will still have to provide some care. You need to choose the right bulbs as well as the cloves to begin with. Be sure to keep in mind that planting garlic in water is not going to give you harvest-ready, full-sized bulbs. It's just an easy way to start garlic that you can then plant in the soil or use as garlic greens in your cooking.
Preparing and Initiating Garlic Sprouts in Water
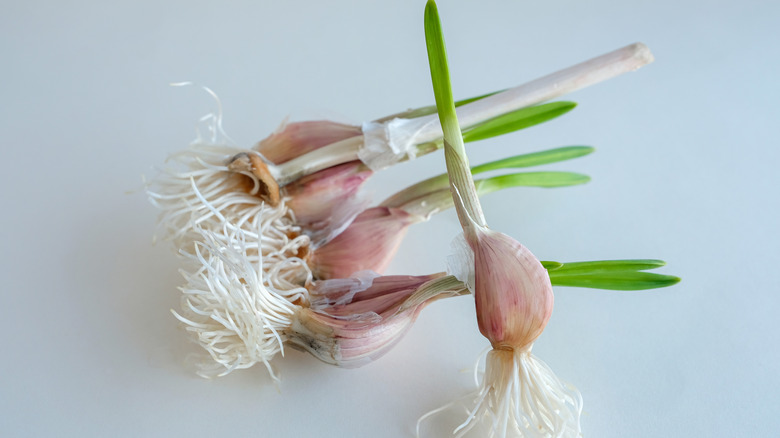
You need to choose healthy stock to start your plants, so start with a large, healthy, and firm garlic bulb. Make sure the bulbs you choose are free of soft spots and mold. Avoid shriveled or undersized bulbs, which are more likely to produce weak or disease-prone plants. Then, right before planting, separate the garlic bulbs into individual cloves. Separating the cloves too early can reduce your chances of success. When separating the cloves, make sure the papery skin and basal plate stay intact.
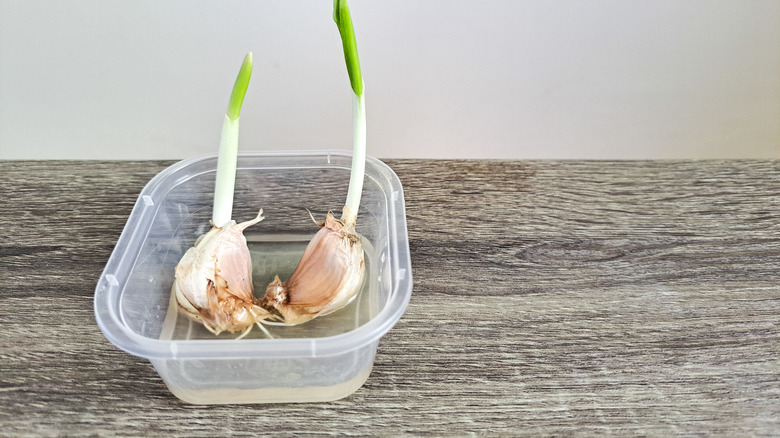
Large outer cloves are usually the best ones to get your garlic garden started in winter. Use a shallow, wide bowl and add just enough water to moisten the base of each clove without submerging it. If needed, you can also put pebbles or marbles and put your cloves on top of them. Avoid submerging the entire clove, as only the root end should stay in contact with the water.
Place the bowl in a well-lit spot, ideally near a windowsill. Now you can use plain water for this whole process, but make sure you change it on a regular basis before the water gets cloudy. Remove the cloves before refreshing the water. Then, in a few days, your garlic should develop roots, and they can be moved into the soil.
Transitioning Water-Sprouted Garlic to the Garden
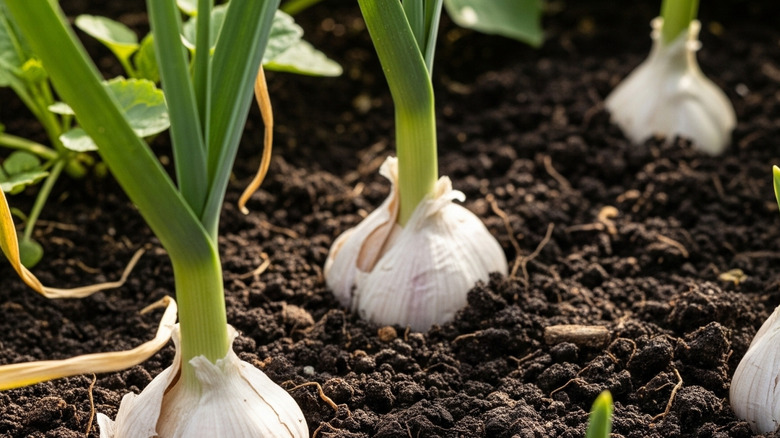
Transplant the cloves once they develop a healthy root system and several inches of green growth. Just make sure that the soil you use is rich in organic matter and is well-drained. The area where you will transplant also needs to receive full sun. Other than that, before moving, it would really help if the sprouts underwent a brief period of hardening off. Hardening off plants simply means gradually exposing the rooted cloves to outdoor conditions.
This prevents the severe transplant shock that can stunt the plant's development or even result in its death. Nevertheless, once the garlic sprouts are hardened off and the soil is ready, put the cloves in the ground with the sprouted roots oriented downwards. When planting in the ground, maintain a distance of about six to eight inches between the cloves and bury them at a depth of about two inches.
After transplanting, water thoroughly to settle the soil, then provide about an inch of water per week. Just make sure you don't overwater. Garlic bulbs need consistent and evenly moist conditions to grow, but too much water can cause them to rot. For the best results, you'll want to use well-amended soil to grow bigger and better garlic.