The Space-Saving Shoe Storage Solution That Fits On Your Door
We may receive a commission on purchases made from links.
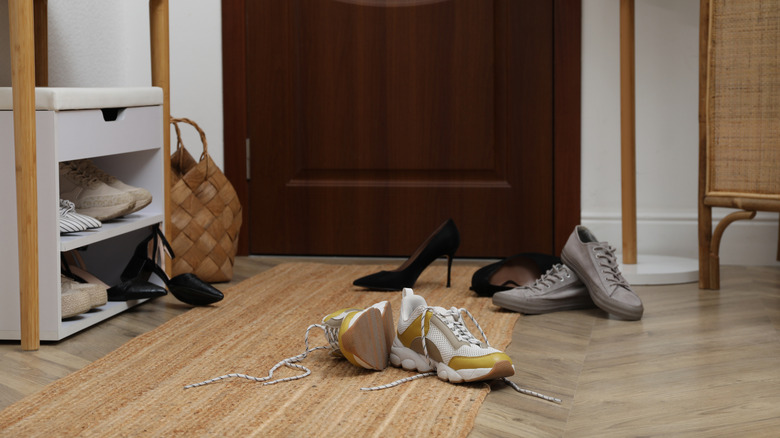
If you've ever tried to keep shoes organized in a small space, you know how quickly they start to take over. A few pairs by the door can turn into a messy pile or your closet floor fills up faster than expected. Shoe storage solutions are often bulky, taking up more room than the shoes themselves. Shelf-style shoe racks sit on the ground and eat up valuable floor space, especially in small homes or narrow entryways. Forget the closet: there's a better way to store shoes in limited space: wall-mounted brackets that store shoes vertically on a door. They get your footwear collection off the floor, clear visual clutter instantly, and make use of the forgotten space you're neglecting for ultimate shoe storage — your door. Plus, they're easy to install and flexible. Add as many brackets as you need or your door can fit.
First, decide which door — or doors — you want to store your shoes on and measure the space. Behind a entryway door or inside your closet door both work well. Using those dimensions, shop around for some wall-mounted brackets. They come in a wide range of styles. Walmart sells a four-pack of sleek Black Wall-Mounted Shoe Racks made from PC plastic for about $63. If you're really tight on space, these Skuntuguang Foldable Aluminum RV Shoe Hangers for about $30 might come in handy. If you prefer to store pairs side by side, you might like the MyGift Premium Acacia Space-Saving Footwear Storage System. Check if the brackets you buy come with sturdy installation parts. If they don't, you might have to also get screws or adhesive strips.
How to store your shoes vertically with wall-mounted brackets
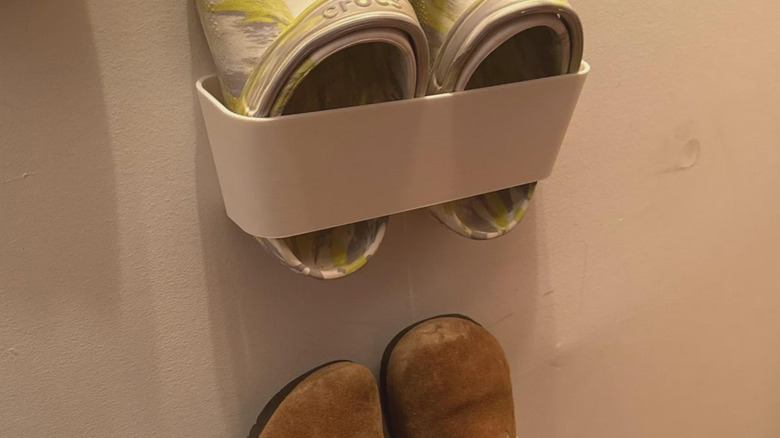
Once you have your shoe rack in hand, the installation process is simple. Clean the mounting door to ensure a secure surface for the screws or adhesive strips. Adhesive strips are best for renters or homeowners looking for a damage-free solution, while screws provide long-term stability. Then mount the rack according to the manufacturer's instructions. The instructions are likely bespoke to the product, so be sure to read any pieces of paper that come with your product carefully. Once the brackets are up on the door, this chic DIY to completely organize your shoe closet — or any space you need it — is ready to use. Simply slide your shoes in toe-first.
Your shoes will sit upright and are easy to see, even when the slim brackets hold multiple shoes. This makes it less likely that you'll forget what you own or lose one shoe of a pair in the back of your closet. How you arrange the shoes in the brackets is up to you and your needs. Customize the setup to fit your routine. Install a few racks down low to hold frequently worn sneakers and slip-ons. Store seasonal and outdoor footwear on brackets in more out-of-the-way locations. To keep you from trekking dirt indoors, install some brackets behind the door to your mudroom, pet parlor, or backyard shed for gardening shoes, work boots, or rain boots.