Turn Dollar Tree Gift Boxes Into High-End Christmas Decor With An Easy DIY

Whether you want to participate in the Ralph Lauren Christmas trend that's dominating 2025, or simply want high-end holiday decor that won't break the bank, DIYing is a fun and affordable way to achieve your desired aesthetic. Dollar Tree gift boxes, with their various cute designs, can easily be made into chic holiday signs if you have some scrap wood, sand paper, and a little Mod Podge on hand. This easy DIY is proof that you can create elegant, simple holiday decor on a Dollar Tree budget if you just harness a little creativity.
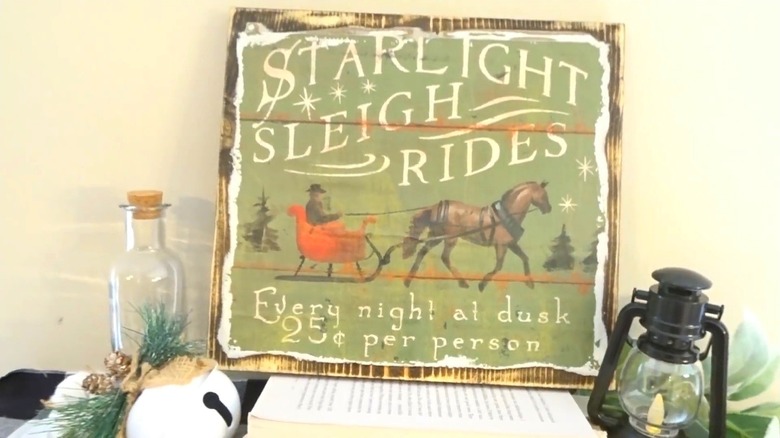
For this DIY, you will be transferring the image from a gift box onto a block of wood to create that rustic, expensive look. There are a few different ways you can tackle this craft, and there's also plenty of room for customization and personalization. For example, a cricut is not necessary, but if you do have one you can use it to add a personal touch to your finished sign by adding your family name.
Transfer a gift box image to wood for a beautiful holiday sign
Before starting, make sure you have all of your materials. You'll need a piece of wood roughly the same size as the image on your gift box. If you don't have any scrap wood on hand, you can also use a Cooking Concepts Bamboo Cutting Boards from Dollar Tree. A decorative gift box (or gift bag), Mod Podge, and an electric sander or piece of sandpaper. Optional supplies include an iron, parchment paper, wood stain, and either a cricut or a stencil to add a personal touch.
For the first method, apply a layer of Mod Podge to your wood and wait for it to dry. Then, place your image on the wood, cover it with parchment paper, and iron over the image to help it adhere to the wood. Next, use your eclectic sander to remove excess paper and rough up the edges of your image. Finally, use wood stain on the exposed wood to darken it up.
For the second method, place your image on the wood while the Mod Podge is still wet, then cover the image with more Mod Podge. The following sanding and staining steps remain the same. For a nice finishing touch, you can add a few pieces of foam to the bottom of the wood so it won't scratch the surface you place it on. If you want to make use of both sides of the wood, consider adding a Halloween or Thanksgiving image to the reverse side so your sign can be used for multiple holidays. And there you have it, a creative Christmas decoration you can make with household items.