12 Simple Soil Additions That Will Help These Common Herbs Thrive
We may receive a commission on purchases made from links.
As a master gardener who specializes in organic growing and permaculture, I'm a little obsessed with soil. That crumbly brown stuff is the foundation of your entire garden. It doesn't matter if you're growing ornamentals or edibles; if you don't have healthy soil, you'll never have healthy plants. Truly healthy soil is alive. It's rich with balanced nutrients and trace minerals and is surprisingly biodiverse.
For herbs, soil impacts flavor, aroma, regrowth, and health. Herbs often just get lumped together as "the herb garden" or a few clumps all crowded together in a sad raised bed by the kitchen door. And while it's true that they are all edible and flavorsome, they do actually have different needs.
The right soil amendments bring balance and give specific herbs the nutrients they need to thrive. Some additions are fast-acting, like liquid feeds and fine powders, and these tend to add very specific nutrients to a targeted area. There are also some slower-release amendments, like mulches and composting-in-place, that are slower to work but build healthier soil overall, so you'll need fewer fast-acting amendments long-term. I'm focusing entirely on natural additions here, because they're effective, don't cost much, if anything, and leave your soil healthier in the long run.
Blood meal is high in nitrogen and great for leafy herbs
Blood meal sounds exactly like what it is. It's dried, powdered animal blood. Yes, it sounds a little gross, but it's incredibly useful. Blood meal, like Burpee Organic Blood Meal Fertilizer, is a potent, high-nitrogen, animal-based soil amendment that you only need to use in small amounts. Because it's so high in nitrogen, blood meal is great for leafy growth, so don't use it late in the year unless you're treating the herb like an annual; otherwise, you'll get a flurry of new growth that the frost will kill, which weakens the plant as it goes into winter. Instead, reserve it for leafy herbs, where you want as much leafy growth as possible during the growing season.
Apply in spring to basil, parsley, cilantro, mint, and similar leafy herbs. Woody salvias like sage and rosemary can also benefit from a light application of blood meal to give them a little boost as they come out of winter dormancy. Follow the instructions on the packet, but don't be tempted to overdo it. Too much nitrogen too quickly can soften growth and weaken plant cell walls. Plus, it can reduce essential oil concentration. This makes the herbs less flavorsome and aromatic. You can top dress lightly, being careful not to get right up against the plant's stems, as you don't want to cause nitrogen burn. I like to scratch blood meal into the top inch or so of soil, so that it doesn't just get washed away in the first downpour.
Bone meal boosts calcium and phosphorus evenly
Bone meal, another animal-based soil amendment, is finely ground animal bones. It is a slow-release fertilizer that has a nice, balanced ratio of calcium and phosphorus. Burpee Organic's bone meal is a great choice if you want to use it in your garden. This combination helps herbs and other plants to build stronger root systems and, for perennial herbs, develop a stronger, healthier, long-term structure. Bone meal is most helpful for new plantings, poor soil, divisions, and transplant shock recovery. Woody perennial herbs like thyme, oregano, rosemary, sage, and lavender prefer high calcium levels. Interestingly, so do many Mediterranean herbs, as they originate from chalky, calcium-rich areas. Chives also do better with higher calcium levels.
For new plantings, divisions, and planting out young herbs into their final position, sprinkle in a little bone meal (again, follow the package instructions for the quantity) into the bottom of the planting hole and add a light covering of compost before planting the herbs to avoid root shock from too much immediate calcium exposure. For established plants and herb beds where calcium and phosphorus are depleted, add it as a light top dressing or scratch it in, much the same as blood meal. Avoid going overboard, though, as too much of either calcium or phosphorus can be detrimental to plant and soil health. You need overall balance, so only amend the soil if you actually need to.
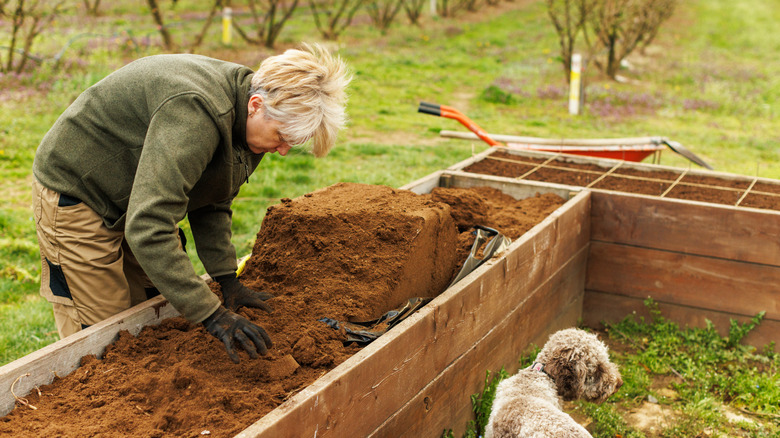
Veg scraps with composting in place, or trench composting
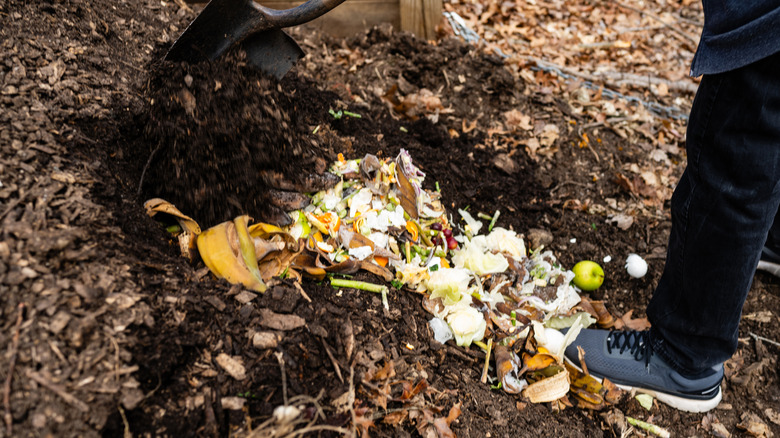
Trench composting, or composting in place, is probably my favorite way to amend soil for every plant. It's ridiculously simple, efficient, and effective. And it's the easiest way to compost without a compost bin. There's minimal manual labor involved, and you don't have to spend money on it. Plus, there's no back-breaking turning of the giant compost heap every couple of months. This method creates a slow, steady nutrient release that also improves soil structure over time. And it benefits all plants, because the nutrients are relatively balanced and they break down comparatively slowly. Faster than conventional composting, but slower than a fertilizer-type amendment. However, woody herbs that dislike sudden, rich feeding, along with many perennial plants, do particularly well with this method.
Composting in place is super straightforward. You dig a trench between rows of plants and pile the soil along one edge of the trench. It doesn't need to be super-deep; even six inches is adequate (a foot is preferable). And then you add your raw fruit and vegetable waste from the kitchen whenever you have it. Fill a little bit of the trench with compostable scraps, and cover that bit with soil. And so on, until the trench is full. Then start a new one somewhere else and repeat the process. Cut your scraps small for faster breakdown and nutrient release. And obviously avoid things like potato peels, which can potentially take root and produce potato plants. Similarly, don't put rotten or mouldy food in the trench, and never dairy, oils, meat, or anything cooked.
Well-rotted manure slowly releases nitrogen and trace minerals

Well-rotted manure is a potent source of nitrogen, as well as having good levels of trace minerals, phosphorus, and calcium. It also helps to improve soil structure because it's full of rough organic matter. With manure, age makes a difference. Fresh manure is too "raw" and will burn plants and roots. It has too much ammonia, nitrogen, and salts. Plus, there's the risk of introducing viable weed seeds. And fresh manure carries the risk of pathogens like E. coli, which can potentially be transmitted to humans (and pets). So, you need to be careful when adding manure to your garden. Well-rotted manure is the way to go. I give it at least a year in a covered pile so that it gets as hot as possible for as long as possible. This helps to break down any pathogens, kill off weed seeds, and let the ammonia and nitrogen settle to more acceptable levels. You can also buy well-rotted manure or buckets of chicken manure pellets that are ready to use.
While all herbs appreciate a manure application in the winter, clumping herbs like chives and perennial herbs like rosemary really do well. Although it's high in nitrogen, the nutrients are released slowly from composted manure, so applying it in winter as a mulch won't fuel new leafy growth until spring. Treat it like any other garden mulch, keeping it a few inches from the base of plants, and waiting to apply it until the ground freezes.
Ground eggshells add calcium and fend off slugs and snails
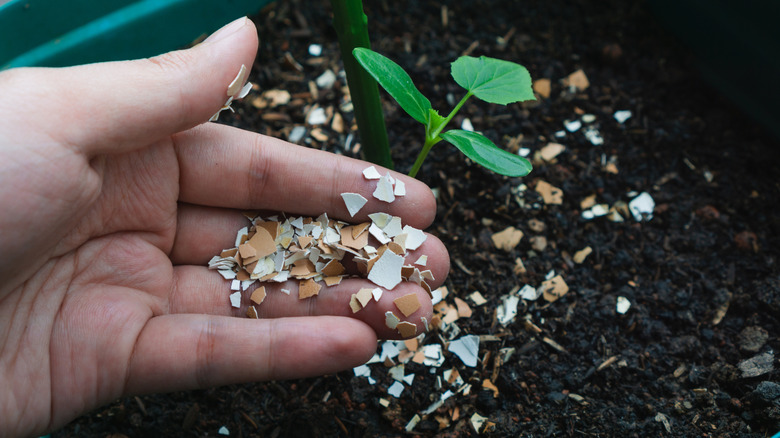
Eggshells are surprisingly useful in the garden. They provide two key benefits. Firstly, they are an excellent source of calcium for Mediterranean herbs and woody herbs that need the nutrient to thrive. Secondly, slugs and snails dislike crossing them, making them a great line (literally) of defense for vulnerable leafy herbs like basil.
There's a bit of prep work required for successful eggshell application. Start by washing your eggshells, then pop them in the oven to dry off. I tend to wait until I've cooked something, then turn the oven off and set the eggshells, separated, inside, and just leave them in there for ten minutes or so. Then I cram them in a glass jar until it's full, or I have enough to make it worthwhile to make a batch of powder. I use this Amazon Basics electric coffee grinder, designated just for eggshells. The finer the eggshells, the faster they'll break down and release their calcium. So I use a two-pronged approach. Where I want to boost calcium fairly quickly, I grind the shells to a powder, then scratch them into the top inch or two of soil. Where I want to fend off slugs and snails, I keep the eggshell particles chunkier so they stay sharp, then I sprinkle them in a circle a few inches away from the base of vulnerable plants.
Coffee grounds feed soil organisms and improve soil structure
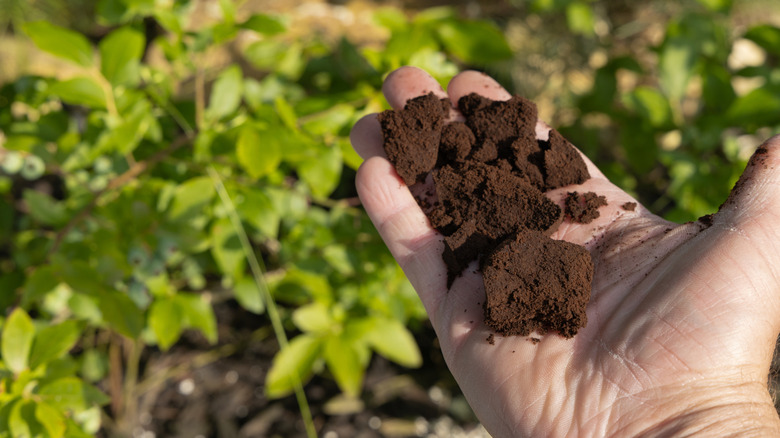
Coffee grounds are a great soil amendment for all plants, but particularly for herbs that struggle in poor, clay, or compacted soils. They boost organic matter, release carbon, nitrogen, and other trace elements and compounds that feed your soil, soil organisms, and your plants, and they actively suppress some soil-borne pathogens, particularly fungal ones. Because coffee grounds don't have a huge amount of nutrients, when used correctly, they will feed both plants and soil without causing growth surges or diluting flavor. This makes them a good option for any aromatic herbs.
I adore really good coffee, so my French press gets a lot of use, and I tend to have large amounts of coffee grounds to use up. I do three separate things with them. I add them to my compost pile, mix them with wood ash to use in the bottom of planting holes, and I dig them into the top few inches of soil. Just dumping coffee grounds around the base of herbs results in dry, hard, compact clumps of grounds that water just runs right off. This crusty mess can block oxygen exchange and reduce water penetration. Digging the grounds into the topsoil or mixing them with a small amount of wood ash solves this problem, as it helps prevent clumping and forms a more balanced feed.
Wood ash raises pH and adds potassium and calcium
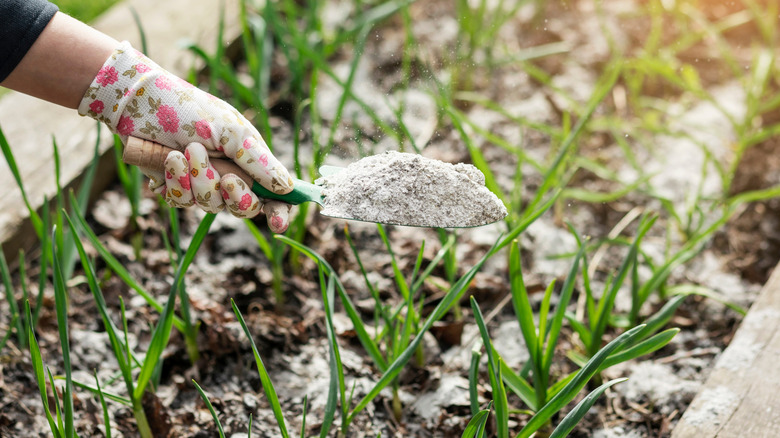
Wood ash is high in potassium, calcium, and other trace minerals. It's extremely alkaline, so it also raises soil pH. Where the soil is too acidic, wood ash is a great balancer (so try not to overdo it). And for herbs like lavender, thyme, sage, and other woody aromatics, all of which prefer a slightly more alkaline soil, it's a great choice in small amounts. Plus, because wood ash promotes overall health and vigor, rather than large amounts of leafy growth, the essential oils in the plants are concentrated and fully flavored.
Potassium and calcium are both essential for good structural herb growth. Among many other vital functions, calcium strengthens cell walls while Potassium makes plants more robust, allowing them to better hold and transport water and making them more resilient to adverse conditions. But overdoing either or applying enough wood ash to drastically alter soil pH can be disastrous. So, only use it if you need it, and only in small amounts from plain, untreated wood. Contaminated ash, whether that's from treated wood or burning non-wood items, is bad for your soil, your pets if they come into contact with it, and potentially your health, too.
I rarely use wood ash alone. Unless I'm working in an area that's way too acidic or has a significant potassium and calcium deficiency, I use a 1:1 ratio of wood ash to coffee grounds, and I scratch in a small amount around the herbs most in need of help. But unless you know your soil and your plants well, I'd always recommend a soil test before you apply much wood ash to your garden.
Fish emulsion is a fast-acting rescue feed
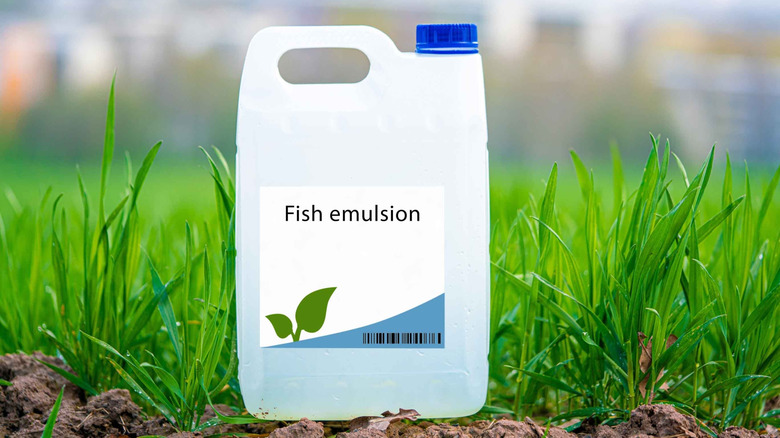
I'm not going to lie, fish emulsion stinks. It's essentially fermented fish guts, heads, and bones, so you can imagine just how potent the scent is in concentrated form. Alaska Concentrated Fish Emulsion claims to be deodorized with natural wintergreen, but I'm not convinced that it will truly mask the intense fishiness. That being said, it's fantastic for your plants. If you've been gardening for a while, you've probably heard the old remedy of burying a dead fish at the base of your plants. It sounds weird, but fish emulsion is the commercial version of burying that dead fish. It's fast-acting and works wonders for stressed and over-harvested plants, as well as pot-bound herbs. I use fish emulsion for any herbs that are old and tired, as it has all of the necessary macro- and micronutrients needed to revitalize and rejuvenate them. For example, I have a very old mass of chives and another ridiculously old sage bush that need a drink of fish emulsion every few years, and it really does give them a new lease of life. It's also great for plants growing in those thin raised beds that were trendy outside the kitchen door a few years back, and for outdoor potted herbs.
Fish emulsion is really easy to use. You just dilute it according to the package directions and water the base of your herbs with it. Use it in spring as the garden is starting to wake up to give your herbs a real growth and strength boost. Just remember not to use it neat unless you buy a ready-to-use formula, as you'll "burn" your plant's roots.
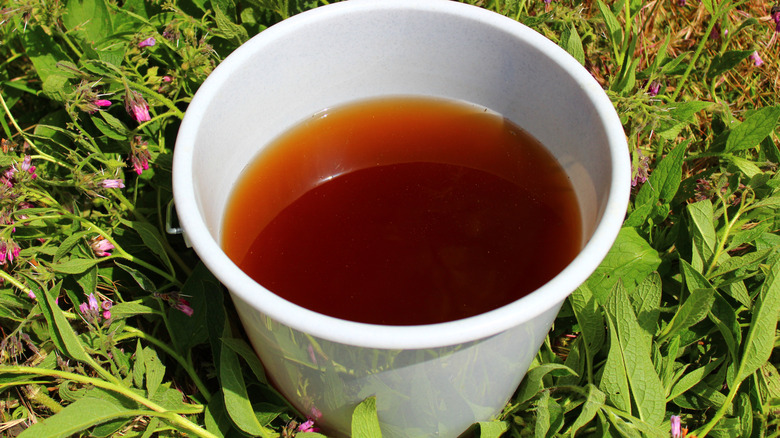
Nettle tea is a free, easy DIY liquid feed
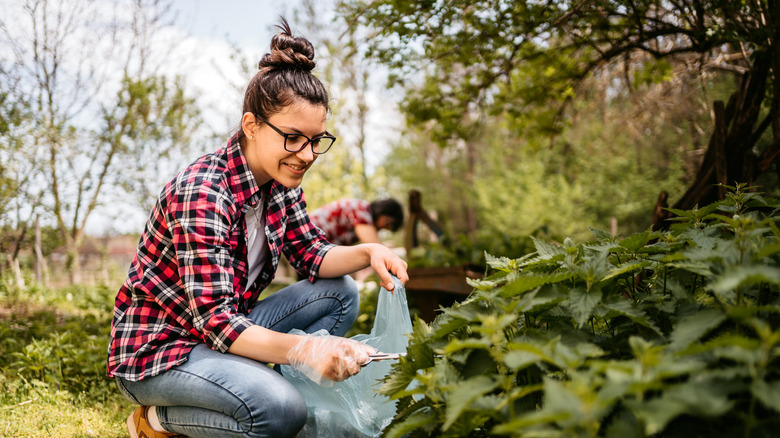
Nettle tea is wonderful. It's among my favorite old-fashioned soil amendments because it's free and so easy to make and use. It does contain some trace minerals, but it's most beneficial for its high nitrogen content. Used in moderation in spring and summer, nettle tea promotes lots of strong, leafy growth for herbs like basil, dill, parsley, and mint. But as with other nitrogen amendments, too much and you'll get "soft" foliage that lacks flavor.
To make nettle tea, get a big bucket and fill it full of nettles. But remove seed heads and roots first. Then top the bucket up with water, cover it, and leave it for a week. Remove the lid, stir, and replace the lid. Leave for another week, and you've got concentrated nettle tea. Don't use it neat, though, as it's too high in nitrogen and will burn your plant roots. Instead, dilute with water in an approximately 1:10 ratio. Then water around the base of your herbs. It's really that simple.
Leaf mold is a potent soil conditioner
Leaf mold is another freebie that's invaluable for herbs. It's one of the best soil conditioners, as it slowly releases macro- and micronutrients, holds moisture when used as a mulch, improves soil structure, and feeds soil organisms. And most of us put our leaves in the trash instead of making use of them. Herbs planted in thin, weak, clay, or very sandy soils benefit from leaf mulch, as do shallow-rooted herbs that aren't terribly drought-tolerant, like parsley, chervil, lemon balm, and chives. Woodland herbs such as these would receive an annual covering of leaf mold in their natural habitat, so it only makes sense to add that to your garden.
Spread leaf mold like mulch around herb clumps, leaving 2 to 4 inches between the plants and the leaf mold. You can also use a handful at the bottom of planting holes for new plants and divisions. And where a whole bed is tired, spread a thin layer right across the surface of the bed, avoiding touching any plant stems, and let winter and worms do their job to draw the organic matter into the bed. It's good for compacted soil, too, because as it breaks down, it helps to create an open crumb structure that lets soil organisms and plant roots breathe and grow.
Green manure boosts nitrogen and organic matter

Green manure, or a cover crop, serves all herbs. It's a quick-growing plant that suppresses weeds, controls erosion by stabilizing soil, prevents nutrient runoff and scouring of bare patches, and builds organic matter. And if you plant the right options, they'll also act as nitrogen fixers. There are lots of options for cover crops, such as vetch, oats, and legumes.
I use a combination of clover and peas. These plants are both fast-growing and have a symbiotic relationship with specific soil bacteria that convert atmospheric nitrogen into bioavailable nitrogen and hold it in the soil, ready for herbs and other plants in the spring. My dogs also love nibbling the pea shoots like two weird little sheep, so it's multi-use. And when you turn the cover crop into the soil in the spring, it quickly breaks down, releasing its nutrients, and acting as valuable soil-enhancing organic matter.
Comfrey leaves are full of minerals
Comfrey is free and super easy to use. It's chock-full of trace minerals as well as being high in potassium. It's a dynamic accumulator, meaning that it pulls up large amounts of minerals from far below the soil surface that other plants can't access due to its long, deep roots. These get stored in the comfrey leaves. While all herbs and plants in general respond well to comfrey as a soil amendment, Mediterranean aromatics like thyme, oregano, savory, sage, and marjoram really thrive because they originate in areas that have thinner but mineral-rich soils.
You've got a couple of options for applying comfrey. You can make a comfrey tea liquid feed exactly as you did with nettles, and dilute to the same 1:10 ratio before applying. Alternatively, shred the leaves roughly, lay them on the soil surface, then add a layer of mulch over the top. You can also bury the leaves around the root zones of established plants or in the bottom of the holes of new plantings to add concentrated nutrient pockets to help your new plants get off to the best start.