Grab Holiday Cookie Cutters To Take This Festive Candle DIY To Another Level

Tired of the same basic candlesticks every Christmas? While we love minimalism, this season is just screaming for some whimsical DIY holiday flair in everyone's home decor. And fortunately, the secret to getting this festive elegance isn't anything you'll find in an expensive boutique; in many cases, you can make the most creative holiday decorations using household items found right in your kitchen drawer. Thanks to a clever hack from TikTok user @cozyhome_living_, you can turn your taper candles into dazzling centerpieces with nothing more than some holiday metal cookie cutters and melted wax. Using the shapes as molds for the wax, it's easy to make festive bases for standing candles and create an even more dazzling display. This fast, inexpensive DIY is the perfect way to help your dining table stand out during holiday parties.
To get started, grab an existing candlestick, various metal cookie cutters (stars, trees, gingerbread men, or snowmen work well), candle wax (soy or paraffin are common choices, or you can melt down an old candle), parchment paper, a double boiler or melting pot, and a tiny bit of hot glue or wax adhesive. While this DIY is cute on its own, take it to another level by focusing on how to style it so it looks less like a fun craft and more like high-end holiday decor. Start with color strategy. Shades of red or green wax are classic and festive, as are white or creams for a snow-dusted, neutral holiday look. You can also opt for new trending Christmas colors or mix glitter in with the base candle for a shimmery texture. For visual interest, avoid using only one cookie cutter; try using multiple cutters for one setting or experimenting with different candlestick thicknesses and heights.
Make and style your festive candle centerpiece decor
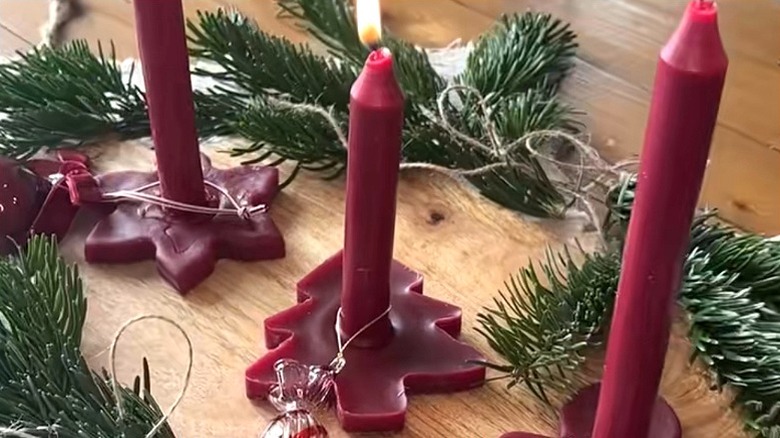
This project is easy. Set your cookie cutters on the parchment paper. Melt your wax in a double boiler or in the oven on its lowest setting. Once it reaches the ideal temperature (around 120 to 140 degrees), carefully start pouring the melted wax into the mold, carefully but firmly pressing the cutter down so wax doesn't leak from underneath it. About halfway through, place your existing candlestick in the center of the cookie cutter and hold it. Then, pour more wax into the cutter ring; the candlestick should be able to stay upright by itself at this point, but you may need to keep holding it until the hot wax sets a little. Once it's completely set, gently peel the metal cutters away to reveal your new festive wax base and candle, ready for display.
Now, the finishing touches are what really separate a DIY from designer decor. Once the wax is completely dry, feel free to add embellishments and think about how you'll set them up. You can group three of these cute customized candles together on a mirrored or wooden tray to make an opulent holiday centerpiece. To really give them a holiday vibe, surround the newly-molded bases with fresh or faux pine boughs, mini frosted pinecones, and scattered cranberries. Or, accent your DIY candles with mixed metals, another Christmas decor trend that will bring a quiet glow into your home. Regardless of how you style it, combining the cheery simpleness of a cookie cutter with some fun holiday extras helps you have an unforgettable table centerpiece everyone at your holiday dinner party will love.