Give Garden Soil A Boost By DIYing A Leaf Mold Bin
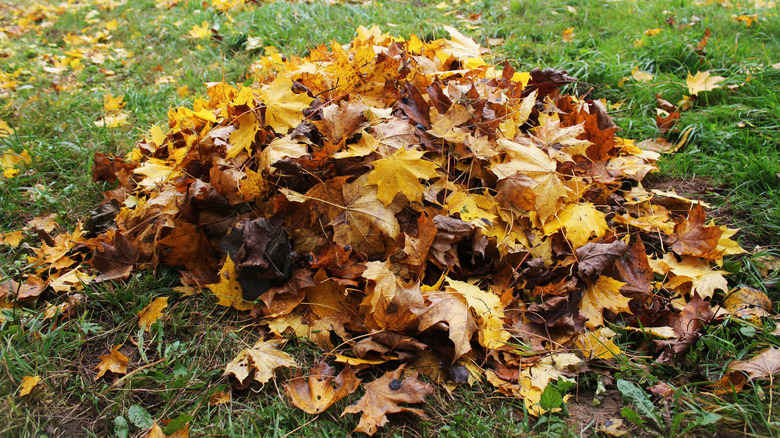
You may be familiar with the concept of using fallen leaves to give garden soil an extra boost, but you may not know that you can DIY a bin for fallen leaves that allows them to transform into the soil booster known as leaf mold. A bin is a useful asset when making leaf mold because it holds critical moisture needed for decomposition, prevents leaves from blowing away, and provides a bit of insulation as fungi work to break down the leaves. Using a bin is tidier than simply using a pile of leaves for leaf mold, as some gardeners do. To DIY some easy leaf mold bin options, you can construct a large bin with wood or chicken wire, or drill holes in an existing container like a garbage bin.
First, let's briefly review what leaf mold is and how it enhances soil. Leaf mold refers to decomposed leaves. Creating leaf mold can be compared to cold composting. While hot composting requires both nitrogen-rich and carbon-rich materials to make heat, cold composting ignores this mix. Since leaves, the only ingredient in leaf mold, are primarily a carbon-rich material, comparatively little heat is generated, and the decomposition process is slow; it can take up to two years for leaves to decompose into leaf mold.
The resulting product, often called "garden gold," is a rich, brown or black crumbly substance that is terrific for your soil. It's not as nutrient-rich as compost, but aids soil in water retention, boosts soil structure, and functions as a soil conditioner. Leaf mold is also a highly hospitable environment for earthworms and helpful bacteria.
Construct a bin from wire or wood
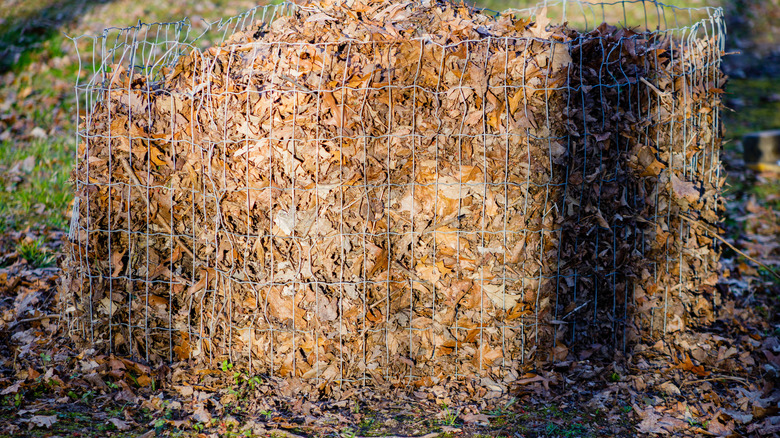
For a simple container, you can build a 6-foot x 6-foot cube-shaped bin with chicken wire or similar fencing fastened to four T-posts at the corners. Stakes can alternatively be used for the corners. A slightly simpler version is a cylindrical bin with the same kind of wire or fencing formed into a circle and staked into the ground. It should be at least 3 feet wide and deep to accommodate the volume of leaves needed for decomposition.
A wood bin is also an option and can be made in similar cubic dimensions as above using wooden pallets, arranged in a cube and screwed together at the corners. All three of these options allow air to flow through the leaves, an important factor in decomposition. A shady location is recommended for your bin so leaves retain moisture. If your locale is windy, place the bin near a structure that can act as a windbreak.
DIY a leaf mold bin from an existing container
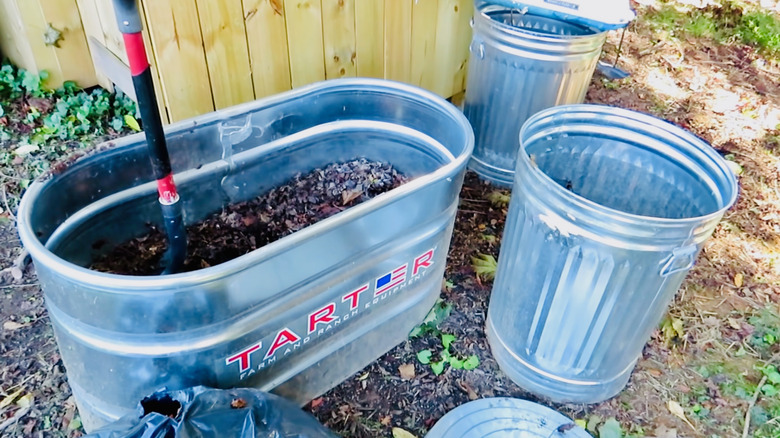
If you want to pick a bin from existing items, you can use metal containers, such as garbage bins or stock tanks. Some experts recommend drilling holes in the bottom and sides of these metal containers to promote airflow, provide access for worms and other beneficial insects to enter the leaf mulch, and to help excess moisture drain out so leaves don't get soggy; leaf mold, like compost should have moisture content that make it feel like a wrung out sponge.
Should you cover your closed decomposing leaf bin or not? You'll find proponents for both practices, but it really depends on a few factors. Leaving bins uncovered promotes aeration but could allow too much moisture so the leaves get soggy in the bin (which is where the drilled holes come in). Conversely, covering means you have to introduce needed moisture manually rather than relying on precipitation, but the leaves will retain more moisture than if uncovered; the leaf mold also may not get enough air. If you're in a very wet climate, covering bins will keep leaves from getting waterlogged. In drier climates, consider keeping bins uncovered or using a breathable tarp, and monitor moisture so leaves are not too wet or too dry. Whichever DIY bin style and coverage you choose, you'll likely be glad you decided to use leaves as fertilizer in your lawn or garden.