Turn Any IKEA Cube Shelf Into A Multipurpose Furniture Solution
We may receive a commission on purchases made from links.
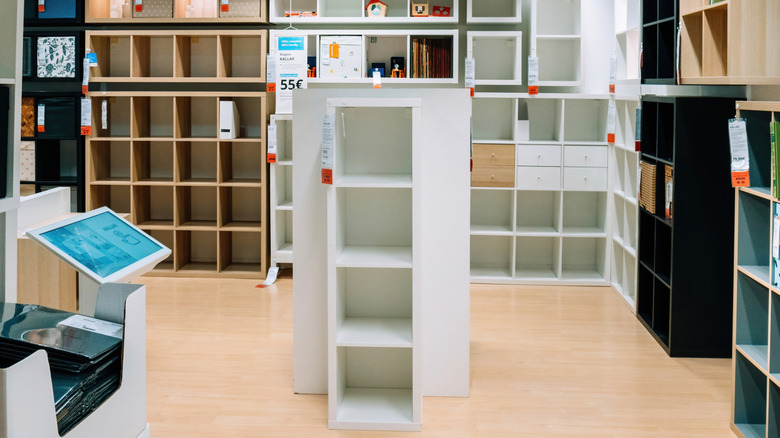
Ah, the ever-versatile IKEA cube shelves. Whether you prefer the two-, four-, eight-, or 12-cubby versions, many IKEA cube shelf products for storage and organization have tons of potential throughout your home. Even if you're not the craftiest person, all it takes is screwing a few wheels onto the bottom of one of these shelves to transform it into a bar cart, or adding a few cabinet doors for a quick, simple kitchen island. Of course, if you're willing to get a little craftier, you can attach multiple cube shelves together using brackets to create a larger piece of furniture. Add some hooks, decorative elements, and a wood table top, and suddenly you've got a multi-functional furniture solution you can use in your kitchen, office, garage, craft room, or wherever else you're able to roll it.
Whether you need a kitchen island, a workbench for your garage, or an extra-chic desk with storage, these cube shelves have you covered. Of course, there are plenty of brilliant IKEA Kallax DIYs that prove it's the most versatile piece in-store, but really, any cube shelf will work, including smaller options like the EKET Cabinet with 4 compartments if that's what you have access to.
Combine IKEA cube shelves to create multi-functional furniture
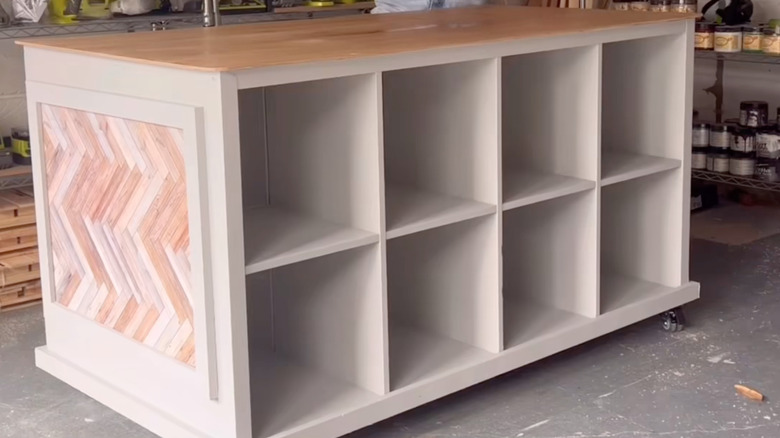
To begin crafting your multipurpose furniture piece, use strong wood glue to attach two of the same size units together, such as two 8-cube or two 4-cube cabinets. Then, reinforce the glue by attaching a few flat brackets at the top and bottom – where the units meet — and between the cubbies. Next, you can sand, prime, and paint your shelf in a color that suits your style. Once dry, attach a piece of plywood to the top using wood glue and a nail gun, and cover it with a protective sealant, such as SEAL-ONCE Clear Water-Based Waterproofing Wood Sealer. Repeat that process on the bottom side of your shelves as well for extra stability, then use a screw gun to attach castors to the bottom. If you don't need the shelf to move around, add four legs instead.
At this point, you have the bones of the multi-functional furniture piece complete. The next steps are all customizable and optional. For example, you can add a decorative trim to the bottom of your unit to make it look more cohesive or less like two separate pieces. You can also add items like hooks, a pegboard, or a cute design to the side. For the individual shelves, consider placing storage baskets or attaching custom doors. You can find all kinds of different IKEA KALLAX accessories for even more organized storage. Remember, these shelves are incredibly versatile, and you can achieve similar results by using only one shelving unit if that's what you have on hand.