13 Foolproof Ways To Get Rid Of And Prevent Weeds From Growing In Flower Beds

We may receive a commission on purchases made from links.
Ah, weeds. They are the bane of gardeners around the world, sprouting from the soil in even the most adverse conditions and, if left unchecked, choking out our most desired plants and flowers. They're thieves of food, stealers of sunlight, and let's be honest, they're not always very nice to look at.
Of course, many would argue that a weed is simply a plant in the wrong place. But if that place happens to be in your carefully cultivated flower beds, then it's very hard to look kindly upon them. Add this to their knack for constantly reappearing, and weeding is perhaps the most frustrating part of any gardener's schedule.
Don't worry, though; we're here to help. While there is, ultimately, no replacement for good old-fashioned hand-pulling, there are several complementary methods you can use to maximize your weeding efforts and make your life easier. There are also myriad preventative measures that you can take to suppress weed growth and thus ensure that only your flowers flourish.
Form a regular weeding habit

This first tip is about proactivity, and it's hard to overstress its importance. The reason we consider weeds with such contempt is that they are excellent growers and spreaders. There are several reasons for this. Many can self-seed and spread, helped by the wind, water, and animal manure. Many are also highly adaptable, capable of thriving in even the most adverse soil conditions. In some cases, weeds have very little susceptibility to insects and diseases, and seeing them growing luxuriantly in your flower beds can feel like a kick in the teeth when the rest of your plants are fighting a losing battle against pests.
With all of this in mind, keeping an eye out for weeds is crucial, as is understanding that there is no replacement for good old-fashioned hand-pulling. Even the most robust weed-prevention measures can struggle to eradicate their presence altogether, and only by monitoring your flower beds and by knowing the various types of weeds and how to identify them, can you remedy the problem quickly. If you pull them out whenever you see them, you'll reduce their chances of self-seeding, which is key to preventing their naturalization in your flower beds.
Use a propane torch to control young broadleaf weeds

If you have a propane torch in the garage that has failed since you bought it to make itself useful, then now might just be its time to shine. Perhaps unsurprisingly, these handy garden tools are incredibly effective when it comes to killing weeds. The flames serve as a contact herbicide, killing the parts of the plant that they touch by effectively boiling the sap and water inside.
As touched upon already, you'll still need to pull any weeds up by their roots once they've died back. This is especially important with older, more-established weeds, whose root systems are likely to survive the stress of fire treatment. And in order for it to be foolproof in your flower beds, it's important to use this method with care. Fire is unapologetically unselective, and will wreak wanton destruction upon your favorite flowers if allowed to do so. You could consider placing a fireproof bucket over your flowers to protect them from the flames. At the very least, try to use as small a flame as possible, and aim it as precisely as you can to avoid scorching the rest of your flowers.
Use boiling water as a contact herbicide on new, emerging weeds

Another way to kill weeds is by simply boiling the kettle. Hot water can be poured over problem plants as a contact herbicide, although it will only kill the parts of the plant that it touches. As with any herbicide, the key is to pull the entire system out of the ground once the visible parts have died back — roots and all. With this in mind, boiling water may not sound like the hammer blow you were hoping to deal to your most problematic plants. However, there are several reasons to consider using your kettle on your weeds.
One is that it's organic, requiring no chemicals, which could potentially contaminate your wider flower bed. Another is that it's incredibly cheap, requiring no additional chemicals or tools. Just know that it's most effective against younger weeds; older, more established root systems will inevitably bounce back, especially if you don't root them out after treatment. You should also be careful when applying hot water. Like your propane torch, your kettle isn't choosy about which plants it scalds. Use this method in flower beds where there's enough space to avoid harming plants you want to keep. If your beds are tightly packed, then use something to screen your desired plants, like an upturned bucket.
Consider sinking your edging deep around your garden bed

Having hung your propane torch back in the garage and returned the kettle to the kitchen, it's time to future-proof your flower beds against the reemergence of weeds. Now, it should be said that it's hard to eradicate them altogether. Even the most well-executed weed prevention strategy can fall foul of a number of external factors, like wind-strewn seeds and those spread by animal manure. But that's not to say that you can't still make your flower beds less welcoming for weeds.
One of the best ways to do this is by fortifying your beds with weed-proof garden edging strategies. Edging is often added decoratively, sometimes with bricks and stones, sometimes with wooden pickets. The results are almost always beautiful, however, in order for edging to be effective against weeds, it's important to install it deeply enough. Ideally, edging trenches should be at least a foot deep. You can line the underground (and unseen) part of the trench with damp-proof coursing, which you'll be able to find at your local builders' merchants and which will stop any weeds from spreading underground. You can then save your aesthetic edging, like bricks, for the upper, visible layer.
Use weed control fabrics in annual beds

Weed control fabrics are a superb, nonorganic means of mulching your flower beds. However, to get the most out of them, it's important to only use them in areas where you can regularly access and replace them. Unfortunately, most materials tend to degrade over time, which leads to two issues. Firstly, they become less effective at weed control, which is precisely why you installed them in the first place. Secondly, they can begin to contaminate your soil as the material breaks down. In annual flower beds, these issues are easily avoided. Since annual beds naturally have fallow periods, they provide ample opportunities to assess the membrane and, if necessary, pull it out and replace it.
In order to use a weed membrane, you'll first need to prepare your flower bed. Remove any weeds from the soil and try to pick out any stones. Once the soil is clear, lay the membrane over the top, and tuck it in around the edges of your flower bed. Like other mulches, the membrane should stifle any weed seeds lurking in the soil underneath, blocking out sunlight and rendering them unable to grow. If you need two or more lengths of fabric to cover the bed, then ensure they overlap by at least six inches. Cut crosses into the membrane where you intend to plant your flowers, and watch with satisfaction as they grow without the invasive interference of weeds.
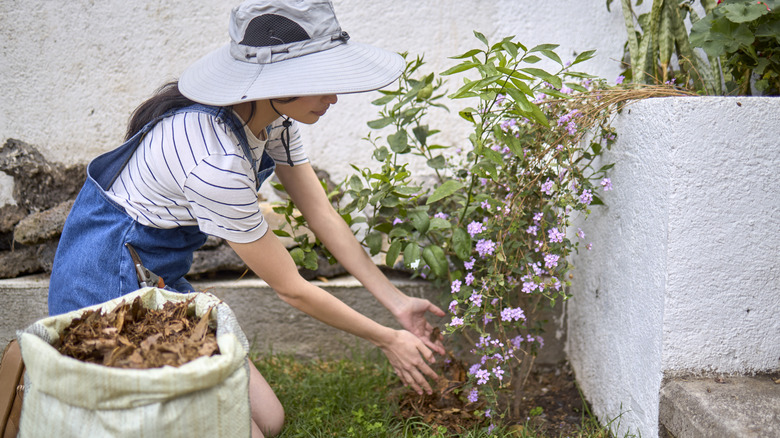
Use wood chips to keep weeds from growing

If you'd prefer to lay something organic over your flower bed and avoid any issues with future contamination or material degradation, then wood chips are an excellent choice. They will decay over time — however, in this case, that's a good thing. When they do, they'll pass valuable nutrients into your soil, feeding your future flowers. While they degrade, they will also help to conserve moisture in the soil beneath and insulate it against the worst of any cold weather. Crucially, they'll also help to suppress the growth of weeds, effectively blocking out the sun from any seeds that are lurking in the soil.
Wood chips may be better suited to established perennial flower beds. Younger beds, or those with annual plants, may struggle due to an issue known as "nitrogen tie-up." Without delving too deeply into the science, this essentially occurs as organic material on top of the soil begins to break down. In order for it to do so, it needs help from microbes in the soil beneath. These, in turn, require nitrogen, which they pull directly from the decomposing material, thus "tying it up" and preventing your plants from using it. It's one of the main problems with using wood chips to mulch your soil, although it's most problematic with younger perennials and annuals. If your flower bed has well-established perennials, then it shouldn't cause you any issues.
Cover your flower beds with pine needles to suppress weeds
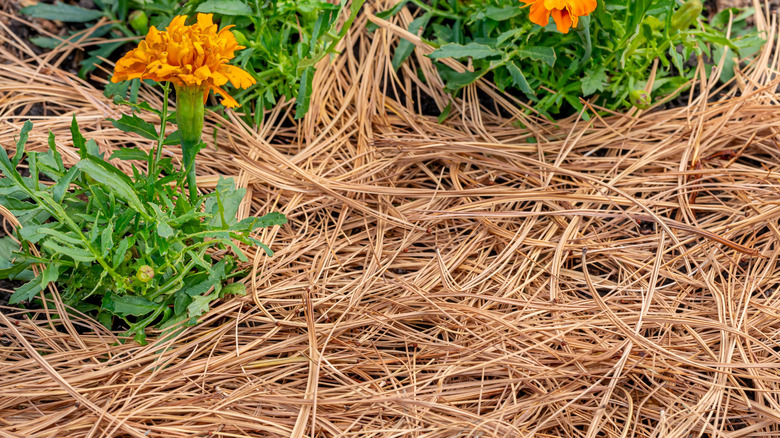
Unlike wood chips, pine needles can be used on perennials and annuals alike. They serve the same purpose — breaking down and providing nutrients to your soil, insulating it against the cold, helping it to retain water, and suppressing weed growth. However, they are potentially much more cost-effective; if you have a conifer in your yard, then all you really need to spend is the time it takes to gather them off the ground.
You may be wondering whether it's advisable to use pine straw as mulch, and it's a fair question. Pine needles were once avoided by gardeners, as it was thought they acidified the soil too much. Today, while it's understood that pine needles have a low pH when fresh, gardeners have also realized that this quickly begins to neutralize as soon as they hit the ground. In other words, they are now considered one of the best ingredients to use in your mulch. You may need quite a few of them, though. Experts tend to recommend a six-inch layer of pine needles. This sounds like a lot, but the needles will quickly settle and sink.
Shred fallen leaves to make a DIY mulch
Another boon to gardeners on a budget, fallen leaves are inevitable in yards with deciduous trees. In other words, they're free, and if used correctly, can make an effective type of mulch to help stop weeds from sprouting. The thing to avoid here is using the leaves whole. If you simply gather the leaves from around your yard and layer them over your flower beds, they can start to "mat," effectively causing water to sheet away from the soil instead of seeping into it.
To get around this problem, shred them. Use your lawn mower, or buy a dedicated leaf vacuum and mulcher. Either way, once they're shredded, spread a layer 2 or 3 inches thick over your flower bed, and relax in the knowledge that you've starved any dormant weeds of sunlight. Using fallen leaves can also give your soil a boost, supplying it (and thus your future flowers) with nutrients at the end of a long and strenuous growing season. Just remember that leaf litter can, if piled too deeply, attract pests like insects and rodents. With that in mind, stick to just 2 or 3 inches, and if you start to notice unwanted wildlife incursions, consider removing them altogether and following a different approach.
Consider suppressing weeds with grass clippings
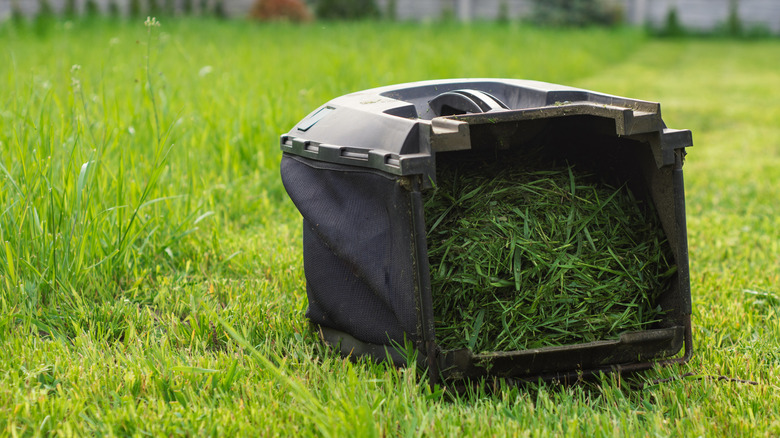
If you regularly mow your lawn, then you have a potentially abundant and readily available supply of organic mulch material. Like other mulches, grass clippings work to suppress weeds from growing in your flower bed, while fueling the soil and therefore your flowers with valuable nutrients. There are just a few things to be careful of. One is laying your grass clippings too wet and too thick. This could lead to matting, which can prevent water from accessing the soil and potentially cause the soil beneath to overheat. Aim for dry grass clippings, spreading them to a depth of no more than four inches.
Another potential risk is the spread of grass in your flower bed. The best way to avoid this is to ensure you cut your grass before it has a chance to shoot seed heads. If any of these find their way into your flower bed, there's a good chance they could eventually seed and start to take over. A final consideration is whether your lawn has had a herbicide applied to it. Some herbicides can take up to a year to break down, so if you've recently applied one to your lawn, consider mulching with another material.
Get ahead of weed growth with pre-emergent herbicides
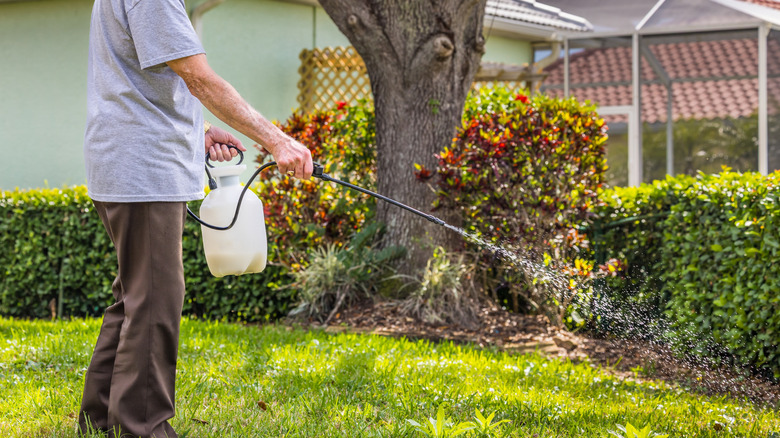
As the name suggests, this type of herbicide aims to attack your weeds before they have a chance to emerge. Using one will help reduce the chance of competition with your flowers, particularly if your problem weeds and flowers tend to shoot at the same time of year. They are available in granular and liquid form, and if applied in a timely manner (before your problem weed types have a chance to establish), they can help to reduce issues in the height of the growing season. Just bear in mind that they can lead to damage to desired plants, and that one pre-emergent herbicide is unlikely to provide a solution to all weed types. Depending on the species you're trying to stop growing, you may also need to apply the herbicide at different times of the year.
For example, annual bluegrass is best treated in the fall, when soil temperatures consistently drop below 70 degrees Fahrenheit. Crabgrass, however, is best treated with a pre-emergent herbicide when soil temperatures reach about 55 degrees Fahrenheit for several consecutive days, followed by a second application six to 10 weeks later. The best way to be effective is to identify the weeds growing in your flower bed, source a pre-emergent herbicide that's formulated specifically to target them, and then follow the user instructions to ensure you get your timing and application right.
Plan a bespoke irrigation strategy

If weed control is your goal, then this is one of the most genius tips for watering your plants. But before we get into it, it's important to understand why it works. By only watering your desired plants when they need it, you reduce the likelihood of weeds taking over. This is because weeds tend to flourish when moisture is in abundance. On the other hand, if you use an automatic irrigation system and it continues to switch on like clockwork even after heavy rain, then there'll be far more water than your favorite flowers actually need.
With this in mind, consider altering your irrigation strategy. Manual watering is one of the easiest ways to ensure you don't overdo it, be it with a hose or watering can. Alternatively, if you have an automated irrigation system, you should at least adjust it to account for seasonal rainfall, and if you happen to experience heavy showers at a time when you're not expecting them, consider switching it off until your plants actually need it.
Steal the sunlight from weeds with dense groundcover
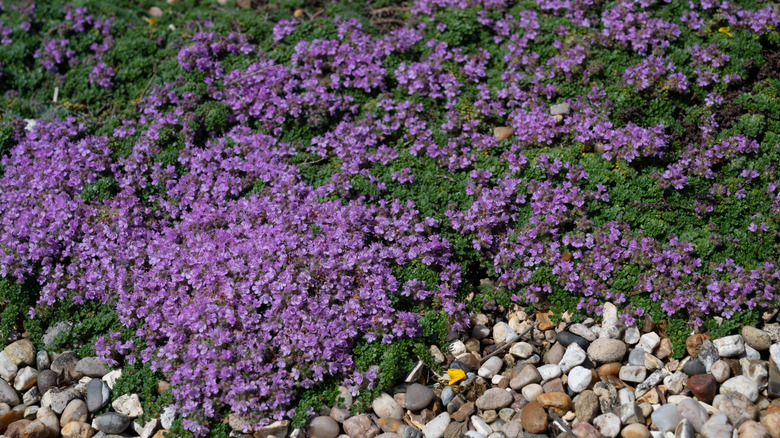
Think of ground cover like a living, beautiful mulch. It serves similar functions to other materials like wood chips and pine straw, insulating the soil from the worst of the cold and helping it to retain moisture. And while it doesn't feed as many nutrients into the soil as organic decaying materials, it certainly helps to suppress weeds.
Now, this may not be the best fit for perennial beds, where planting ground cover would interfere with established plants as they try to re-emerge in the spring. However, it's a superb weed-control method for annual beds, providing weed-suppressing cover at a time when the beds would otherwise lie fallow. Depending on the type of groundcover used, it can also bring much-needed color to your garden during the bleak months of winter. Just try to choose the right cover crop.
To do this, whittle down the list of potential plants to those that are likely to thrive in your climate and garden conditions. Next, look for plants whose growth periods are most likely to be effective against your specific weed problem. Anita Dilli, agronomist at Kansas State University, explains, "To plan for the greatest weed management with cover crops, you should start by knowing when your key weed species of concern germinate and emerge. Your goal should be to establish the cover crop prior to that key point in the lifecycle of the weed for most impact."
Keep weeds in check with non-organic mulch

Inorganic mulches work in much the same way as organic types. They block out the sunlight, preventing dormant weeds beneath the soil from sprouting, while insulating the soil against the cold and helping it to retain moisture. Also, like organic mulches, there are several types you can choose from. Weed fabric is a good example. But if you want a more decorative solution, you can also use gravel.
Gravel is great for flower beds; you can spread it over the surface of the soil, and then clear away "spots" in which to plant your flowers, before gently raking the stones back around the base. Gravel is available in a multitude of colors, too, allowing you to complement the hues of your chosen flowers. What's more, provided that you choose stones no more than 10 mm in diameter, it's very effective at suppressing weed growth.
The only potential downside is that non-organic mulches like gravel don't feed the soil underneath them. What's more, if you choose dark-colored stones, you might find that the soil underneath overheats. This last point is easily overcome by opting for stones in a lighter shade. And as for feeding your soil, while gravel doesn't do this directly, it does contribute to improved soil conditions. By insulating and raising the temperature of the substrate, gravel helps to increase microbial activity, which in turn leads to an improvement in organic matter content.