How To Upgrade A Bird Nesting Box To Keep Birds Coming To Your Yard All Winter
Regular bird boxes don't work in winter because most bird nesting boxes are designed for spring and summer breeding rather than winter survival. During colder months, birds must cope with low temperatures, strong winds, and limited shelter options. Instead of leaving birds to deal with these conditions alone, you can help by upgrading an existing bird nesting box into a winter roosting box, which birds use for warmth rather than nesting.
A roosting box is a small wooden shelter designed to trap heat and keep birds safe during winter, while nesting boxes are intended for laying eggs in spring and summer. Roosting boxes have entrance holes positioned lower to allow warm air to rise inside, while nesting boxes are more ventilated with higher entrances to keep cool. This simple upgrade helps birds conserve body heat, and having a roosting box encourages birds to visit your yard all winter. To make the conversion, you'll need a nesting box and a screwdriver, and you may also want wood filler or scrap wood, weather-resistant screws, and untreated wood shavings.
Convert a bird nesting box into a winter roosting box
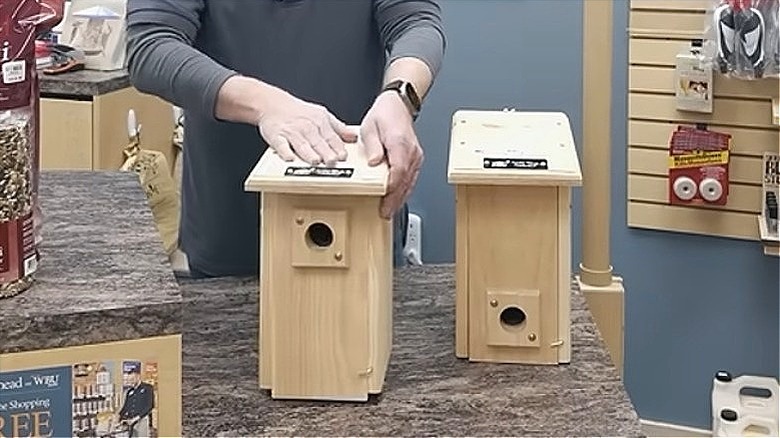
A manager at Wild Birds Unlimited, Diana Goss-Graham shared an easy method for turning a bird nesting box into a winter roosting box using simple materials. In the YouTube video shared by WBU On the Fly, she removes the screws from the bottom of the structure and flips the front panel piece upside down, quickly shifting the entrance from the top of the box to the bottom. She then reuses those same screws to secure the front panel at the top, so that the panel hinges open at the bottom for easy cleaning. Any ventilation holes near the top of the box can be filled using caulk, tape, or wood filler to prevent heat from escaping.
For other types of bird nesting boxes, you can still follow the same basic steps by shifting the entrance and sealing openings to create a space that stays warm without becoming airtight. Start by drilling a new entrance hole closer to the bottom to help trap heat inside. For smaller birds, make the hole at least 1.5 inches wide, and for larger birds, about three inches. Seal the original upper entrance hole with wood filler or a wood patch once you've placed your new opening. If you want to take the project a step further, you can add texture or grooves inside the box for birds to cling to, install a few perches at different heights, or add untreated wood shavings or other natural materials for extra insulation.
Where to place a winter roosting box

Placement matters even more during winter, when roosting boxes need to protect birds from harsh weather. Choose a secluded spot that isn't overly exposed. It should be protected from wind, heavy snow, and rain while getting some sunlight to avoid constant shade. Mount the roosting box about 6 to 15 feet off the ground, facing away from prevailing winds. If possible, place it near natural cover such as shrubs or trees and hang it high enough to deter predators. Because roosting boxes can attract a diverse variety of birds to your yard, multiple birds may roost together for warmth.
Aside from providing a roosting box, there are other ways to help birds in the winter, including placing food and water sources in your yard, but not close to the box to prevent predators from sneaking up. High-energy options like suet and black oil sunflower seeds are great in bird feeders because birds need more calories to stay warm in the cold weather. A heated bird bath gives birds access to drinkable water, but there are also other ways to keep your bird bath from freezing this winter. You can also leave natural shelters like dense brush or shrubs to provide extra protection and foraging opportunities.