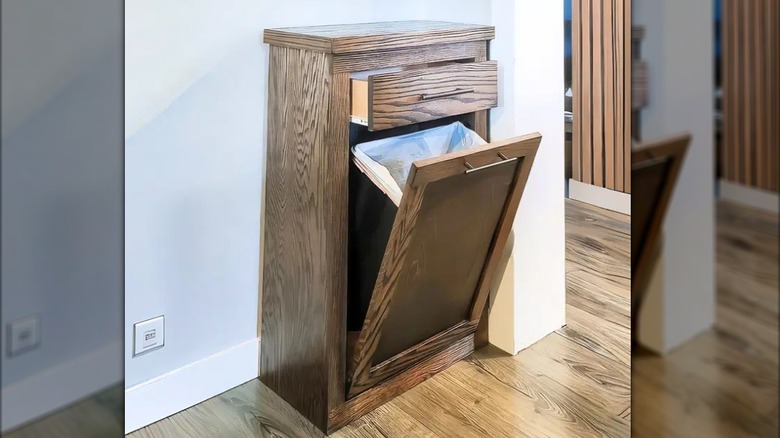
How To DIY A Tilt Out Trash Cabinet
We may receive a commission on purchases made from links.
The trash can in your kitchen is almost always an unsightly highlight — so it may be time to address it. Creating a space for your trash can to go can be cumbersome, especially if you're tight on space or don't have the budget, but hiding your trash can be an easy task. A tilt out cabinet is a great solution to conceal your bin. The tilt option also makes it easy to access your garbage without opening a cabinet or pulling out a drawer. You can DIY a tilt out trash cabinet with some handy tools and materials, such as solid and plywood boards, wood glue, screws, cabinet hinges, and a stain or finish.
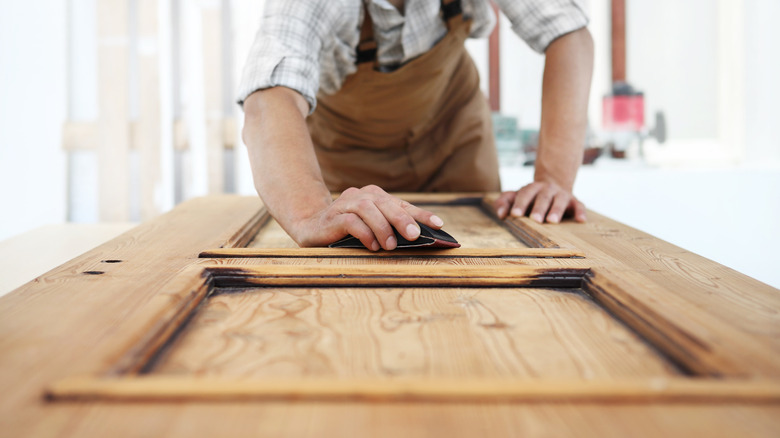
You can match your tilt out cabinet to complement your room's aesthetic and design and reflect your personality. To build this DIY cabinet, use plywood panel sheets and hardwood boards. Oak veneer or Baltic birch work really well. For your solid wood boards get some 3⁄4" with 2-inch to 6-inch widths like these Barrington Hardwoods Red Oak Lumber Boards for your framing, trim, and supports. One sheet of 3⁄4" plywood that's 4 feet by 8 feet will work for the main box and tilt platform, and you'll want another small sheet of ¼" plywood for the backing and trim. Some builders add solid wood trim boards to frame the front and support shelf edges. You'll need screws and wood glue, a stain or paint of your choice, and Heavy Duty Piano Hinges. For tools, you need a drill, a table or circular saw, a miter saw, a sander, clamps, and a level.
Steps to build the primary cabinet box
You want two sides, a bottom, and a back, with markings and measurements based on the trash can and cabinet sizes, and with more space inside so it can fully enclose and conceal your trash; a couple of inches all around should be enough. You can complete the bulk of the build with one sheet of plywood for the box and tilt platform, with a few extra boards for trim and supports. Use the stronger wood boards to ensure durability and longevity. Use your table or circular saw to cut down the panels and boards. Cut the top and bottom pieces to the same depth and width as your final cabinet. A thin ¼" plywood back helps keep the cabinet square and strong.
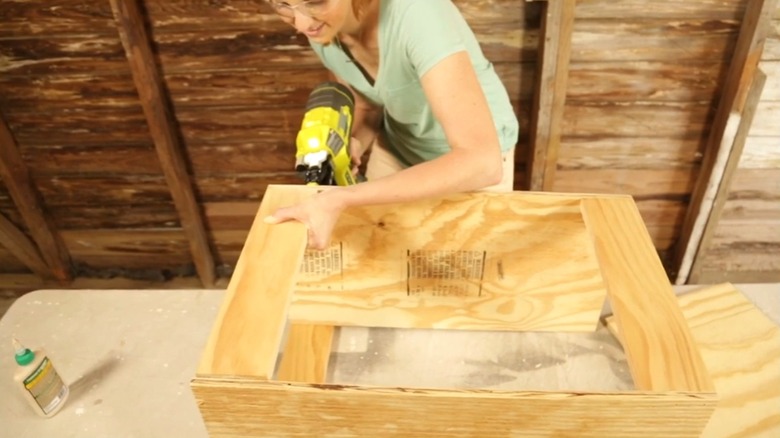
Add horizontal supports to the top and bottom of the inside of the box, helping to screw everything together and give solid surfaces for hardware attachment. Use your miter saw for the lengths, and assemble the main cabinet box with pocket holes (you can use a pocket hole jig like this Kreg K4 Pocket Hole Jig) and glue. Use a trim blade if you have one to help prevent the wood from chipping. Attach the top, bottom, and side panels together with your screws and wood glue. Ensure everything is square and securely clamped before the wood glue dries, then sand the edges down.
Steps to take when building your tilt out drawer
Next, you need to tackle the tilt out platform "door". Cut a rectangle from 3⁄4" plywood for your front panel. Attach that piece to the inside of the cabinet with a piano hinge along the bottom edge. Reinforce the tilt arm by adding angled braces or support cleats between the tilt panel and cabinet sides so it stays solid when you tilt it open. If you're using drawer or slide hardware, you can mount the slide parts inside the cabinet on the tilt platform to guide motion.
Sand all surfaces smooth and apply your stain or paint finish. Install a pull or knob on the front of the cabinet, and place your trash can inside the cabinet. Now, test the motion so that it tilts forward easily but doesn't swing too far. You can take things a step further and add a top drawer to your cabinet using drawer slides and extra wood pieces to store extra trash bags. Consider something like this as a DIY solution for your outdoor trash cans, too!