Cloudy Water In Your Plant Propagation Jar? Here's What It Means And How To Fix It

We may receive a commission on purchases made from links.
There is an abundance of houseplants you can propagate or grow in water — and garden plants, too, for that matter. For the most part, the process is relatively easy. However, there are some general guidelines even experienced indoor gardeners need to adhere to. For example, if the water in the jar turns from clear to cloudy, it's a sign that something is wrong in the tiny ecosystem you've engineered. Microbes and algae are growing in the stagnant, oxygen-deprived water — a process called bacterial bloom that's also common in aquariums. Leave the cloudy water in your propagation jar for too long and you'll end up with mushy stems, rotten roots, and a cutting that's failing to thrive. The fix couldn't be easier. You simply need to switch the stale water out for fresh regularly.
The water in a propagation jar is still (unlike, say, a constantly running stream), which causes oxygen levels to slowly drop. At the same time, your plant cutting is releasing a lot of organic matter into the water as it forms its roots. Combined, these processes create the perfect environment for bacteria to multiply quickly. Bacterial bloom is accelerated if the propagation jar is placed in a too-warm room or on an overly sunny windowsill. Roots that look or feel slimy are covered in biofilm, too much of which will block the plant's water and nutrient intake. This is an issue that shows up often on houseplants you can propagate in the winter, such as pothos, snake plants, and ZZ plants, because there's less light and warmer indoor temperatures during the colder months.
Replace the cloudy water in your propagation jar to keep roots healthy
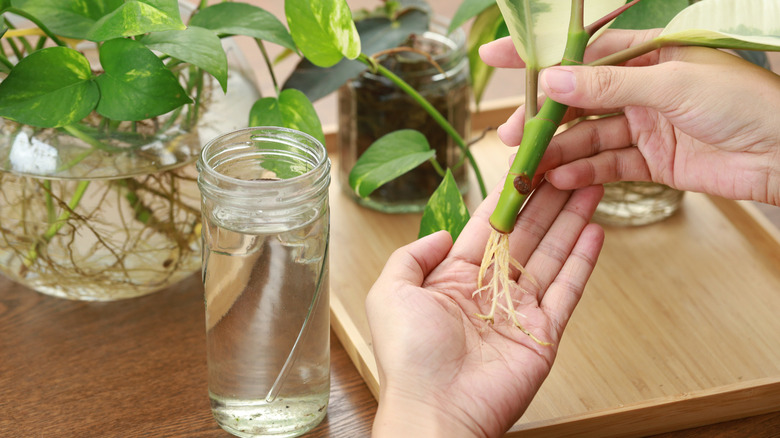
Cloudy water in a propagation jar means one simple thing: the water has been in there for too long. The first step in fixing this problem is removing the cutting from the jar. Examine it for slimy or discolored roots, stems, and leaves. These aren't going to recover, and may even cause cutting death if left in place, so they need to be trimmed off using a sterilized pair of Fiskars Micro-Tip Pruning Snips. If a cutting is mostly rotten, even a change of water won't help it. It's beyond saving, so discard it. If you're propagating multiple cuttings in one jar, try not to overcrowd them, as this can also raise the risk of bacterial overgrowth. Set the cutting aside somewhere cool, wrapped in a slightly damp paper towel, and turn your attention to the propagation jar.
Empty all the cloudy water from the jar into a sink. While even just a quick rinse can make a difference, it's far better to scrub the jar with sudsy water and a clean sponge or brush. Rinse out any soap residue, then fill the clean jar back up with fresh water. Filtered or distilled water is optimal, but tap water is also okay. Place your trimmed, healthy cutting into the water and set the jar in a spot with bright, indirect light. Doing these water changes regularly — the frequency ranges from every other day to when the water starts to look cloudy — removes microbe-attracting debris and restores the water's oxygen levels. Disguising your propagations with a nifty hack for full-looking plants, such as hiding the jars inside an opaque container, is fine. However, you'll need to be more diligent about remembering to check on the water regularly.