Removing An Old Tree Stump From Your Yard Is Easier With These 11 Tips And Tricks
We may receive a commission on purchases made from links.
When faced with a freshly cut tree stump, you immediately know you've got your work cut out for you with trying to get it out. Even a stump that's been there for a decade or more can seem like it's welded into your yard. It looks like it's going to be a very expensive or very labor-intensive job. So you avoid it.
I'm a master gardener and permaculture specialist, so I prefer natural, low-chemical methods for dealing with stubborn tree stumps. And, even though it's a long process, there are plenty of tricks that can help you make tree stump removal easier, whether you eventually dig it out yourself or call in professional help. Softening the wood of the stump, weakening the roots, especially the main anchoring ones, and feeding decay all take their toll on a stump over time.
Call before you dig around the stump

Like any other digging project, you must assume that there could be buried utilities nearby or right in the dig zone, so resist the urge to just start digging. It's common for roots to grow around or over gas, electric, phone, or water lines, especially in older neighborhoods and yards with larger, older trees. Remember, the roots of a tree grow to about the same diameter as the canopy, so it's very possible that there could be some kind of utility-root issue.
At least a few days before you get to digging, call 811. This gives utility companies the chance to mark approximate line locations with paint or flags. You can't just hack at the ground and hope you don't hit something important or dangerous. If you do, you're risking your life and potentially a large bill if you're responsible for causing damage.
Cut the stump low and flat to expose fresh wood
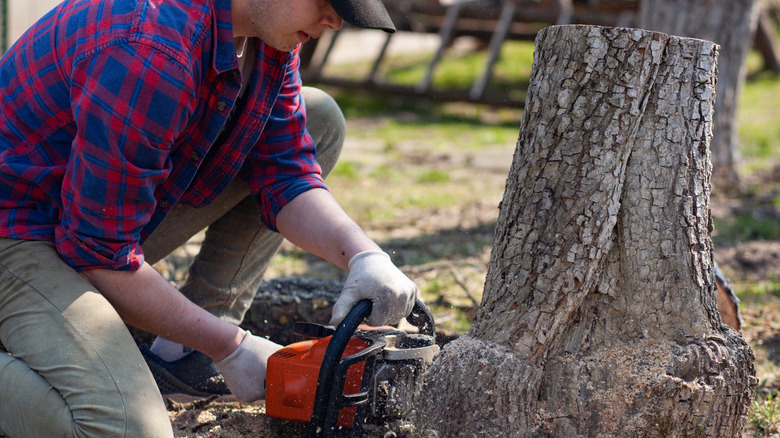
To make future stump removal much easier on yourself or the pro you hire, cut it as low as possible to the ground — but without putting yourself or your equipment at risk. A low, flat surface exposes fresher wood to the elements. Old, sun-baked wood is semi-"healed" in that it decays slower because the sun has sealed over the surface over time. A fresh surface has more moisture and nutrients, which are what wood fungi and decomposing bacteria need to thrive.
Remember, though, that safety is important. Don't go so low with your chainsaw that you risk hitting soil or stones with the chain. Scrape away loose soil and stones from around the stump before you make your first cut. Make sure you're wearing all the appropriate safety gear, and work slowly and safely, keeping the top as level as possible. If you don't have the knowledge or the skills to safely use a chainsaw, call a tree service to lower the stump, which is a comparatively affordable job. You can then carry on with DIY stump weakening without having to worry about using dangerous power tools.
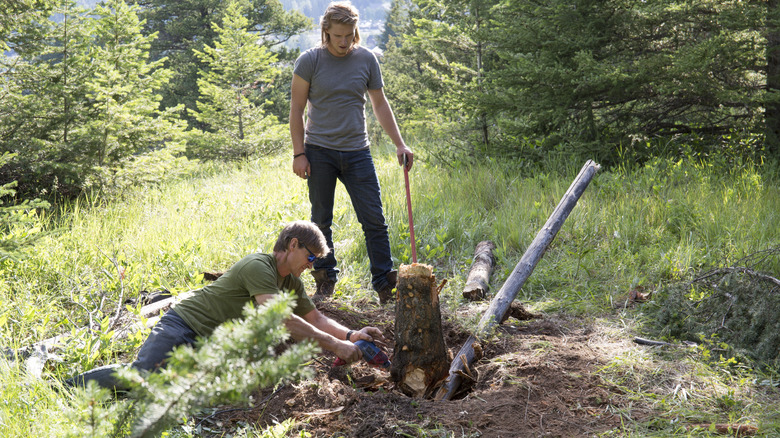
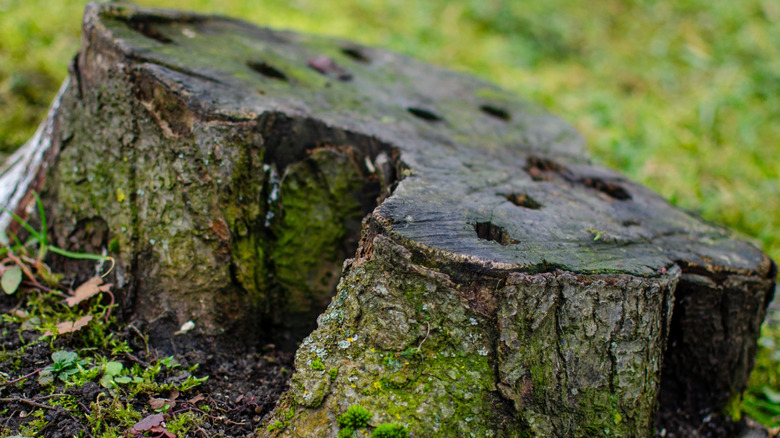
Drill deep holes to open up the interior

Drill a grid of deep holes across the entirety of the freshly exposed surface. This is by far one of the best ways to speed up decay naturally without heavy machinery. The holes create significantly more surface area inside the stump, so water, oxygen, microbes, and insect decomposers can penetrate deeply and get to work weakening and consuming the stump from deep inside. Use a large drill bit and space holes about an inch apart for the best, fastest results. You want to drill to about two-thirds of the stump's height so you maintain the structural integrity of the stump for proper decomposition.
You can also fill those holes periodically with compost tea and other liquid feeds that provide nutrients to the bacteria and fungi that are colonizing and weakening the tree stump. As the bacteria and fungi do their work, the wood around the edges of the holes turn soft, punky (spongy and rotten), and crumbly. This makes it far easier for you to pry out chunks periodically. And each time you pry out a new chunk, you're essentially exposing new surface area to the decomposing organisms, which further hastens decay.
Keep the stump and soil gently damp to feed decay
Because you want to encourage and feed wood-rot fungi and bacteria to speed up decay, you want to keep them healthy and happy. So, you need to keep the stump damp for optimal results. But there's a fine line. If you let the stump get too dry, sitting out in the sun with no regular moisture, the decay slows to a crawl, as the necessary bacteria and fungi struggle to survive in dry, nutrient-poor conditions. On the other hand, too much water and you'll create a waterlogged, anaerobic environment in which your wood-rot organisms end up suffocating.
I like to run a soaker hose, like the Rocky Mountain Goods heavy-duty soaker hose, around the base and across the top to give slow, even moisture during dry spells. You can also keep a mulch layer close to the base of the trunk to hold moisture and provide nutrients. Over time, keeping the stump moderately moist lets the helpful organisms break down the lignin and cellulose. This makes the tough, solid stump into softer, more fibrous material that's easier to hack out.
Add nitrogen so microbes aren't starved
The bacteria and fungi you want to populate the stump need nitrogen, and fresh stump wood is much higher in carbon than nitrogen. Until the tree stump starts to decay and break down, it doesn't release much nitrogen. So you'll need to supplement it if you want to speed up the decay process. Without enough nitrogen, the organisms that rot the stump struggle to build their own cells and to multiply. This significantly slows the time it takes to rot down the stump. Even if you've drilled down deep and used most of the other tips here, if you starve those helpful little organisms, you won't get the results you want.
Now, let me be clear. Nitrogen is not a miracle fix that will "melt" a tree stump. And you shouldn't drown the stump in high-nitrogen fertilizer, as it can spread to the surrounding beds and cause problems. The judicious application of nitrogen feeds the bacteria and fungi that decay the wood of the tree stump. You can use a fertilizer with a high nitrogen-to-carbon ratio and sprinkle it carefully into the holes, following the manufacturer's directions. But, because I'm an organic gardener, my preferred method is to do the same, but with a natural source of nitrogen. Well-rotted manure is a solid choice. Better, though, for this particular job, is chicken manure pellets, as you can sprinkle those dried little pellets right into the holes and then just water them to help them start to break down. This provides both food and hydration for the decay organisms at the same time. Whichever type of nitrogen you choose, remember not to overdo it in a single application, especially if the stump is near other garden beds or lawns. You don't want to cause a severe nitrogen imbalance. Nor do you want to fertilize any other parts of your garden with nitrogen in late fall or winter, or you'll push new growth that won't survive the winter. It's one of the biggest winter gardening mistakes you can make that will hurt your plants next spring.
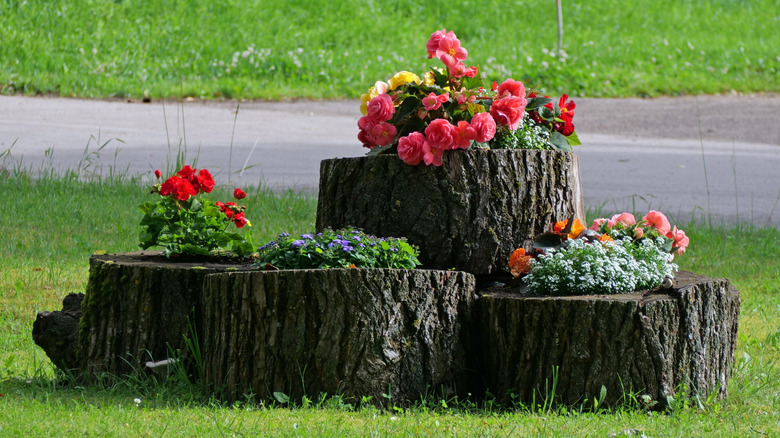
Build a compost-and-mulch cap over the stump
As long as the tree stump isn't too close to the house so it doesn't become an eyesore, turning it into the core of a compost heap is a great idea. You essentially cover the stump and the immediate area around it with compost or rich topsoil, then top the whole thing with wood chips. You can also use a different type of mulch, but in my experience, wood chips work best here, as they encourage the healthy organisms you want to encourage. Plus, you don't have to replace them as frequently as other mulch types. And, if you do want to make a feature of this mound, you can plant through them into the topsoil below. The mulch also helps to hold moisture, and the compost provides extra microbes and nutrients.
Over time, you'll find the mound slowly sinks as the stump collapses inside. This is an excellent sign, as it means the soil organisms are doing their job and essentially composting the stump, breaking it down into rough, fibrous organic matter. And eventually, you'll end up with a shallow mound that's full of rich, crumbly, healthy soil that will help anything you plant on the site thrive. If you really want to hide the mound, I'd recommend you plant some shallow-rooted, fast-growing ground cover like creeping thyme, creeping myrtle, or creeping phlox. The roots knit together and will help anchor the compost or topsoil over the mound and protect it from runoff and wind scouring. Hardwearing ground covers are a great choice because they are pretty tough and will cope with the changes as the mound collapses in on itself.
Expose and weaken key roots so the stump loses its anchor
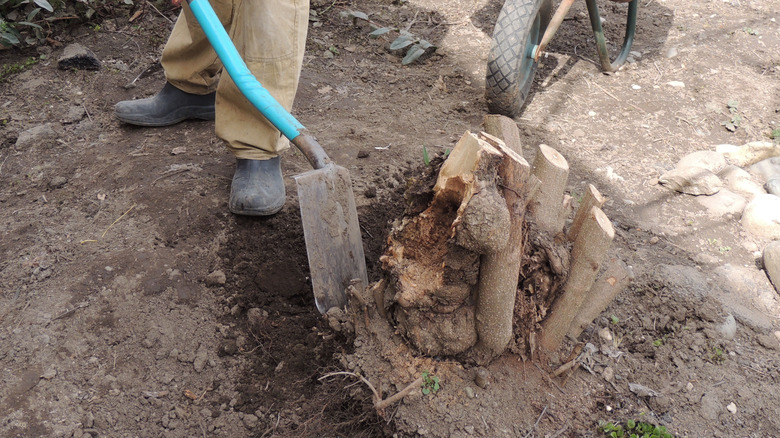
Those thick, lateral roots that you trip over are the ones that anchor the tree stump in place. Even if the center of the stump has started to soften and rot, those anchoring roots will make it seem immovable, as they grip into the soil. And they can spread quite a distance. Your best option is to dig a shallow trench around the stump and identify the biggest roots. Then follow those, digging around them to expose as much of the roots as possible. Now, this doesn't mean you're going full-on excavation mode. You're not going after every single feeder root, and you're not actually digging them out. You're looking for the biggest lateral roots. These tend to travel outward, fairly close to the surface as they anchor the tree in place rather than drilling down to access nutrients and water.
Expose as much of the lateral roots as you can. Once they're exposed, there's a good chance you can cut through them with a pruning saw or an axe. This exposes the open ends to air and moisture, much like you did when you cut the stump as low as possible. Over time, decay sets in and gradually reduces how strongly they anchor the stump. This isn't something you have to do all at once, as it's a little labor-intensive. But, as you release each one and it starts to decay, you'll find the stump becomes a bit easier to rock and wiggle and, eventually, to lever out. And, while you're waiting for them to rot, you can landscape around the exposed tree roots fairly easily so they become part of your gardenscape.
Time the heavy digging for soft soil and weakened wood
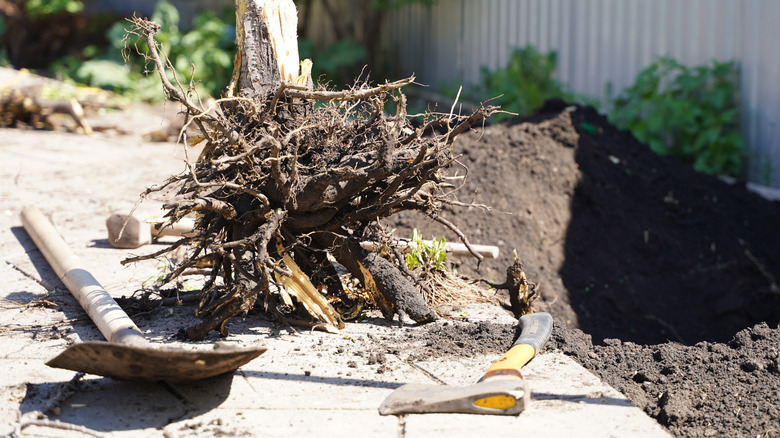
Digging in very wet or very dry soil is hideous. It's such impossibly hard work you'll very quickly want to give up. Even if you think the stump should be weak and decayed enough just to dig around and lever up, if you do it in the wrong conditions, you'll regret it. Waterlogged soil makes digging incredibly tough, as it's sticky and heavy and clings to your boots, your tools, the stump, and the roots. If the soil is very dry, so is the stump, and that combination increases friction. Plus, very hard soil can turn rock-like and difficult to break through.
Don't be in a hurry. Weakening or removing a tree stump is a long, slow, patient endeavor. Ideally, your tree stump has been sitting in soil that's been kept suitably moist for a year or more, and it's been exposed to regular freezing and thawing. Months of decay, moist soil, and freezing temperatures make the stump brittle and more susceptible to breaking and crumbling, rather than destroying and bending your tools like fresh wood would.
Time your digging, levering, heaving, and winching for late winter or early spring. But check the ground before you go for it. The ground should be moist but not waterlogged. In dry climates or if you just can't wait for spring, presoak the ground slowly with a soaker hose a day or two prior to try and lubricate the soil and hopefully make the digging easier.
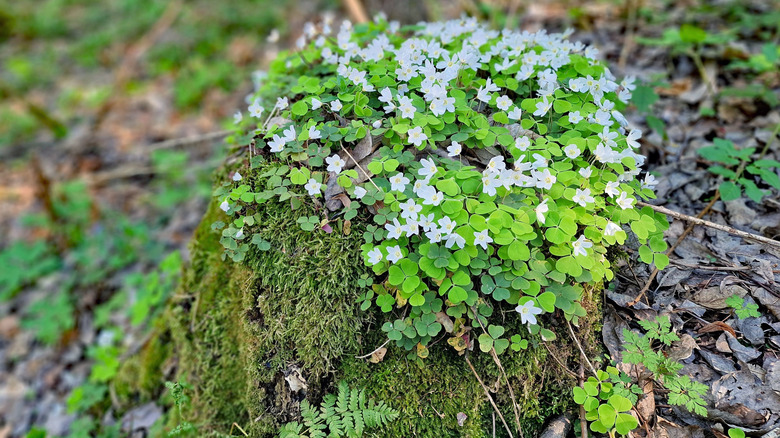
Turn a slowly rotting stump into a planter while it breaks down
This is one of my favorite methods, as it turns the stump into a lovely garden feature while speeding up decay. You may have to use the drill method to weaken the center of the stump for a while before using this tip. But, once the center softens and you can break it up and hack it out, it creates a depression in the center that can act as a natural planter. Fill the center with rich, good-quality compost and choose some shallow-rooted flowers or herbs. Avoid anything that gets too big and rooty itself; otherwise, you'll make life even more difficult for yourself when you have to remove both the stump and the big, well-rooted center plant.
As you take care of the plant, with regular watering and maybe some nutrient-rich top-dressing, you're also helping speed up the decay of the stump by creating the perfect conditions for the organisms that break down the wood. I like herbs for this, like sage or rosemary, because they're useful, pretty, and woody, with moderate root systems. So they'll root into the wood of the stump and speed up the breakdown by pushing through the wood and pushing it apart as they grow. This turns the stump into rich, crumbly humus even faster than composting alone. Lavender is another great option. Alternatively, you can go for something trailing, like lobelia, which is easy to grow and will cascade down over the edges of the stump.
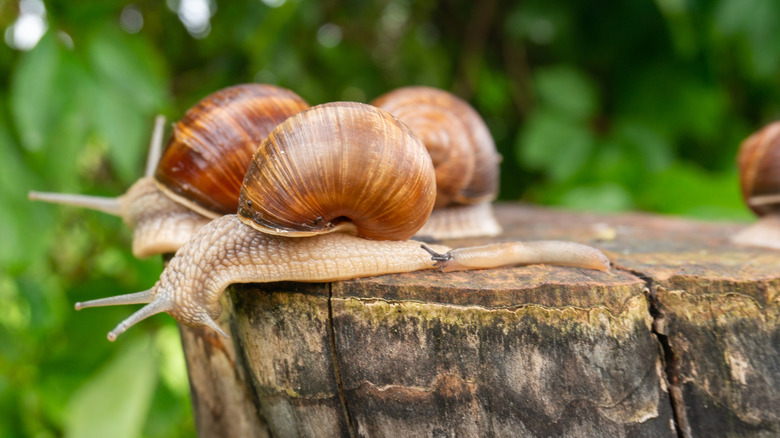
Let fungi and wildlife help eat the stump from the inside
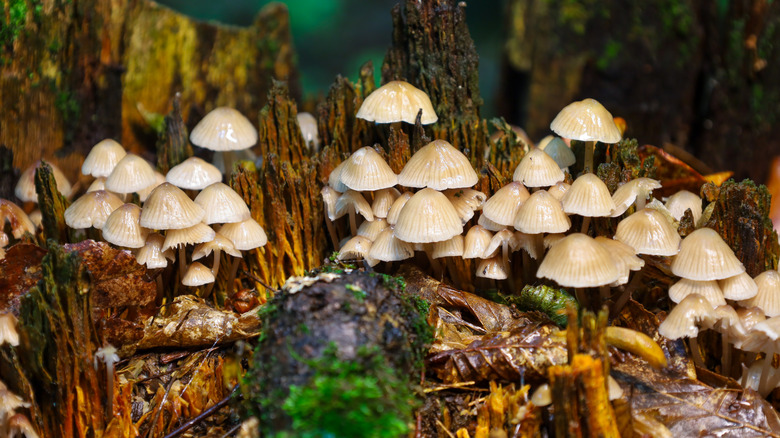
This is another of my favorites, because it prioritizes permaculture techniques and working with nature. Nature is very good at breaking things down. The weather, fungi, wildlife, and more all work together to recycle dead things back into useful, usable elements. Once the stump is drilled, perfectly moist, and surrounded by plenty of organic matter, it immediately becomes very attractive to all manner of wood-rotting fungi, beetles, woodlice, and other decomposers. They act as a free labor force, and really you need do nothing more than leave them alone.
If you really want to help them out, create a stumpery. This is basically just piling old logs around the stump to more closely mimic the way wood breaks down in the forest. It creates a more complete habitat that encourages armies of decomposers to join the busy community. With time, this army of decomposers will turn the hard, structural wood of a tree stump into soft, crumbly organic matter that easily breaks apart.
Prep the stump so professional grinding is faster if you call in help
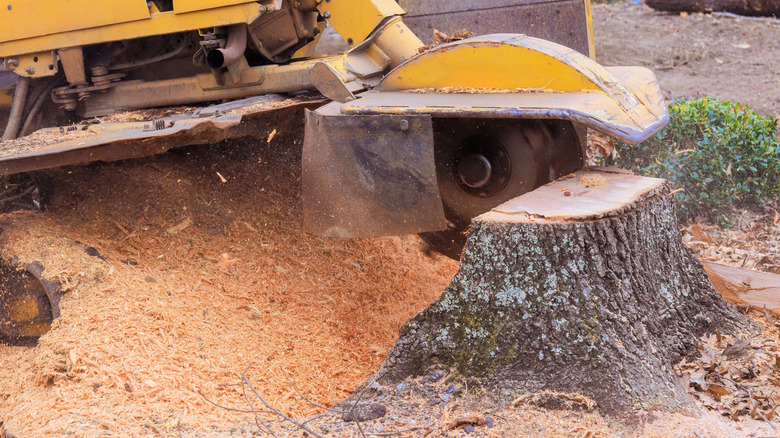
Now, as much as I love letting nature take her time and do things at her own pace, sometimes nature and DIY just aren't enough to get the job done. Some tree stumps are just too big, too awkward, or too close to important structures for full DIY removal. And as a homeowner, you need to know your limits. There are times when it just makes more sense to call in professional help. A stump grinding service can quickly chew through the stump and the roots, turning them into sawdust in short order.
But, if you can, it still makes good sense to prep the stump as much as you can yourself. If you've pre-weakened it with composting, drilling, a stumpery, or any of the other tips on this list, then you've made the pro's job easier. Grinding a stump that's been prepped is faster and less labor-intensive, so it should make the service more affordable than grinding out a fresh, unprepared stump.