The Creative DIY Solution For Keeping Shoe Clutter Organized And Off The Floor

We may receive a commission on purchases made from links.
Shoes are always migrating to the floor — it's easy to kick them off when you get home or leave them around after trying on several pairs. The disorganization of footwear clutter is common in homes, especially if you lack storage options that are easy to access. You could keep shoe clutter organized with a budget-friendly Dollar Tree solution, but inexpensive options aren't always aesthetic or super durable. Fortunately, there is another creative solution that can offer you a sleek, space-saving way to corral shoes while keeping them completely off of the floor. The DIY installation of industrial pipes into your wall creates a modern and minimalist aesthetic while providing a way to ensure your shoe clutter stays organized.
This clever project creates a wall-mounted shoe rack that's both functional and visually appealing. While it is more expensive than shoe storage with a budget-friendly Dollar Tree find, it can become a fun conversation topic when you have company over because of its unique design. Also, instead of hiding all your shoes, it keeps them on display, lined up neatly, while freeing up valuable floor space. It's a brilliant option for mudrooms, closets, entryways, or even bedrooms if you have the space.
To build the structure, you'll need two of each of the following: floor flanges, 48-inch industrial pipes (try these PLUMBFLEX Black Steel Pipes from Home Depot), 5-inch pipes, 2-inch pipes, elbows, and T connectors, making sure the diameter is the same for all parts. You should also get a bottle of Goo Gone — before you assemble the rack, clean all your pipes with the Goo Gone. Pipes are often coated with oil or manufacturing residue, which can transfer to your walls or shoes if you don't remove it.
Assemble a wall-mounted DIY shoe organizer with industrial pipes
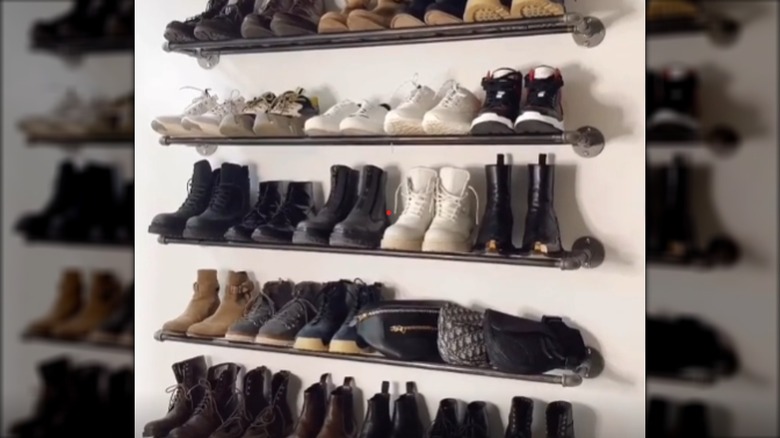
To build this DIY shoe rack, assemble the pieces on the floor to get a sense how it all fits together. The two long pipes create the shelf part, and the rest of the pieces create the shelf bracing. The floor flanges act as your mounting points on the wall. The 2-inch pipes will go into the flanges to bring the shelf out from the wall, attaching to the T connector, then the 5-inch pipe, then your elbows. Repeat this for both ends. You'll then secure the 48-inch pipes (one to your T connectors and the other to the elbows), which will hold the shoes. These allow the rack to extend outward from the wall and maintain balance. Screw in and tighten each connection securely by hand, adjusting as needed to keep your structure even.
Once you've assembled the parts, you can mount them onto the wall. You'll want to use a level to ensure that your rack is straight and properly aligned. You want the rack to be able to safely hold the weight of multiple pairs of shoes without shifting. Once level, attach the flanges firmly to the wall; it can be most helpful to secure them to studs for added stability. Consider adding more racks on the wall to hold all of your shoes. You can also adjust the length of the shelves by choosing different pipes. If you'd rather not have your shoes out on display, you can build the racks in a closet. Or, forget the closet and store shoes in the garage for organized, clutter-free footwear storage with a stylish design.