13 Budget-Friendly Ways You Can Elevate Outdoor Areas
You really don't need a huge landscaping budget or a massive redesign to update and elevate your outdoor space. There are plenty of affordable, simple ways to make your yard feel more polished and welcoming, even if it's tiny. Paint, plants, lighting, and layout all impact the way the space looks and feels.
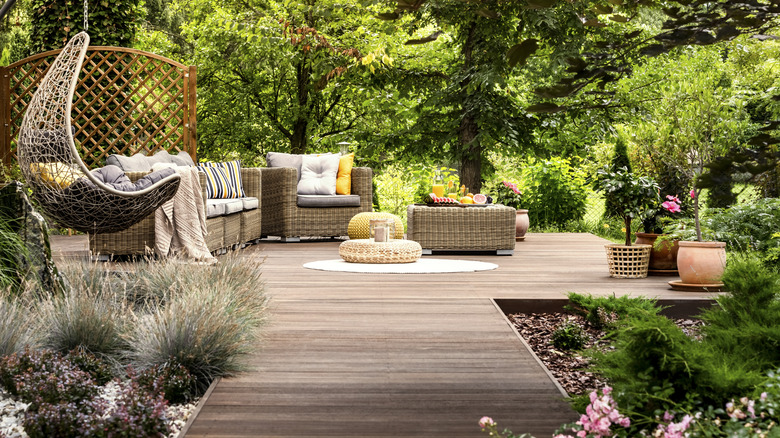
Carrying a theme in terms of color or texture through a space really brings a look of refinement and intention. And that can be as simple as using the same color or similar shades on pots flanking the back door, the soft furnishings on your outdoor seating, and the paint you use for the fence. You could even keep costs low here by thrifting the pots, furnishings, and even the outdoor seating.
Refresh fences, railings, and walls with paint
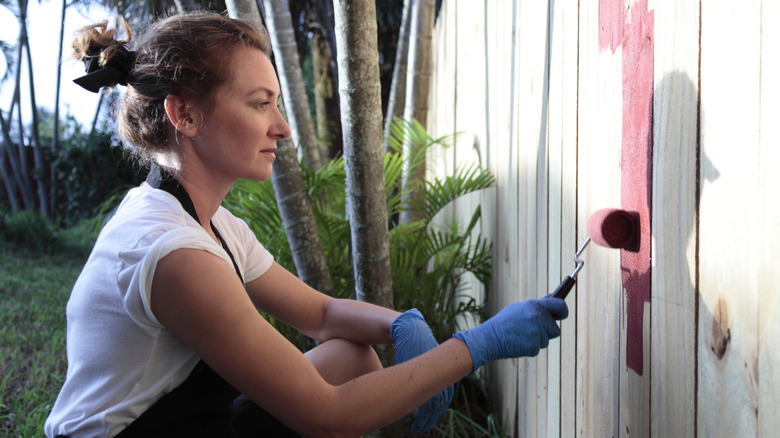
Probably the easiest way to uplift your yard is to give the fence and railings (and possibly the walls) a fresh coat of paint. It's comparatively cheap and has an immediate visual impact. Plus, proper outdoor paint protects wood and metal from the elements, slowing rot and rust. Tired fences, balcony railings, concrete walls, sad bed edging, and even sheds go from drab and lackluster to high-impact, fresh, and interesting.
If you want what you're painting to look cohesive but visually recede so your plants and other features stand out, choose a darker color. But if you want them to stand out and help make the space feel brighter and calmer, choose soft neutrals. You can also mix things up a bit by choosing one color for larger surfaces like painting overlapping fences and sheds, and another for accents like planters and storage boxes. Just remember to prepare each surface appropriately before you slap on the paint. At the very least, you'll need to clean, dry, and sand each surface. Depending on what you're painting and the type of paint you're using, you'll likely need to prime the area, too.
Use gravel and mulch to define paths and seating zones
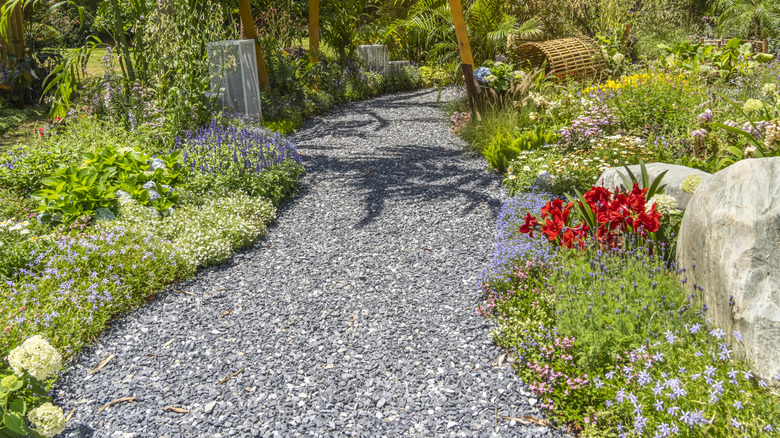
Gravel and mulch are super budget-friendly, and they make zoning that looks like high-end landscaping really simple. Decks and paving slabs are great, but they are expensive, even if you try to cut costs by going the DIY route. And the DIY option requires a lot of work and the right set of skills, too. But gravel and mulch require few skills, they're DIY-friendly, and cost far less. And, if you're working on a really tight budget, you can buy a couple of bags at a time, and just transform small areas as and when you can afford it.
I like wood chips, personally, because my dogs find it easier to navigate than gravel. But both are permeable, so allow water to drain away efficiently. You can use gravel or mulch to lay out pathways and "zones". For example, you could create a slim path of gravel, edged with cut logs, reclaimed bricks, or railway sleepers, from your door to a seating area also floored with gravel or a small patio. You could also have another gravel pathway leading to a kids' zone, or play area, covered in wood chips. Gravel isn't the safest material for kids to play on, as falling on it hurts far more than landing on softer wood chips. If you go with gravel for your primary zoning medium, choose a gravel color that is similar, or has tones of, existing garden elements, like old brickwork, as this helps to make the whole design look cohesive.
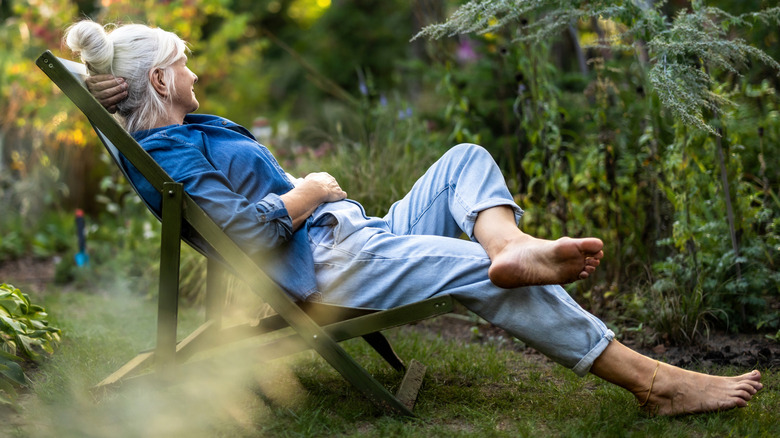
Layer simple lighting so you can use every corner after dark
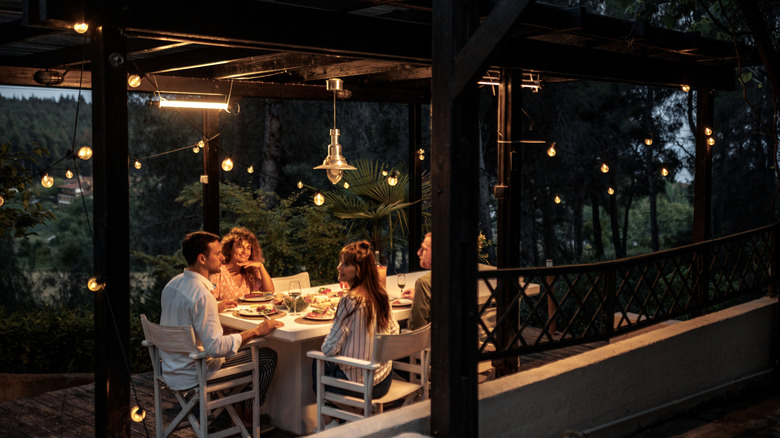
I love lighting in the garden. It brings a whole new dimension to the space and lets you use it after dark if you want to. And it's pretty easy to find budget-friendly outdoor lighting. A few thrifted sets of fairy lights, an outdoor lamp or two, and a firepit or a chiminea, and you've got yourself a cozy, usable evening outdoor space, whether for entertaining or snuggling under a blanket with a hot chocolate, the dogs, and a good book. Shop the holiday sales and thrift for lighting, and please make sure you only go for lights rated for outdoor use.
Solar or battery-powered fairy lights hung around the seating area "zone" the space cleanly. Solar-powered stake lights lining the path leading to your after-dark getaway, and a couple of lanterns by the back door and at the entrance to the lighted area, and you've got a magical, beautiful spot. Go for battery or solar where you can, as these are easy to move and don't require wiring or running electrical cables. I'd also recommend warm lights, not bright white. Warm lighting gives a cozy vibe, while bright white can feel stark and exposed. I've built a sheltered space that I can use even when it's raining, but you can have a fair-weather-only spot or convert your shed into your well-lit, cozy garden getaway.
Pull everything together with a simple color palette
Unless you're deliberately going for a retro "not one single thing matches" look, which I don't recommend as it detracts from your lovely plants, then stick with a simple color scheme of just two or three hues. This makes even mismatched furniture and furnishings look more like a set or a cohesive unit. Soft greens, pale grays, creams, and off-whites are good choices for base colors, as they stand out and help make the garden feel lighter and airier without distracting too much from the plants. You can then add a pop of accent color like terracotta or mustard, or even a bold navy that repeats on cushions, lanterns, or pots.
You don't have to buy everything new, either. You can simply repaint or recover what you've already got with minimal skill and effort. There are lots of ways to paint plant pots. Clean and dry old plastic planters before you transform them with your base color, then use a stencil or go rogue and freehand a simple design in your bolder accent color. Add applique patches or hand-embroider designs for your exterior textiles, and thrift smaller accessories in those same shades.
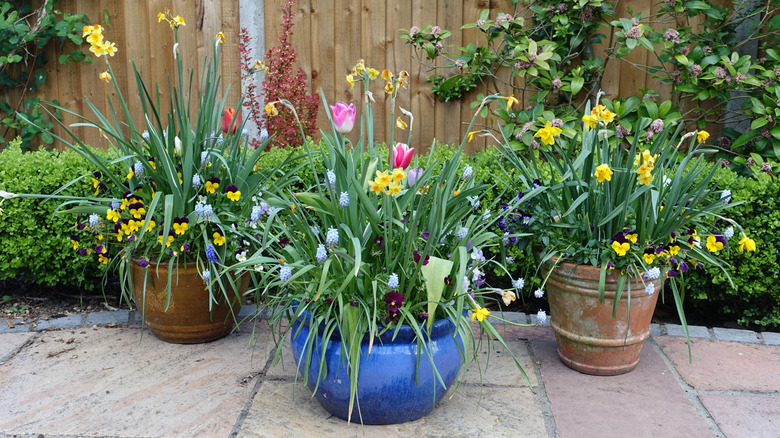
Group container plants to make big-impact displays
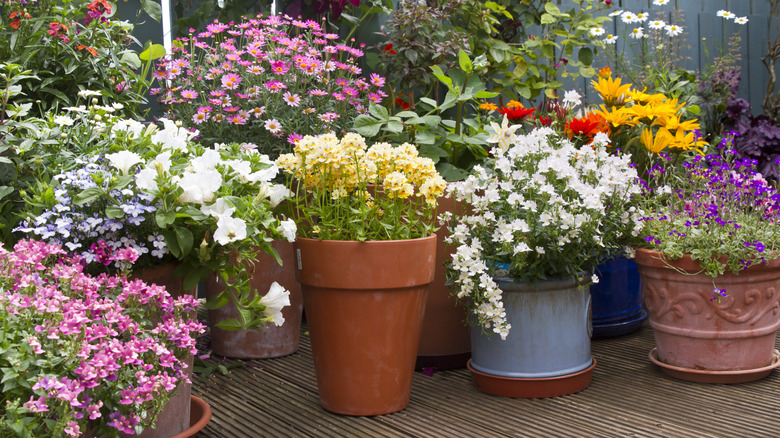
Single containers randomly dotted around tend to get lost or look odd and out of place, which is a common container gardening mistake. On the other hand, groups of container plants look like an intentional, considered display. They create interest and focal points, even if you've just got a small balcony or courtyard. You can create a huge amount of impact with as few as two well-placed containers. Flank your doorway with a matching pair of containers filled with something tall and colorful. Go for containers that are large enough to draw the eye and create drama but not so big that they overwhelm the rest of the space. I like containers that are tall rather than extra-wide for flanking an entryway, because they reflect the shape of the door.
Groupings of containers through the rest of the space, even if it's just one or two sets of pots, create visual interest and movement or flow around the yard. Use differently sized pots or, if that's out of your budget, use what you already have for staging, like stools, upturned milk crates, or plant stands to create displays of different heights. Sometimes, when you're working with a tight budget, you have to get creative. And remember my earlier tip for painting pots with your base color and adding pops of your accent hue. That works well here, too, when creating container displays, and helps keep the whole thing cohesive. You can also do that with repeating a few of the same plants or plants with the same coloring through each cluster. It ties the whole thing together, even when you've got multiple container groupings around your property.
Go vertical with trellises, wall planters, and rail-hung pots

I love a vertical garden. It's bold and dramatic and is a great way to bring more life to an urban yard or a compact space where there isn't much floor space. Vertical gardens also add privacy, and they're a great way to distinguish zones without building an actual wall or a screen. It's also a great way to hide an ugly view. A well-done vertical planting can create a cozy secret garden vibe in a tucked-away corner of your garden, especially if you combine it with fairy lights and seating.
You've got a lot of cheap options for starting a vertical garden. Among the cheapest are trough-style planting containers and a trellis or even a wire setup. In the containers, plant quick-growing vining plants and train them up the trellis or wire to create a living screen. You can also attach individual planters to a trellis and plant a mix of upright and trailing plants. If you go this route, just be mindful of the strength of your trellis and how much weight you're adding to it. You can also use rail-hung planters and fill them with trailing plants that will grow in a beautiful waterfall of colorful flowers and foliage.
Zone spaces with furniture and planters instead of hard walls
If you've got a smallish outdoor area, creating distinct zones can make the whole space feel larger. Simple ideas, like a pair of compact but comfy chairs and a small table, give you an instant reading nook or bistro dining space. And if you've got kids, zone the edge of their play area and keep it distinct from the dining area with a bench and a flanking pair of matching planters.
Using movable objects like benches, planters, outdoor furniture, and outdoor rugs is far cheaper, faster, and generally more accessible and less overwhelming than building walls or installing fencing and permanent screening. A change in ground cover is another easy option. Like moving from a gravel pathway onto an outdoor rug or patio for the seating area, or from the wood chips of the kids' play area to the wonderfully scented purple carpet of creeping myrtle in the sensory garden zone. Use similar planters or colors or types of plants as repeating, budget-friendly dividers between zones.
Add a small water feature or bird bath for life and movement
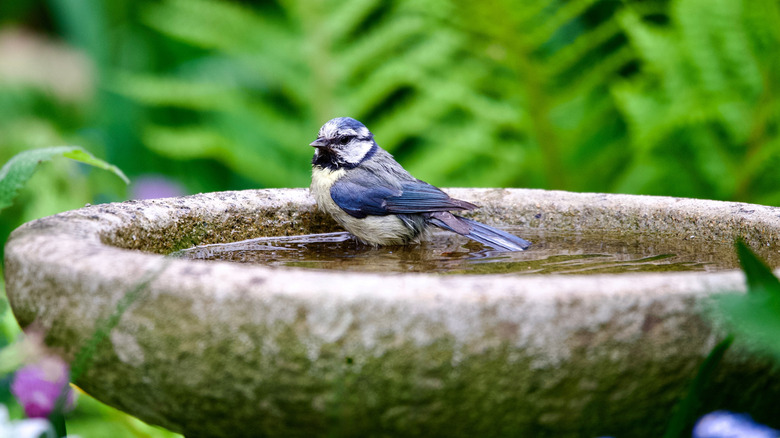
Tiny water elements bring life and movement to even the smallest, concrete urban space. A bird bath, a small wildlife pond, or a little fountain adds sound, reflects light, and encourages wildlife. I do recommend you add a sloping stick or a series of shallow pebbles so that insects and other small beasties can find their way out if they fall in while trying to get a drink. Moving water brings a lively feel to any outdoor space that you can't easily replicate, and attracts all kinds of wildlife.
You don't have to spend a lot of money on this. You can, for example, make your own trickling water fountain from a small, cheap pond fountain or submersible pump, a large bowl, and a couple of terracotta pots and saucers. That simple, cheap setup gives you movement, light, sound, and somewhere for wildlife to hydrate. And you can, of course, surround it with beautiful container plants or add a few water plants. Other options include finding a small, second-hand container pond and filling it with water, a pump, and some plants, again making sure wildlife can escape if they fall in. You can mask the ugly outer of the container by painting it and then screening it with interesting plants.
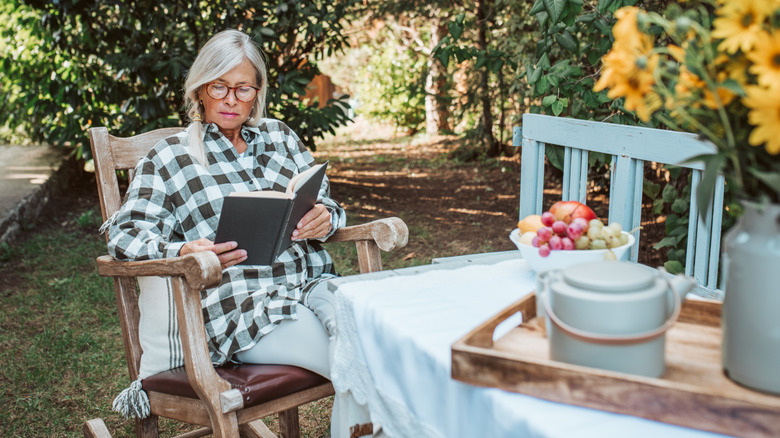
Use textiles to soften hard surfaces and add comfort
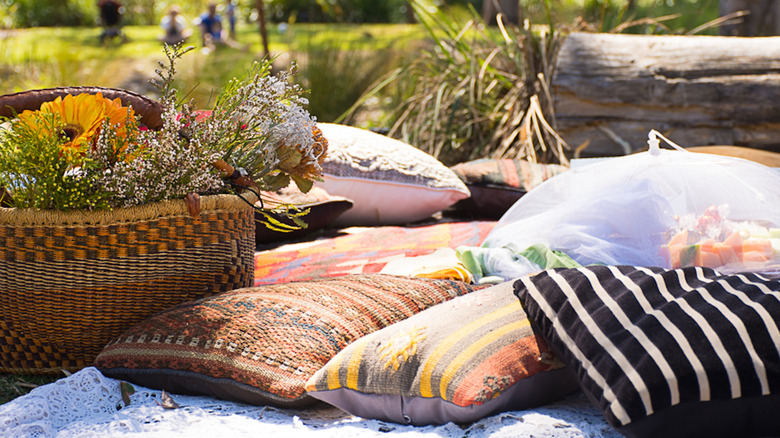
Soft furnishings can quickly change the feel and look of your outdoor space. It's a cheap and easy way to uplift your yard. Outdoor textiles can make a bland, functional, or barren space inviting, welcoming, cozy, and somewhere you actually want to spend time. I love being outside, but gardens often lack truly comfortable spaces, and outdoor-safe textiles and furnishings are the easiest remedy for that. I have a few outdoor-safe floor cushions that are just ridiculously comfortable. Outdoor rugs are also brilliant, especially when they're made from natural materials like jute or seagrass, or from reclaimed or recycled material like old plastics or salvaged rope.
Even if all you've got is a small balcony and a little bistro seating set, just adding a patterned flatweave outdoor rug and matching or complimentary cushions immediately anchors the space and makes it feel warm and inviting. Yes, you can use washable indoor furnishings, like cushions, but you'll need to remember to bring them indoors if there's any chance of bad weather, which can get a bit tedious.
Upcycle and reuse materials for planters, tables, and storage
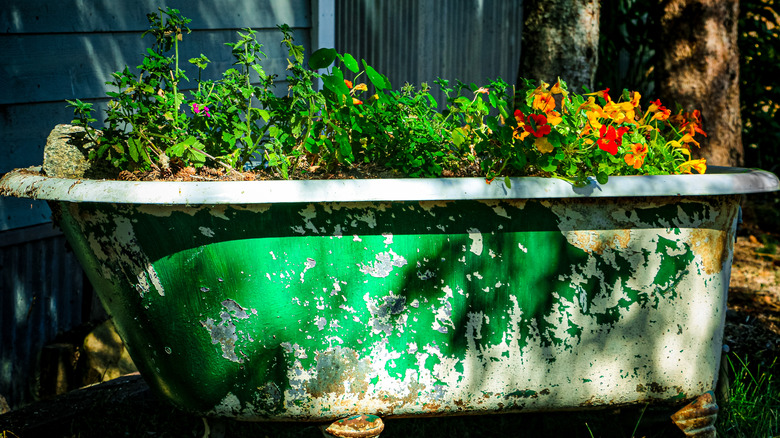
I'm all for making the most of what you have, what you can find for free, or what you can thrift for next to nothing. In the garden, old crates, pallets, vases, buckets, old bathtubs, and all manner of other objects are perfect for turning into useful and interesting things. A pallet, for example, can be knocked apart, and from there, you can turn it into a raised bed pallet collar — or you can keep it pretty much as-is, add some horticultural fabric to one side, and use it as a mini planting bed for shallow-rooted plants or crops. Or take that same idea but stand it upright, anchor it to a post or wall, and use it as a mini vertical planter.
There are so many options to elevate your outdoor space with things you already have or can access for free or very cheaply. You just need to be a little creative. You can turn an old crate into a small side table, or a couple of pallets into a bench or a table. An old wooden cable reel spool can be turned into a larger table or some seating. Reclaimed bricks and logs cut lengthwise make excellent bed edging and zoning supplies. An old sink or bathtub makes a fantastic base for a water feature or even a planter. There are endless possibilities that don't cost anything beyond some time and imagination.
Choose hardworking, budget-friendly plants you can repeat
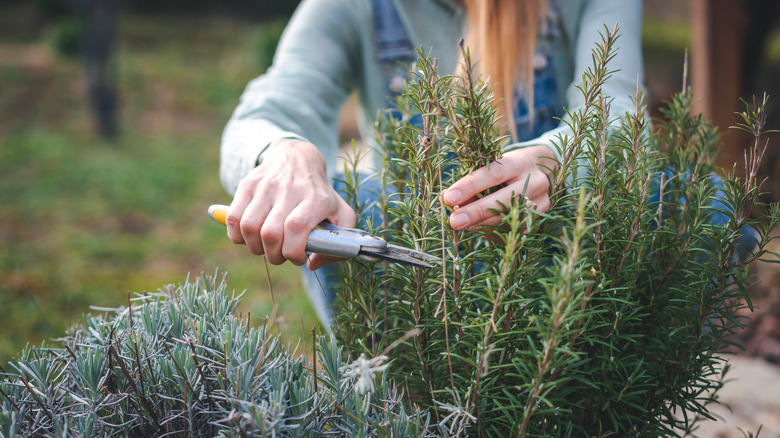
If you want to keep costs low while adding to your plant collection, ask friends for cuttings of easy-to-propagate perennials like rosemary, lavender, phlox, bee balm, and so on. You can also look on local buy-nothing pages for plants, bulbs, and tubers in your local area. If you do have a little wiggle room to buy plants, go for things that grow quickly and that you can later divide yourself. You can also shop sales for plants that have been neglected by store staff but still have a little life left in them. A couple of years back, I snagged around a dozen pretty big fruit bushes that a local store had dropped from $20 each to $1 each because they were "dead." Actually, they were just a bit neglected and it was almost winter, so they were dormant. A tiny bit of TLC, some decent, nutrient-rich soil, and a good planting location, and those babies gave me fruit the very next year.
Don't buy just because something's on sale though. Make sure the plants you choose fit your garden's growing zone and soil conditions. You can also stretch your budget by growing from seed or buying a small back of bulbs, waiting for them to grow, then dividing them to get more. I'd also go for plants that grow and spread pretty fast. And think about repeating colors and types of plants throughout your space. You can also choose plants that follow the latest outdoor design trends.
Keep clutter under control with simple screens and storage
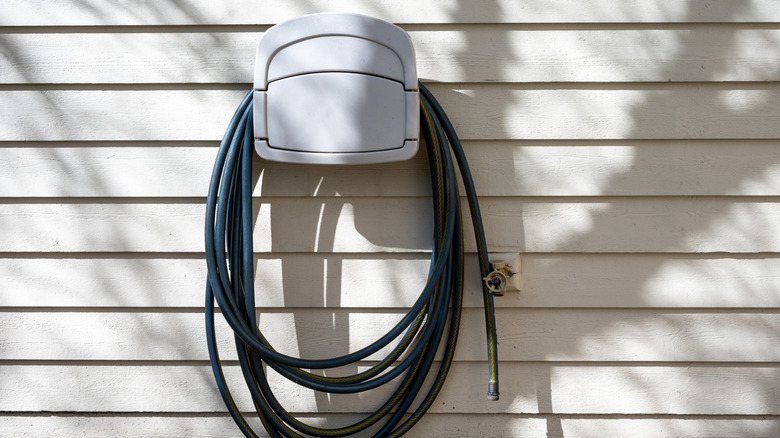
A huge part of elevating your outdoor space is keeping it tidy. A loose hose lying around, trash cans in the middle of the yard, stray tools, a half-completed project, and really anything else that isn't part of your finished design can detract from the uplifted feel you're trying to create.
You obviously can't get rid of everything that's not Instagram-worthy garden perfect. But you can tidy up the same way you do indoors. And you can make use of storage benches, screening, outdoor boxes, and cleverly placed trellis panels or rows of tall pots to disguise the less attractive but necessary things like the bins or the hose reel.
Lean into low-maintenance planting so everything stays tidy
If you're on a budget and don't want to constantly spend time and money tending to or replacing things, I strongly recommend you stick to low-maintenance options. Hardy, low-maintenance plants are less likely to fail because they aren't as fussy in terms of growing conditions or if watering is inconsistent. If you choose ground covers, shrubs, and grasses that are hardy in your location, they're more likely to thrive with minimal intervention from you.
For containers, the larger and roomier the container, the better, as the less stressed the plants will be and the less feed, watering, and compost top-ups they need. Larger and grouped containers are also less prone to winter stress than smaller ones. Add inexpensive drip lines or use a soaker hose on a regular basis to keep plants well-hydrated without stress. For paint, make sure you choose a good-quality, outdoor-safe paint and do your prep work before you apply it so you don't have to keep touching it up.