Transform A Thrift Store Frame Into A Chic Perfume Display With This Clever DIY
We may receive a commission on purchases made from links.
Being a perfume lover isn't just about smelling good. Okay, it's largely about smelling good, but it's also about collecting stunning bottles that look like works of art. And when you love perfume, you may want to display your collection of cute bottles out in the open, rather than keeping them hidden in bathroom cabinets. So, why not use an affordable thrift store frame to make your very own DIY perfume display?
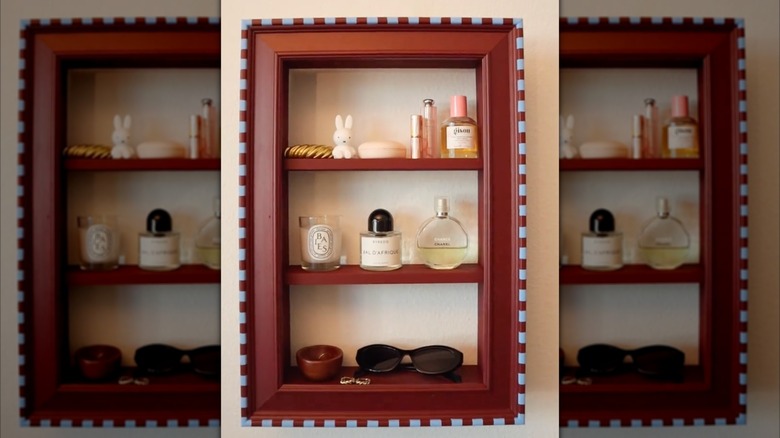
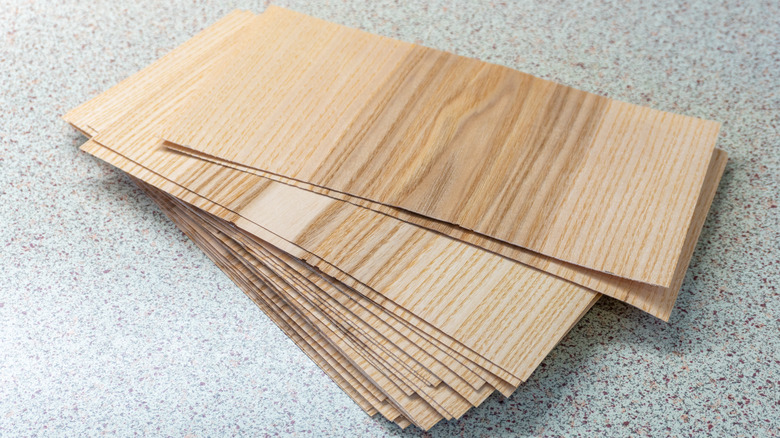
The idea is to create a shelf with wooden planks and place it behind a thrifted frame to make it look unique and old-school. By removing the glass panel and painting the frame, you can turn what would otherwise be a boring shelf into something worthy of showcasing your valuable perfume bottles. There are many ways to customize this DIY through colors and patterns, which gives you freedom to add personality and charm to your home with a DIY that's truly unique. For this project, you'll need a picture frame and some wood planks. And, there's no need to go with fancy hardwood; you can use cabinet-grade plywood, which is ready for staining or painting and easy to cut. You'll need a saw to cut the planks into pieces (jigsaw, circular saw, table saw, and handsaw all work), some wood glue, paint, and two D-Ring triangle hooks for hanging pictures, like these from Leglo. You'll also need a nail gun or drill with screws to assemble everything.
This is a fantastic DIY if you're using a lot of perfumes interchangeably, and it can also be a lovely spot to display empty vintage bottles, or empty perfume bottles you've DIYed into other things, for example. Next to the perfume bottles, you can add small decorative items, like dried flowers, small mirrors, pictures, and fragrance diffusers with sticks.
How to DIY a perfume shelf with wood and a frame
To make this DIY, start by cutting wood pieces to act as the shelf structure (behind the frame). The width of the planks will determine the shelfing unit, so account for 5 to 10 inches. Cut two identical pieces the length of the frame to act as the sides, and cut several pieces the width of the frame for the top, bottom, and shelves. The exact number of shelves you'll need depends on the size of the frame and the height of the shelves. Try to space these out evenly, and use your tallest perfume bottle as a guide for shelf height (give the bottle 1 or 2 inches of extra space).
Once all of your wood planks are cut to size, and before you assemble the DIY, take some time to decorate. If you like the color and style of the picture frame and don't want to paint it, look for a matching wood stain or paint color to cover the wooden planks and make the entire DIY look uniform. Otherwise, you can spray paint the wood planks and the frame and shelves using one or several colors.
When the paint is dry, it's time to assemble the pieces. Create a rectangle that matches the frame, drilling or nailing into the sides of the plywood to attach the structure. Then, add the shelves (you can pre-mark where to attach them with a pen or tape to make sure they're flat). In both top corners of this DIY shelving unit, add picture frame triangle hooks that you'll be able to use to attach it to the wall. And finally, use some strong wood glue to attach the frame to the front section of your DIY shelf. Let it dry before hanging.
How to customize this DIY perfume display
The great thing about this DIY is that you can customize it in many ways to match your aesthetic. Of course, the first step to customizing this is to come up with a color scheme for the DIY. If you're more of a vintage and cottagecore decor and farmhouse aesthetic person, simple dark wood will look perfect. For something a bit more modern but still muted, you can opt for dark tones, like deep reds, greens, and blues. To make this DIY pop, try metallic paints or bright colors, like orange, green, or pink.
Of course, you can also mix and match. For example, paint the entire frame bright orange and use green for the shelves to create a '70s-inspired perfume display. Another option is to use a small paintbrush to create details like stripes, dots, or small flowers all over the frame. This part is truly your opportunity to let your personality shine through and express yourself creatively, so don't hold back on making something that will elevate your home's interior.
As is, this DIY lets the wall behind act as the backing of the shelf. If you're a more daring DIYer, however, you can create a different backing for the shelving unit. To do this, use a very thin piece of plywood or a basswood sheet for DIYs (this will avoid making the unit too heavy). This piece of plywood can be covered with paint, contact paper, wallpaper, or a piece of FunStick flexible mirror sticker to give the illusion of a mirror backing. Once decorated, attach the backing to the structure using some glue or nails.